Posted on 4 Comments

Island Batik Ambassador- November 2023 Project- Switchback Bag- Part of the It’s In the Bag Blog Hop

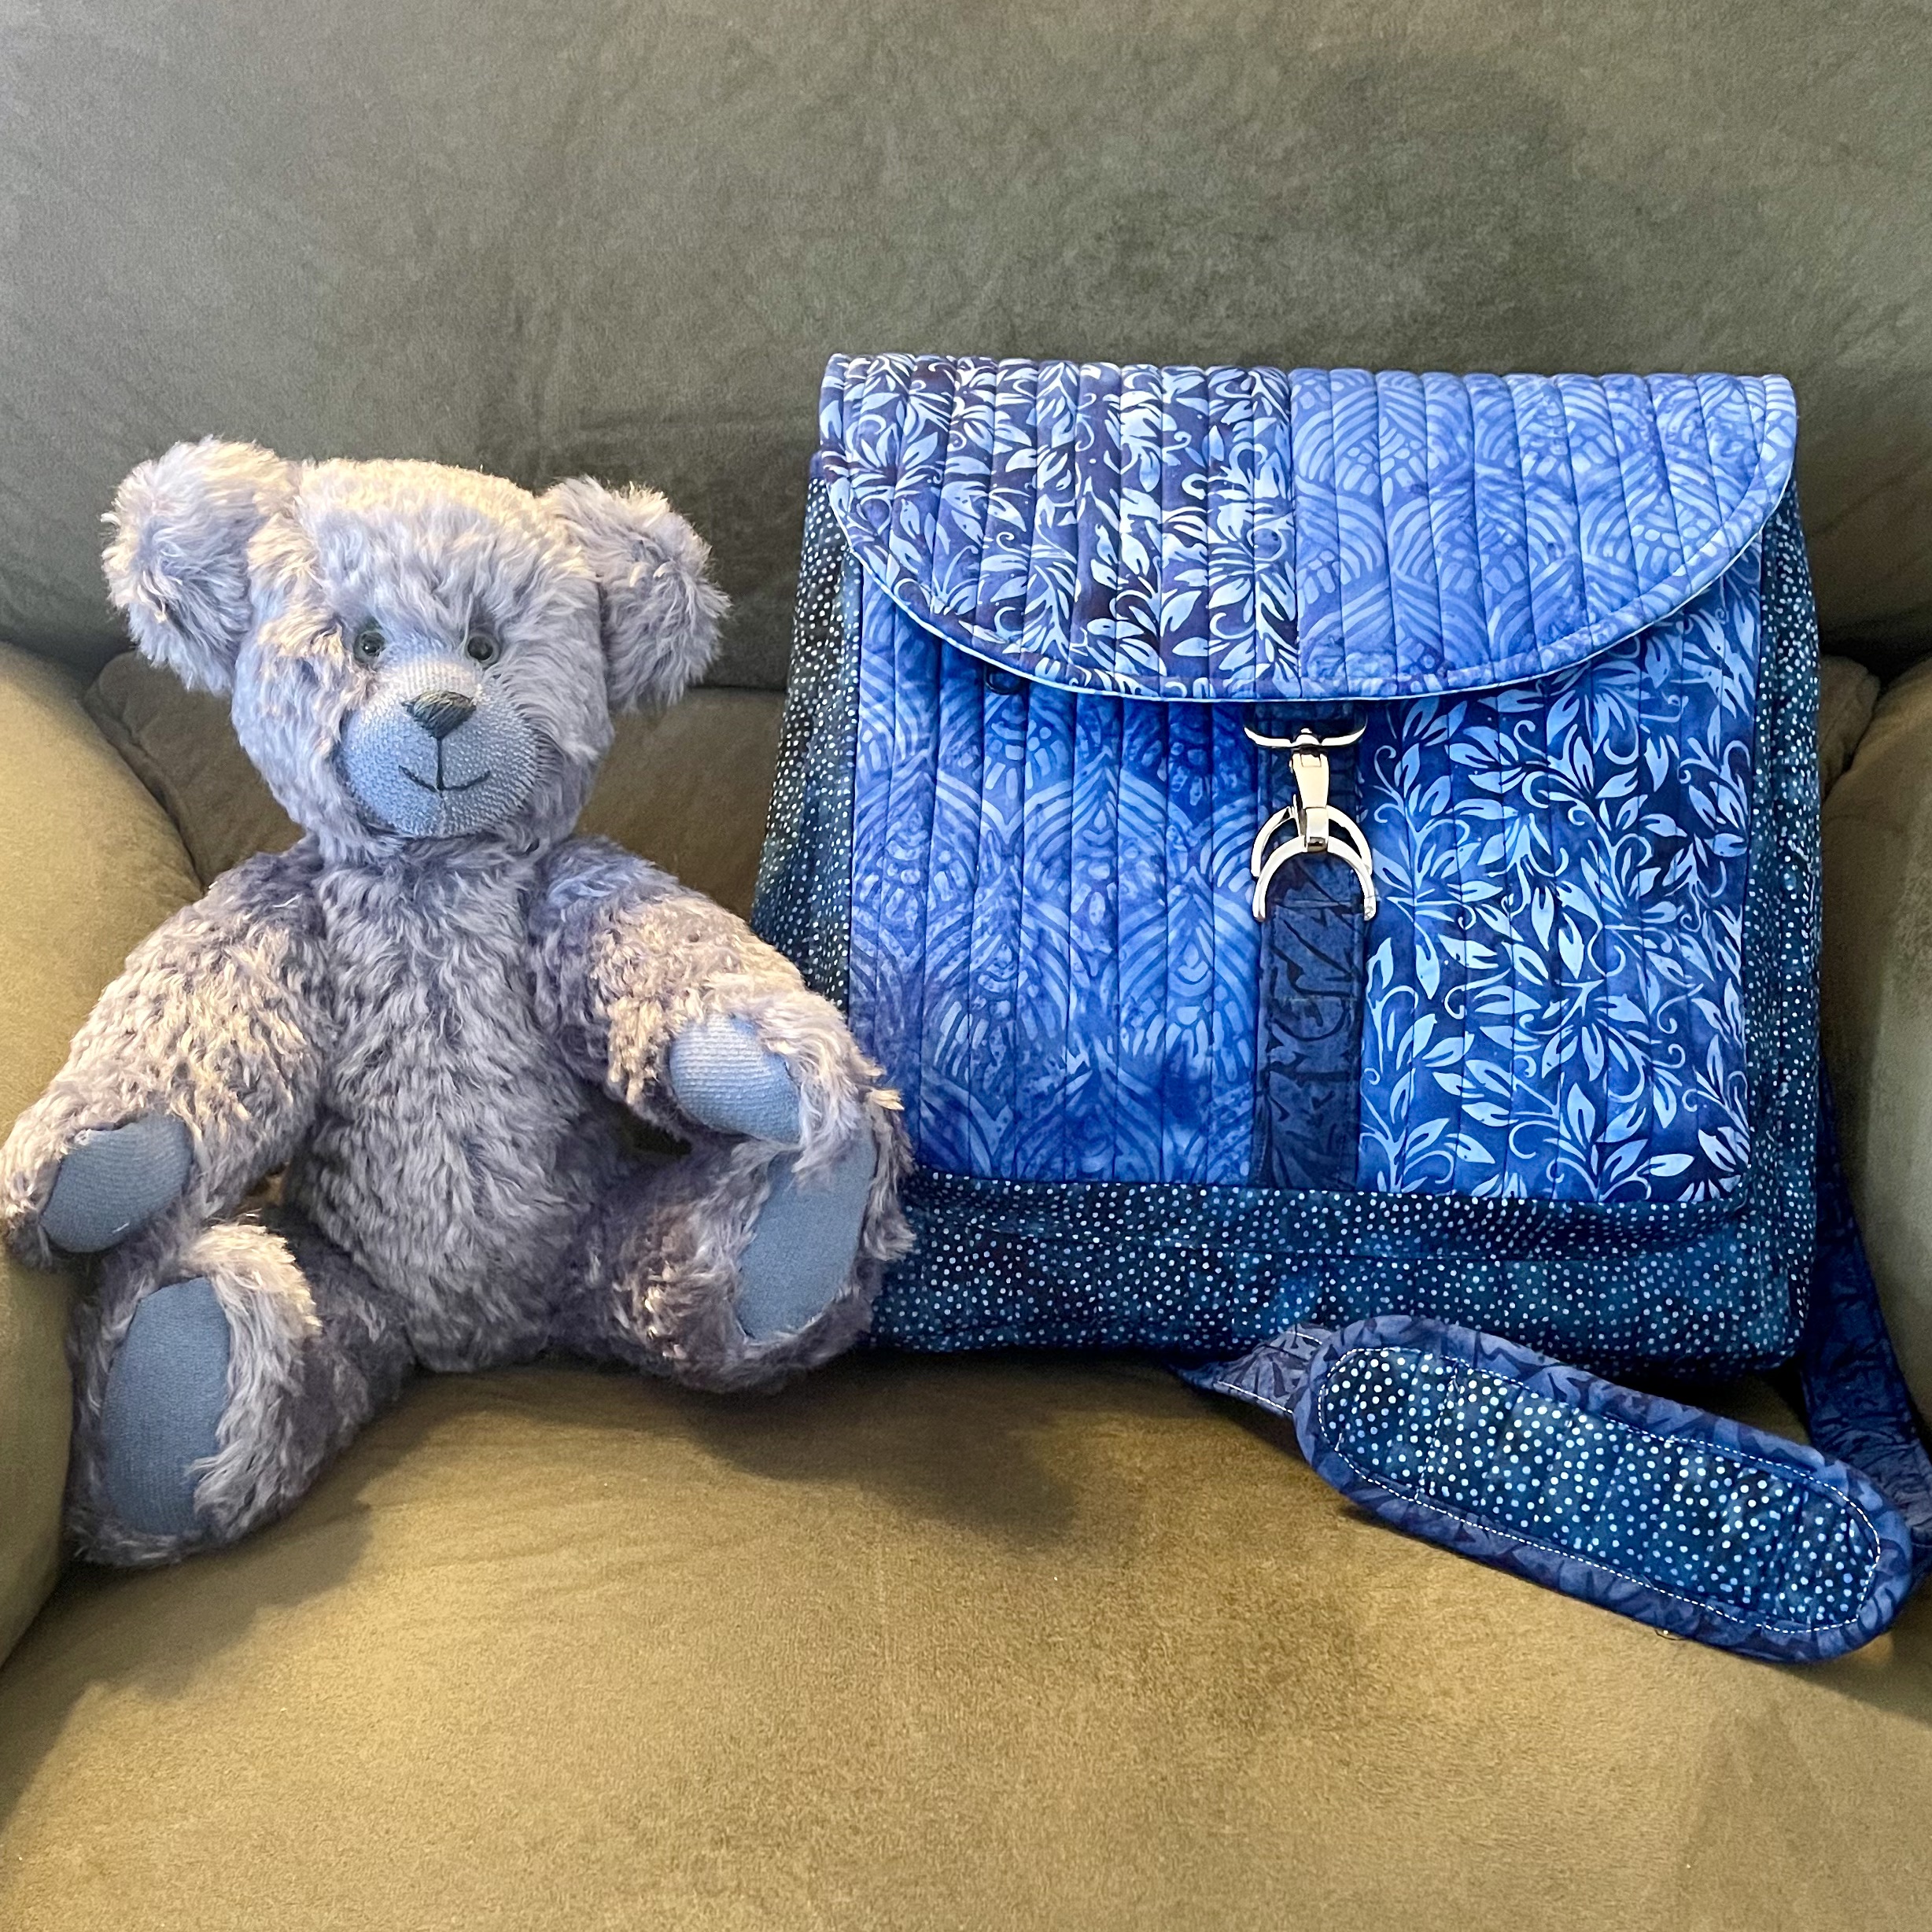
Blue Bear with Switchback bag

This month’s blog hop is called It’s In the Bag as the Island Batik Ambassadors will all be making a project using different upcoming fabric collections from Island Batik and a pattern and supplies from byAnnie.com. I am looking forward to seeing all the wonderful projects that will be created during this month’s Island Batik blog hop as Patterns byAnnie are so easy to follow that they can turn anyone into a bag maker. Since this month is a blog hop, you can check out the Island Batik blog and enter each week to win a fat quarter bundle of some of the fabrics the Ambassadors are using in their projects. I will show the other fabric collections later in this blog along with a link to the giveaway from Island Batik and links to other ambassador’s blogs.

It's In the Bag Blog Hop
It’s In the Bag Blog Hop


Check out the fabric I was given to use to make the Switchback bag: Porcelain Blue by Kathy Engle from Island Batik. Just look at this gorgeous blue and white collection of batik fabrics with a woodsy theme.  The Porcelain Blue collection may be found at your local quilt shop that carries Island Batik, such as Boutique4quilters in Melbourne, FL and Fabric Smart in St. Petersburg FL. This collection should be in your local quilt shop Spring of 2024. You may find them online at https://www.boutique4quilters.com/ or call them at (321) 768-2060 or www.fabric-smart.com or call them at (727) 914-8850. Another online option for you to shop for this fabric would be Hancocks of Paducah: Hancocks of Paducah

Porcelain Blue Collection


The bag I made is 11″ x 11″ x 4. The fabric collection has various shades of blue and white. The Porcelain Blue collection has many woodsy elements like leaves and flowers. Making this bag was easy and fun using the pattern byAnnie.com. 

Blue Bear with Switchback bag

Here is Blue Bear who is thrilled with his new Switchback bag.

The first thing to get started on this project is to get your supplies and tools all lined up. You of course will need some beautiful batiks like the Porcelain Blue collection from Island Batik and some Aurifil 50 wt. cotton thread. You will also need pins, a ruler, rotary cutter, cutting mat and some snips. You will need the Switchback pattern from byAnnie. I was provided some needed supplies from byAnnie as well such as the Soft and Stable foam stabilizer, fusible interfacing, fold-over elastic, zippers, strapping and hardware. 

Switchback Bag supplies

The byAnnie pattern is very well organized and so easy to follow. It makes it possible for someone like me who has hardly made a bag before to make one. The pattern has detailed illustrations and boxes for you to check off each section as you have completed it. There is a page with a list of all the various pieces so that you can keep track of them and know which piece the pattern is talking about.

pattern
pattern

There are 5 different fabrics used in making this bag. The pattern refers to the fabrics by name type and thus I labeled the fabrics to keep straight which fabric was called for in the pattern. 

Labeling the fabric
Labeling the fabric

One of the first things you do is quilt the fabric that is for the front and back of the bag, using the Soft and Stable foam stabilizer. I love this foam stabilizer as it is so easy to quilt with on a domestic machine. 


Quilting the front and back pieces

You can quilt the pieces in a chain piece fashion to make the quilting go faster.

Chain piecing the quilting

A lot of the lining pieces are stabilized with a fusible interfacing, which helps to give the bag more structure. 

fusible interfacing
fusible interfacing

The pattern shows you how to make binding cut on the bias, which makes it have more stretch and makes it easier to go around the curved sections of the bag that need binding. 

binding cut on the bias

The strap of the bag is covered with cloth, which really gives the bag that finished look.

Cloth strapping
Cloth strapping

The pattern shows you how to make all the fabric steps and accessories that are needed for the bag. It has you make precise markings on the bag parts, so you know exactly where to put the accessories. 

strap accessories and tabs

The pattern has you put zippers in the bag with several different methods. The zipper at the inside top of the bag is made with zipper strips. One of the best features of the byAnnie.com patterns is that many of them come with a coupon code that allows you watch a video that covers some of the more difficult aspects of making the bag. These videos come in really handy for someone like me that is not used to making bags.

Zipper strips
Zipper strips

This zipper is for an inner pocket that is accessible from the front of the bag. 

Front pocket
Front pocket

This is a more standard zipper placement on an inside pocket. 

inside pocket
inside pocket

Here I am installing the a zipper strip at the inside top of the bag opening. 

different methods of inserting zippers

One of the final tasks is to sew the bias binding around the raw edges that will be in the inside of the bag. This task can be a little daunting as you have to finagle so many layers of fabric under the needle and sew around curves.

sewing on the binding

Finally, your Switchback bag is complete and you have a stylish bag with so much room and so many pockets to take on all of your adventures. 


Blue Bear with Switchback bag
 

Below is the image of my YouTube video of me revealing this bag. Here is a link to the video if you would like to watch it and see more details of the bag: Switchback Bag- reveal of November Island Batik Ambassador project

YouTube video
YouTube video

If you like the video, please be sure to give it a thumbs up, share it with your friends and subscribe so you don’t miss any upcoming videos.


The supplies I used to make this project were provided by:

Island Batik Porcelain Blue collection

Aurifil 50 wt Thread

Schmetz 70/10 Quilting needle

Patterns by Annie Switchback bag pattern and needed supplies


IB-Aurifil-Schmetz

byAnnie logo
byAnnie logo


If you are on TikTok, be sure to check out the video I have posted about the inside of the bag. (Look for Blue Bear Quilts)

Blue Bear hopes you like his new Switchback bag. Please let him know how much you love it by writing to him in the comments!

The other amazing Island Batik Ambassadors are also posting their November Blog It’s In the Bag projects.  Check out their projects by clicking on the links next to their names to be directed to their blog posts.

WEEK 1

November 1

Celtic-Fields
Celtic-Fields


Susan Deshensky, Lady Blue Quilts

Gail Sheppard, Quilting Gail

November 2

Citron Breeze
Citron Breeze


Lana Russel, Lana Quilts

Mania Hatziioannidi, Mania for Quilts

November 3

Blog Hop Week 1 Round Up + giveaway

WEEK 2

November 6

Country Charm
Country Charm


Brenda Alburl, Songbird Designs

Brittany Fisher, Bobbin with Brittany

November 7

Flour Sack
Flour Sack


Sandra Starley, Textile Time Travels

Victoria Johnson, Forever Quilting for You

November 8

Limerick
Limerick


Maryellen McAuliffe, Mary Mack Made Mine

Emily Leachman, The Darling Dogwood

Leah Malasky, Quilted Delights

November 9

Morris Mist
Morris Mist


Sarah Pitcher, Pitcher’s Boutique

Preeti Harris,Sew Preeti Quilts

November 10

Blog Hop Round-Up Week 2 and Giveaway

WEEK 3

November 13

Morris Tiles
Morris Tiles


Elita Sharpe, Busy Needle Quilting

Pamela Boatright, Pamela Quilts

November 14

Porcelain Blue
Porcelain Blue


Reed Johnson, Blue Bear Quilts   Thanks for stopping by!

Jennifer Thomas, Curlicue Creations

November 15

Red White and Blooms


Connie Kauffman, Kauffman Designs

Claudia Porter, Create with Claudia

November 16

Vintage Charm
Vintage Charm


Suzy Webster, Websterquilt

Denise Looney, For the Love of Geese

Randi Jones, Randi’s Roost

November 17

Blog Hop Week 3 Round Up + giveaway

WEEK 4

Winged Things
Winged Things


November 20


Renee Atkinson, Pink Tulip Quilting

Anorina Morris, Samelia’s Mum

Lisa Pickering, Lisa’s Quilting Passion

November 21

End of Blog Hop + Final Round Up

Island Batik Giveaway
Week 3 of the It’s In the Bag Blog Hop giveaways, from Island Batik, started on Sunday, November 12th!
Two lucky winners will each receive a bundle of new collections that will be featured this week – Red, White and Blooms or Vintage Charm. Don’t miss out on your chance to add these beautiful batiks to your stash. Enter now during the It’s In the Bag Blog Hop:

To enter for your chance to win one of the two prizes above, follow the simple Rafflecopter prompts below.

a Rafflecopter giveaway

This giveaway ends on November 17th at 11:59 pm PDT. Two random winners will be notified by email on November 18th and announced on the Island Batik Facebook page on November 21st. If the winners do not respond within the first three days after being notified, two new random winners will be chosen. Please check your spam folders! 

Make sure to follow Island Batik on social media to hop along with the It’s In the Bag Blog Hop. Be sure to check out the Island Batik Blog.

#islandbatikambassador #islandbatik #bagmaking #iloveislandbatik #aurifil #aurifilthread #schmetzneedles #Janome  #HancocksofPaducah #fabricsmart #patternsbyannie. 


Posted on 2 Comments

Island Batik Ambassador- September 2023 Project- Out of This World Quilt- Part of the Pieced To Perfection Blog Hop

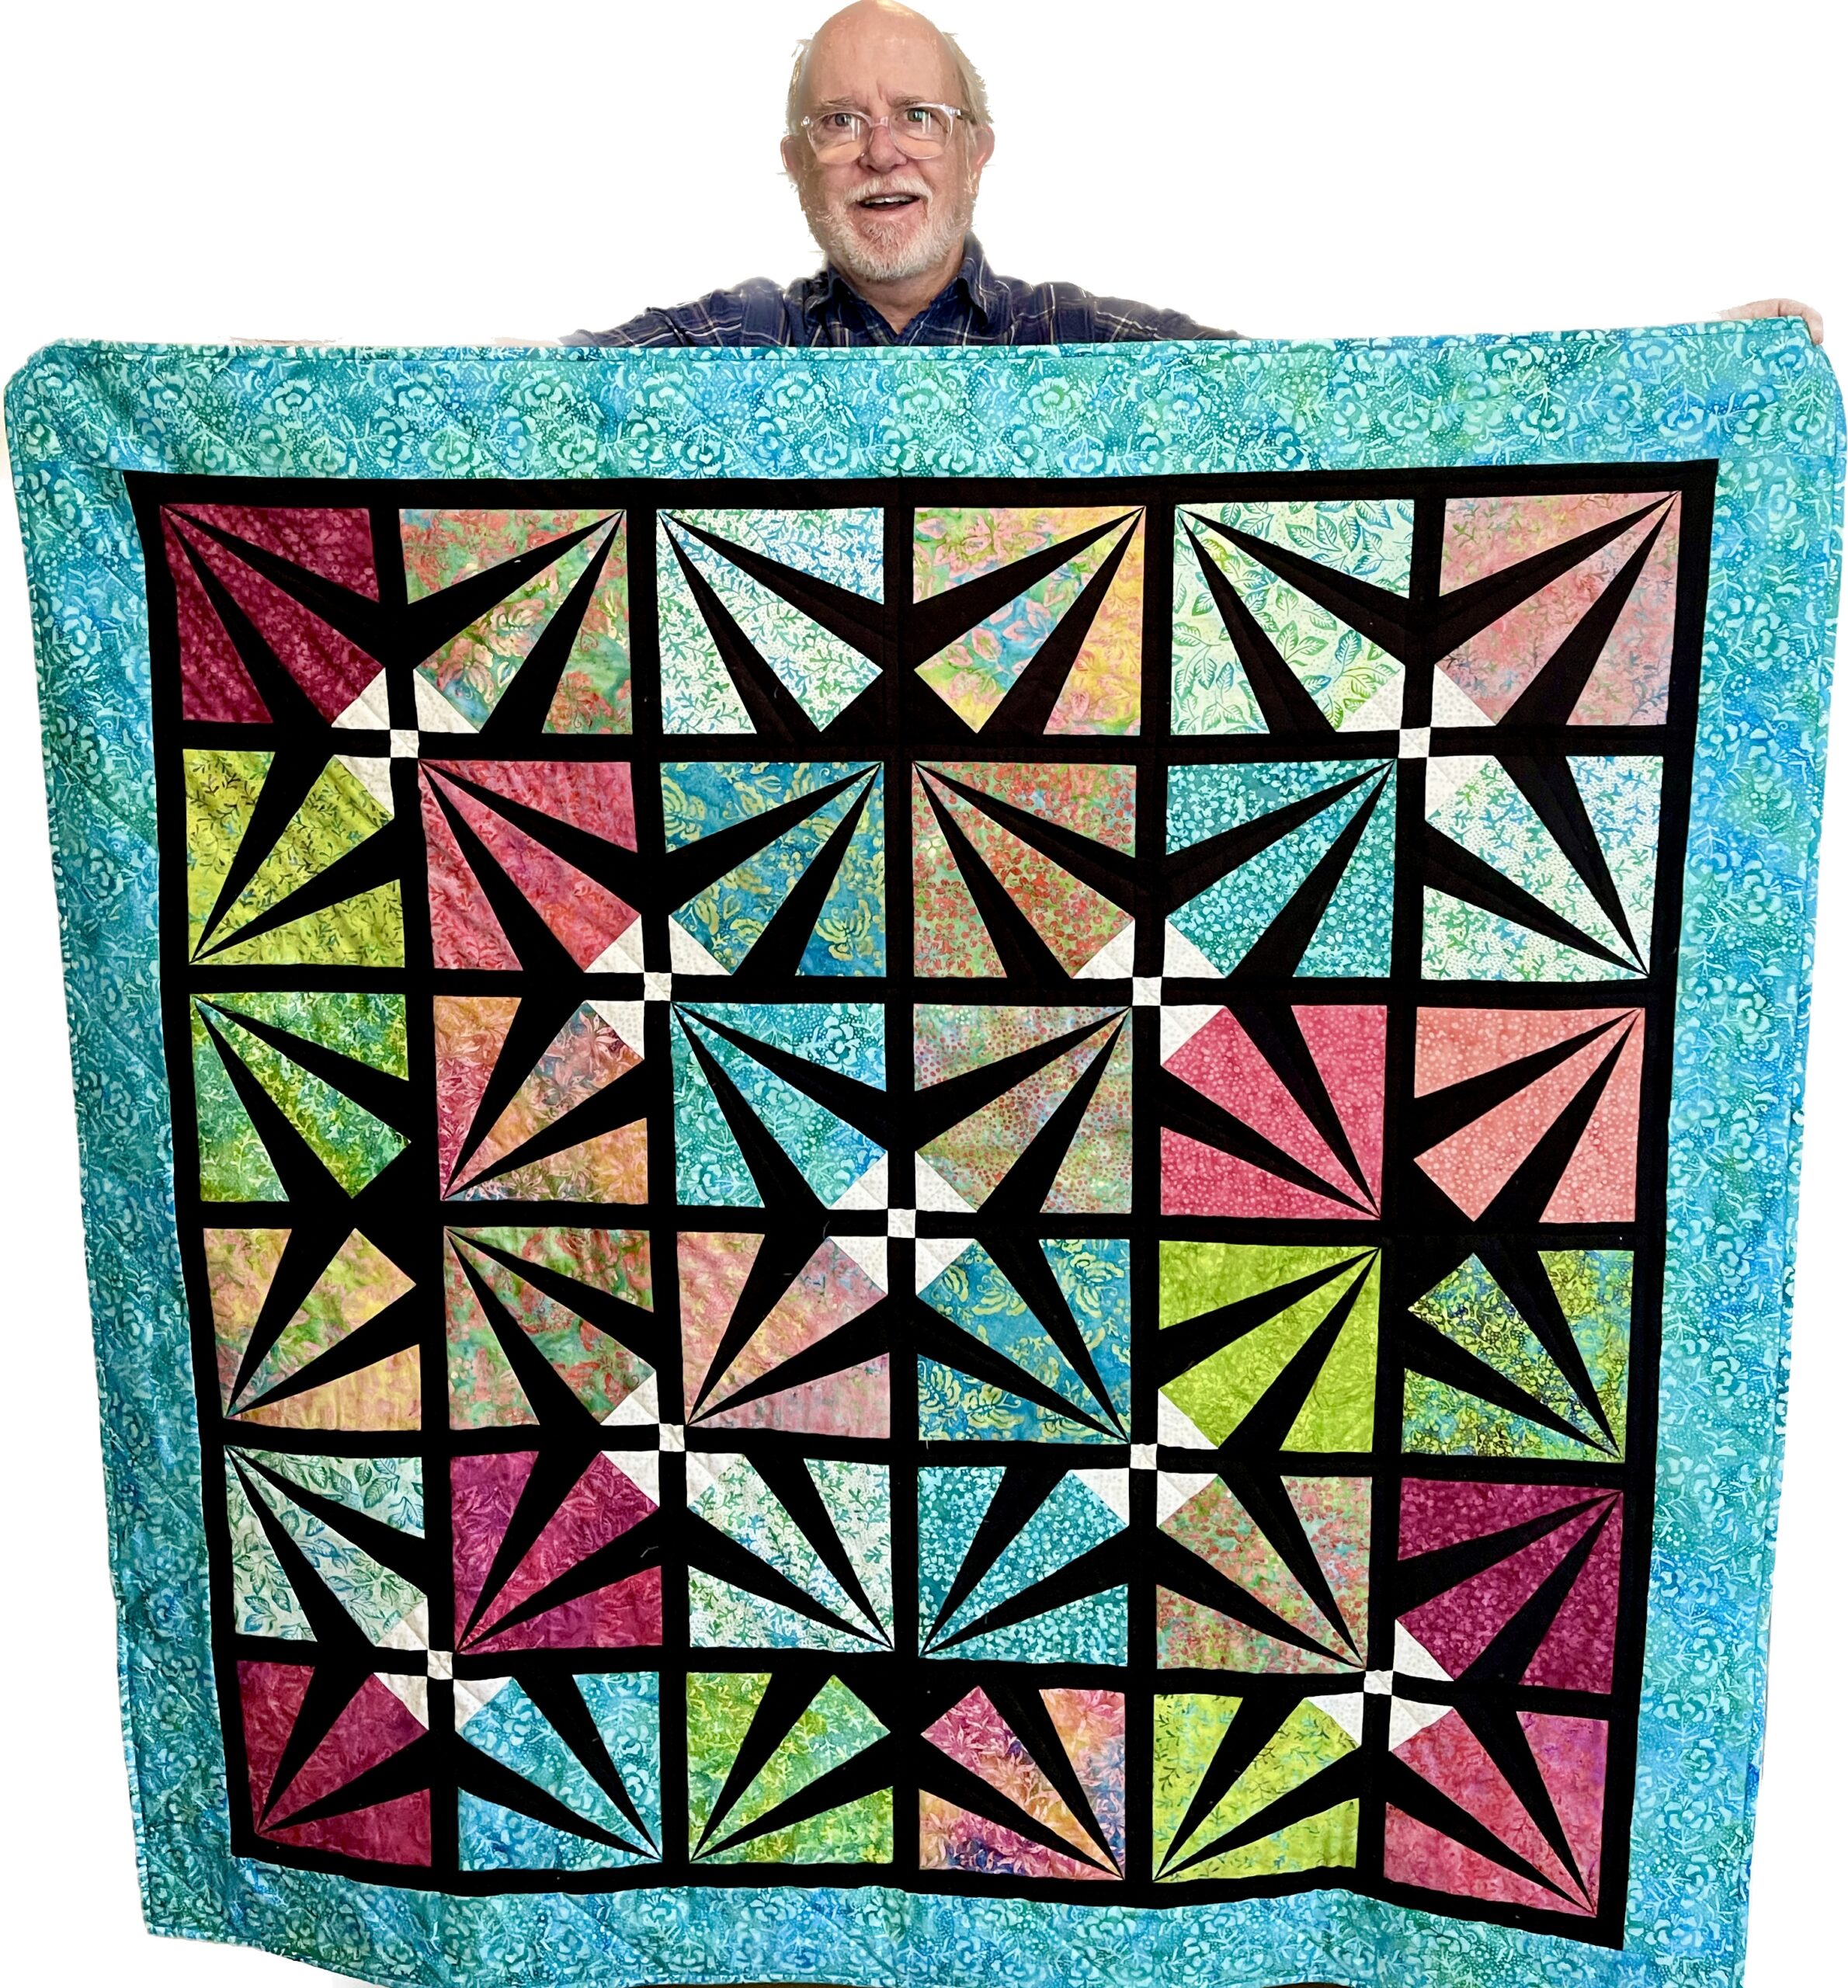
Me with the quilt

This month’s blog hop is called Pieced To Perfection as the Island Batik Ambassadors will all be making a quilt project using different upcoming fabric collections from Island Batik and paper piecing. I am looking forward to seeing all the wonderful projects that will be created during this month’s Island Batik blog hop, as paper piecing allows such perfect points in your piecing. If you dread paper piecing because of all the paper you have to rip out, be sure to read this month’s post and watch my accompanying YouTube video to see how to do a method that uses freezer paper and then there is no paper that needs to be removed later. This is game changing! Since this month is a blog hop, you can check out the Island Batik blog and enter each week to win a fat quarter bundle of some of the fabrics the Ambassadors are using in their projects. I will show the other fabric collections later in this blog along with a link to the giveaway from Island Batik and links to other ambassador’s blogs.

Pieced To Perfection Blog Hop


Check out the fabric I was given to use: Pin Dot Floral by Kathy Engle from Island Batik. Just look at this gorgeous pastel collection of batik fabrics with a floral theme.  The Pin Dot Floral collection may be found at your local quilt shop that carries Island Batik, such as Boutique4quilters in Melbourne, FL and Fabric Smart in St. Petersburg FL. This collection should be in your local quilt shop this Fall. You may find them online at https://www.boutique4quilters.com/ or call them at (321) 768-2060 or www.fabric-smart.com or call them at (727) 914-8850. Another online option for you to shop for this fabric would be Hancocks of Paducah: Hancocks of Paducah

Pin Dot Floral 2
Pin Dot Floral 2

The quilt I made is 57″ x 57.” It has various shades of pink, blue and green, along with  black and white. The Pin Dot Floral collection has many floral elements like leaves, ferns, berries, flowers and butterflies. I named this project “Out of This World”, as it has a retro spaceship feel to it and there is an optical illusion that gives the quilt a rounded or global image. Making this quilt was easy and fun using the freezer paper piece method. I will have a pattern for the Out of This World quilt available on my website later this fall.

Out of This World Quilt

Here is a closeup of the Pin Dot Floral batik bundle I was provided. Aren’t these fabrics just glorious?

Pin Dot Floral Fabric
Pin Dot Floral Fabric 

I used Electric Quilt 8 software to design this quilt, which is shown in the 1st photo below. The second set of 4 photos, below, are alternative versions of the quilt which I thought of making and they all use the same block. This block is so easy to work with and you can see that it created a stunning array of quilts. The 6th photo, below, is a recolored version of a Quilt of Valor I designed for Love of Quilting magazine a few years ago, which can also be made with the freezer paper piecing method.  

EQ8 Out of This World Quilt
Alt 1
Alt 1


Alt 2
Alt 2


Alt 3
Alt 3
Alt 5
Alt 5


Alt 4
Alt 4

The first thing to get started on this project is to get your supplies and tools all lined up. You of course will need some beautiful batiks like the Pin Dot Floral collection from Island Batik. Some Aurifil 50 wt. cotton thread will do a good job of piecing and quilting later on. You will also need pins, a ruler, rotary cutter, cutting mat and some snips. You will need Reynolds Freezer Paper, the plastic coated kind, and an ink jet printer. A nice firm postcard will allow you to fold the template on the line with a nice sharp crease and will provide an edge for the Add-A-Quarter ruler to butt up against. Finally, two optional tools are the Add-a-Quarter ruler and a light box so you can see the lines through the paper for the placement of your fabric. If you want to see, in detail, a demonstration of me using these supplies to make the Out of This World quilt, I will provide a link below to a YouTube video where I show how I made this quilt. 

supplies needed
supplies needed

Below is a photo of a completed block. Notice the sharp, skinny, black points you are able to achieve with this method of paper piecing.

completed block
completed block

It is important that you cut pieces that are large enough to cover the shapes in the block. I measured how big the shape was for covering the first batik piece and then cut strips that size. The upcoming pattern will have the measurements for these strips that need to be cut from the colored batiks and the black and white fabrics.

Cutting green strip
Cutting green strip

Next, you press the block pattern, which has been printed onto the paper side of the freezer paper, with the plastic coated side onto the wrong side of the batik. This is what holds the fabric in place while you are sewing. The plastic on the back of the freezer paper template is easily removed later and does not leave a residue on the fabric.   


Pressing green to freezer paper

It helps to pre-crease the lines on your block pattern template. You fold the freezer paper template on the first line, on the paper side, with your postcard edge on the line, and then trim the fabric that is sticking out with either an Add-A-Quarter ruler or the 1/4″ line on a regular ruler. This creates a straight edge for you to line up the next piece. The beauty of the Add-A-Quarter ruler is that it butts up nicely against the folded edge of the freezer paper and postcard.

Trimming the green
Trimming the green

Line up the straight edge of the next black piece with the straight edge of the green piece you just trimmed. I pin it in place so that it does not shift when sewing. The green piece is adhered to the freezer paper, but the black piece is just floating on top of it.

lining up the black with previous piece

Flip the block upside down so the fabric is now on the bottom and the freezer paper is on top. Fold the freezer paper back so that the trimmed edge of the green is showing. You this stitch along that folded line, right next to the freezer paper template, but not sewing through the freezer paper. The closer you can get your needle to the folded edge of the freezer paper, without the needle piercing the template, the more accurate your finished block will be. Also the more accurate you are in folding the freezer paper template, on the various lines, the more accurate your finished block will be.

sewing the black
sewing the black

Now you press the black onto the plastic side of the template, which will temporarily adhere the black piece to the template.

pressing the black
pressing the black

Next you fold back the template from the paper side, over the edge of the postcard, on the next line in the pattern, which will allow you to trim the black piece so you can add the next green piece.

trimming the black
trimming the black

Repeat across the block until all the pieces are in place. This is what the block looks like before it is trimmed up.

front of block before trimmed

It’s time to square up the block with your straight edge ruler.

squaring up the block

Once the block is trimmed up, you can easily peel the template off of the back of the block and reuse the template as many times as it will stick to fabric.

freezer paper peels off

Here’s the block all trimmed up. Now we just need to make 41 more blocks. You can speed up the process by printing multiple templates and then chain piece each of the various steps. These blocks will be done in no time flat.

completed block
completed block

Once all of your blocks are complete, you will want to lay them out on a bed, or the floor, in a fashion that is pleasing to you. From the alternate quilts I showed above, you can see that this is a versatile block and it can make a variety of interesting quilts.

Blocks laid out
Blocks laid out

The absolute best way to paper piece is to actually sew on the lines of the paper, which will give you those perfectly sewn blocks assuming you can sew straight on the lines and don’t mind picking out small bits of paper. This freezer paper method comes pretty close, but these is the possibility of a small margin of error as your 1/4″ may be off or the fabric may slip, etc. Since these blocks have points that need to match up, I wanted to put sashing in the quilt as that would make any slight imperfections not be as noticeable. There is black sashing between the blocks and a row of sashing with cornerstones in between the rows. 


sashing and cornerstones

The blocks are sewn together in rows with black sashing in between them. Then the strip of sashing with the cornerstones is sewn to the top of the rows.

sewn together in rows

Then the rows are sewn together in pairs.

sew the rows together

Finally the row pairs are sewn together and borders are added and your quilt top is done. Now it is time to quilt it. I wanted to use my walking foot on my Janome 6500. I also wanted to start and stop as little as possible, so I decided to quilt following the design of the black spike triangles with black Aurifil thread. 


Top is ready for quilting

Next I layered the quilt top, with some Hobbs Tuscany Cotton Wool Blend batting. I love this batting as it lays so nicely and is easy to quilt on a domestic machine, especially when using a brand new Schmetz quilting needle.  The Hobbs batting also gives the quilt a nice drape and doesn’t retain any fold creases.

Hobbs Tuscany Wool Cotton Blend

Here are a few more images of the completed Out of This World Quilt.


Out of This World quilt on a chair


Me with the quilt
Me with the quilt


Below is the image of my YouTube video for making this quilt. Here is a link to the video if you would like to watch it and see more detail of how I made the quilt: Out of This World- Paper Piecing With Freezer Paper           

Out of This World Quilt

If you like the video, please be sure to give it a thumbs up, share it with your friends and subscribe so you don’t miss any upcoming videos.


The supplies I used to make this project were provided by:

Island Batik Pin Dot Floral collection

Aurifil 50 wt Thread

Schmetz 70/10 Quilting needle

Hobbs Batting Tuscany Collection Cotton Wool Blend Batting


IB-Aurifil-Schmetz

Hobbs Batting
Hobbs Batting

If you are on TikTok, be sure to check out the video I have posted about the quilt. (Look for Blue Bear Quilts)

Blue Bear hopes you like this quilt. Please let him know how much you love the this quilt by writing to him in the comments!

The other amazing Island Batik Ambassadors are also posting their September Blog Pieced To Perfection projects.  Check out their projects by clicking on the links next to their names to be directed to their blog posts.

WEEK 1

September 5

Blushing Garden
Blushing Garden


Elita Sharpe, Busy Needle Quilting

Denise Looney, For the Love of Geese

September 6

Buds and blooms
Buds and blooms


Sarah Pitcher, Pitcher’s Boutique

Sandra Starley, Textile Time Travels

September 7

Chromatic
Chromatic


Brenda Alburl, Songbird Designs

Preeti Harris,Sew Preeti Quilts

Connie Kauffman, Kauffman Designs

September 8

Blog Hop Round-Up Week 1 and Giveaway

WEEK 2

September 11

Copper Patina
Copper Patina


Brittany Fisher, Bobbin with Brittany

Gail Sheppard, Quilting Gail

September 12

Earthly Greens
Earthly Greens


Maryellen McAuliffe, Mary Mack Made Mine

Susan Deshensky, Lady Blue Quilts

September 13

English Lavender
English Lavender


Emily Leachman, The Darling Dogwood

Jennifer Thomas, Curlicue Creations

Anorina Morris, Samelia’s Mum

September 14

Magenta Dusk
Magenta Dusk


Claudia Porter, Create with Claudia

Victoria Johnson, Forever Quilting for You

September 15

Blog Hop Round-Up Week 2 and Giveaway

WEEK 3

September 18

Natural Healing
Natural Healing


Lana Russel, Lana Quilts

Lisa Pickering, Lisa’s Quilting Passion

September 19

Ornate Gems
Ornate Gems


Randi Jones, Randi’s Roost

Suzy Webster, Websterquilt

September 20

Park Avenue
Park Avenue


Pamela Boatright, Pamela Quilts

Leah Malasky, Quilted Delights

Mania Hatziioannidi, Mania for Quilts

September 21

Pin Dot Floral
Pin Dot Floral


Reed Johnson, Blue Bear Quilts   Thanks for stopping by!

Renee Atkinson, Pink Tulip Quilting

September 22

End of Blog Hop + Final Round Up

Fabric Giveaway
Fabric Giveaway
The final of the Pieced to Perfection Blog Hop giveaways, from Island Batik, started on Sunday, September 17th!
Two lucky winners will each receive a bundle of new collections that will be featured this week – Pin Dot Floral or Park Avenue. Don’t miss out on your chance to add these beautiful batiks to your stash. Enter now during the  Pieced to Perfection Blog Hop:

To enter for your chance to win one of the two prizes above, follow the simple Rafflecopter prompts below.

a Rafflecopter giveaway

This giveaway ends on September, 22nd at 11:59 pm PDT. Two random winners will be notified by email on September, 23rd and announced on the Island Batik Facebook page on September, 26th. If the winners do not respond within the first three days after being notified, two new random winners will be chosen. Please check your spam folders! If the winners do not respond within the first two days after being notified, two new random winners will be chosen and notified.

Make sure to follow Island Batik on social media to hop along with the Pieced to Perfection Blog Hop. Be sure to check out the Island Batik Blog.

#islandbatikambassador #islandbatik #paperpiecing #iloveislandbatik #hobbsbatting #aurifil #aurifilthread #schmetzneedles #doyoueq #Janome #tool crazebloghop #electricquilt #eq8 #HancocksofPaducah #fabricsmart #freezerpapermethod. 


Posted on 9 Comments

Island Batik Ambassador- May 2023 Project- Island Pop Quilt- Part of the Tool Craze Blog Hop

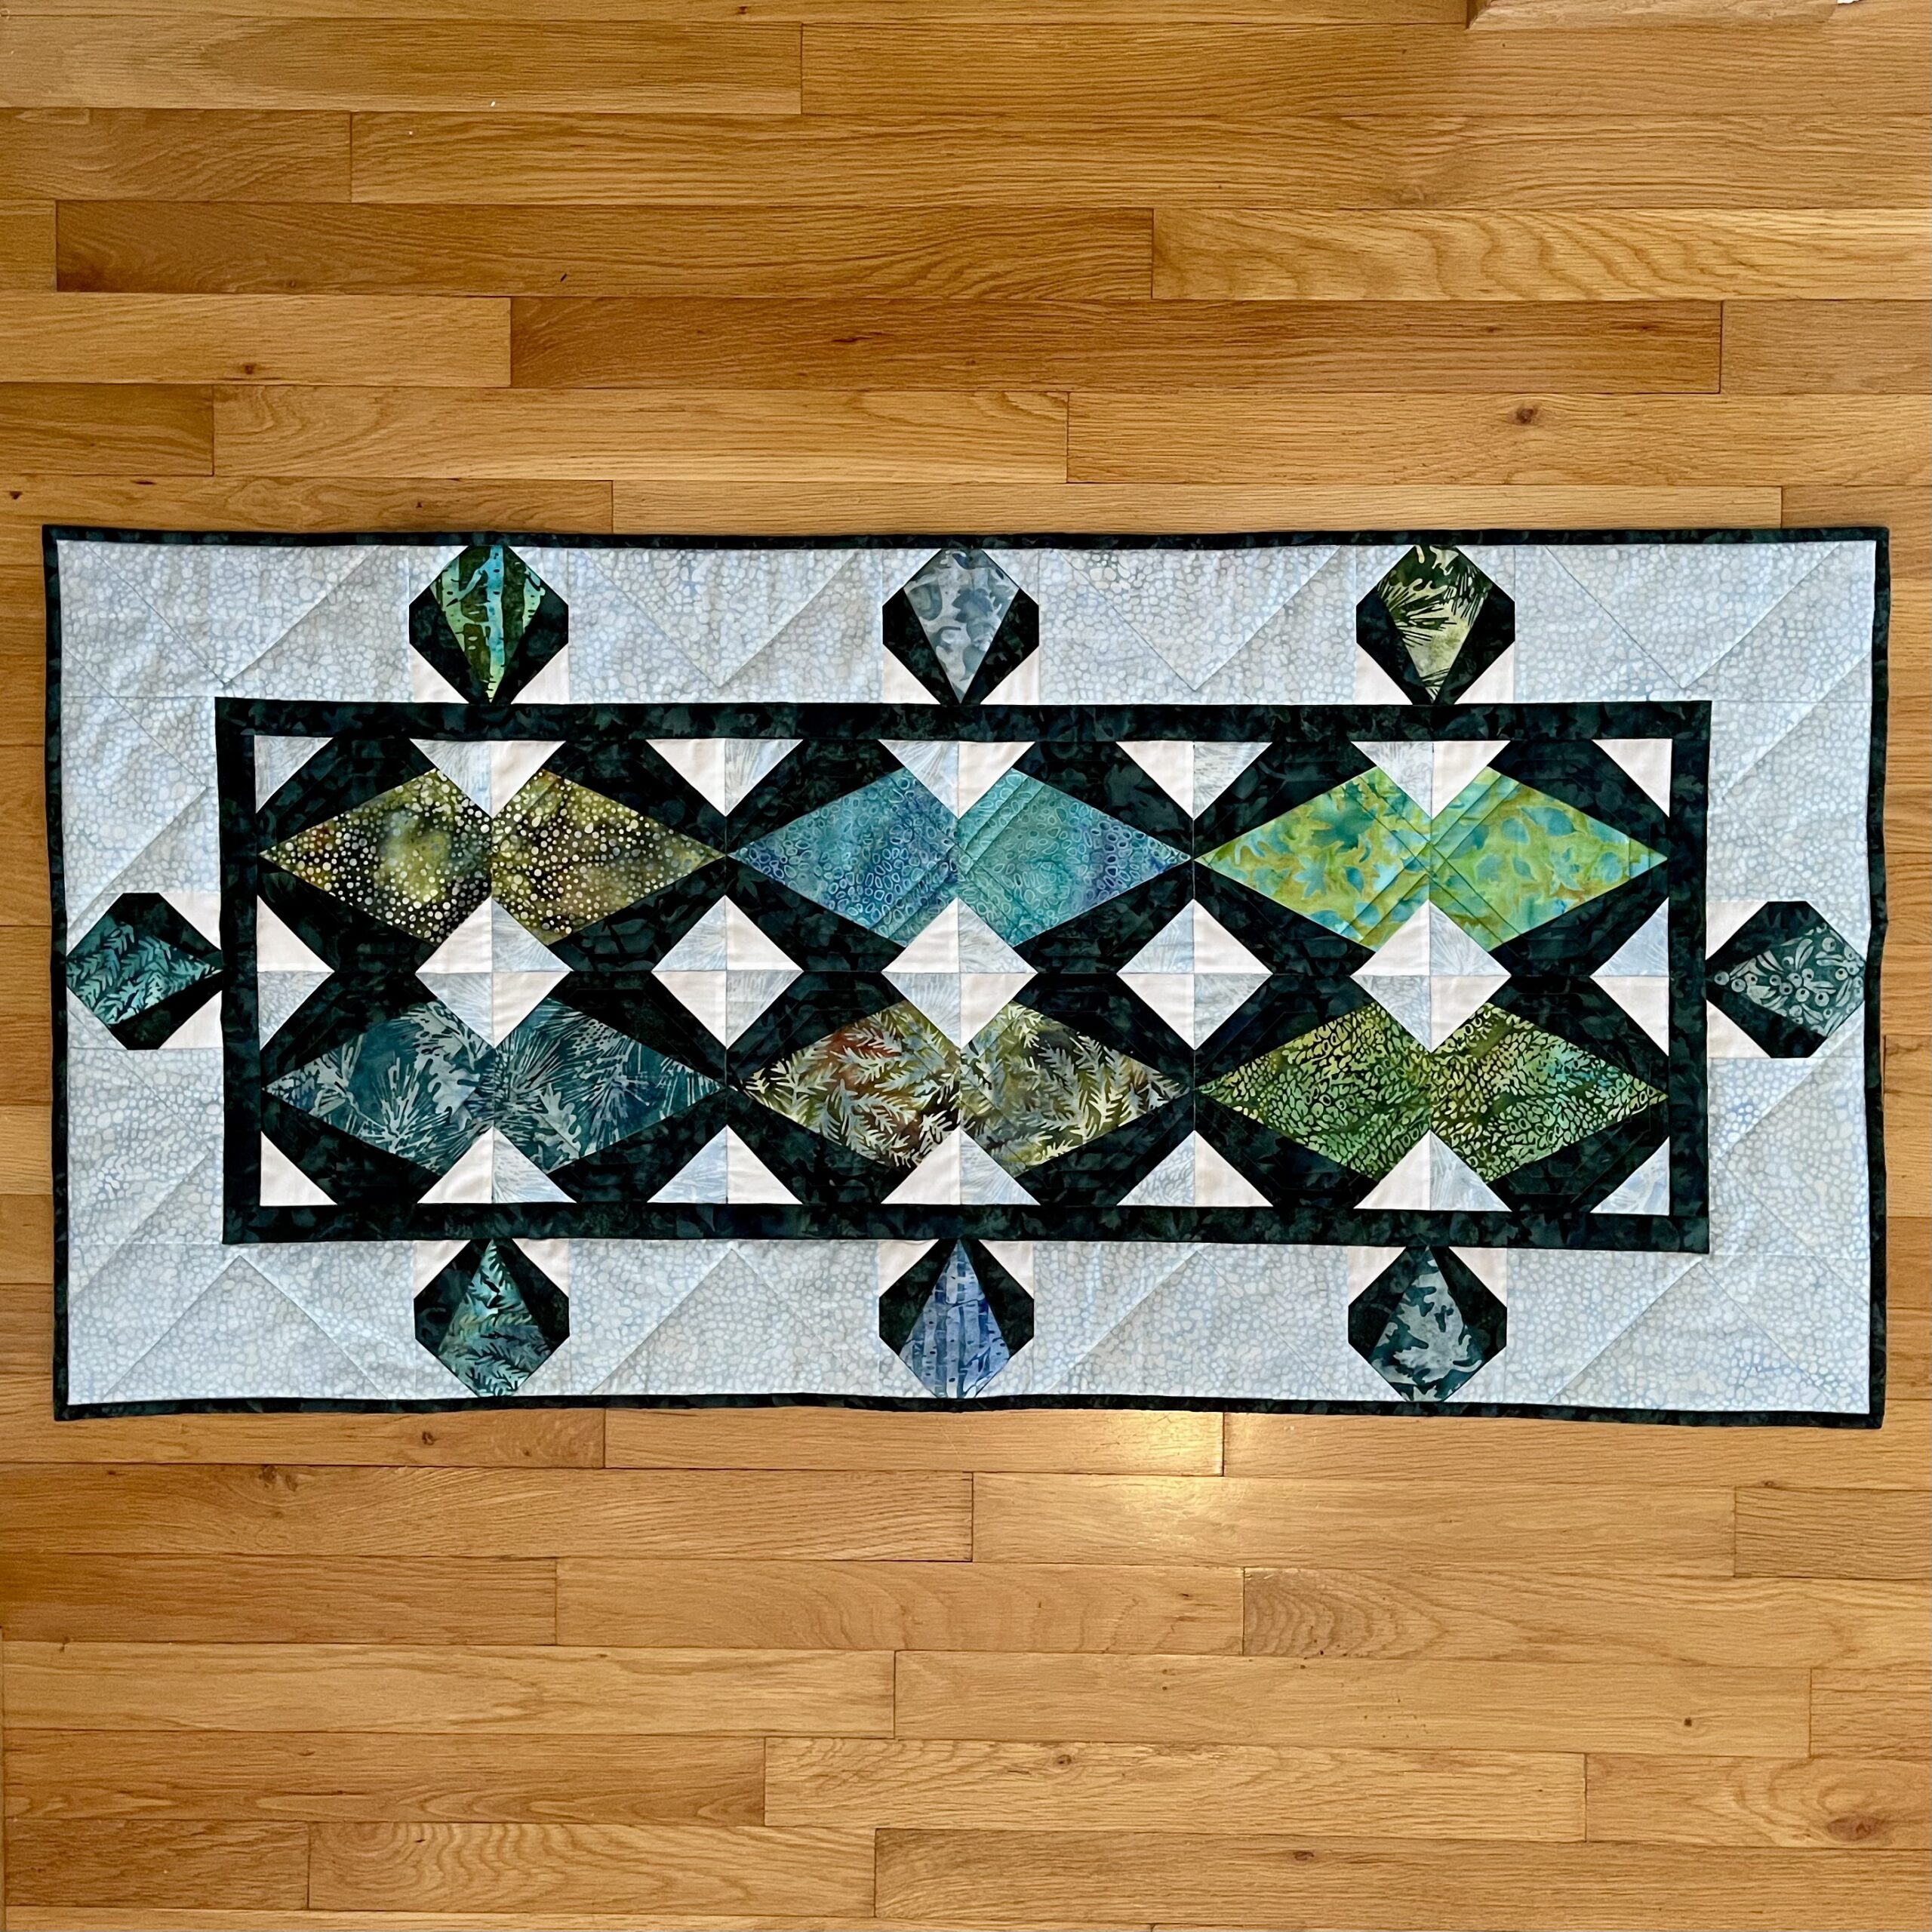
Island Pop Table Runner

This month’s blog hop is called Tool Craze as the Island Batik Ambassadors will all be making any size project using different upcoming fabric collections from Island Batik and a provided Studio 180 Design tool. I am looking forward to seeing all the wonderful projects that will be created during this month’s Island Batik blog hop. Since this month is a blog hop, you can check out the Island Batik blog and enter each week to win a fat quarter bundle of some of the fabrics the Ambassadors are using in their projects. I will show the other fabric collections later in this blog along with a link to the giveaway from Island Batik and links to other ambassador’s blogs.

Tool Craze
Tool Craze


I love the fabric I was given to use: Maple Island by Kathy Engle. Just look at this gorgeous collection of blue and green batik fabrics with a woodland theme.  The Maple Island collection may be found at your local quilt shop that carries Island Batik, such as Boutique4quilters in Melbourne, FL and Fabric Smart in St. Petersburg FL. This collection should be in your local quilt shop this summer. You may find them online at https://www.boutique4quilters.com/ or call them at (321) 768-2060 or www.fabric-smart.com or call them at (727) 914-8850. Another online option for you to shop for this fabric would be Hancocks of Paducah: Hancocks of Paducah

Maple Island
Maple Island


The table runner I made is 22″ x 46.” It has various shades of blue and green, along with  white. The Maple Island collection has many natural elements like leaves, ferns, berries, pinecones and tree bark. I originally was going call this project “Into the Woods”, but ultimately decided to call it “Island Pop” to incorporate the Corner Pop tool into the name. Making this table runner was easy and fun thanks to the Studio 180 Design tools.

Island Pop Table Runner

Here are several closeups of the Maple Island batik bundle I was provided. The first photo shows the bundle with the Corner Pop tool and the second photo is from one of my Tik Tok videos I made about this quilt. My username on TikTok is BlueBearQuilts.

Maple Island fabric and Corner Pop tool
Maple Island selection

I used my Electric Quilt 8 software to design this table runner. The first photo is a quilt I thought of doing which uses the Studio 180 Design Split Rects and Corner Pop tools. I decided to go with the table runner in the second photo, which was made with the V Block tool and the Corner Pop tool, as it had less pieces and I think it showcases the Maple Island Collection nicely. I also like the 3d effect that the Corner Pop tool created in the dark green background. Also, another aspect of this project was to make the blocks in various sizes using the Studio 180 Design tools. I really liked how the smaller version of the blocks looked in the border.

Alternative Quilt
Alternative Quilt


Island Pop Table Runner

The first step in making this table runner is to make the V Blocks aka triangle in a square blocks. Below are the completed V blocks. Don’t they look lovely in the Maple Island Collection? If you want to see in detail a demonstration of me using the Studio 180 Design tools, I will provide a link below to a You Tube video where I show how I made this runner.

V Blocks
V Blocks

The Studio 180 Design V block tool makes it so easy to make these blocks in multiple sizes. The instructions tell you what size strip to cut for the various finished sized blocks. The triangles are cut out extremely accurately using the V block tool. Look how nice this cut out triangle looks.

Cutting triangles with V Block tool


cut triangle piece
cut triangle piece

Next, you cut out the side triangle pieces. they are cut from strips that are the same size as the triangle. When you have the folded strip right sides together you will get the required mirrored image pieces that you need to make the V block.  

Cutting triangle sides with V Block tool

It is important to lay out the block before sewing so that you have the left and right side triangle pieces in the correct location. This is not as necessary with batiks, but it is something to be mindful of. A little known fact is that there really is a right side to batik fabrics. You can keep track out the right side of a batik fabric by being mindful of the fold as it comes off of the bolt. The fabric is always folded with the right side on the outside of the folded fabric. 

V Block laid out
V Block laid out

The pieces are easily sewn together by matching the tips on both ends and then sewing 1/4″ along the edge. I pressed mine toward the dark green fabric. 

The V blocks are oversized and are easily trimmed up with the tool. Below are pictures of the large and small V blocks all trimmed up. You wouldn’t believe how easy it was to make these blocks in several sizes using the Studio 180 Design V Block tool. 

large V Block
large V Block
small V Block
small V Block

Now it is time to use the Corner Pop tool, from Studio 180 Design, to give the V Blocks some pop in the corners.


The Corner Pop tool has two sections to it. The first section is where you trim off a corner of a previously made block. In my case, the V blocks. This is similar to a stitch and flip method, but with less waste of the fabric. If you know what size square you need to do a stitch and flip, the instructions tell you which line to use to cut off the corners of the block. The instructions also tell you what size squares to cut out and then cut in half diagonally to make the oversized half square triangle corners. You cut the corners off with the ruler and then sew the oversized triangles onto the corners. It is easy to sew these corner triangles on as they are centered over the edge that you trimmed off the block. 

After you have sewn the corners on, it is necessary to trim up the block as the corner triangles are oversized. This trimming up allows you to have a perfect sized block when putting the quilt together.

trimming the block
trimming the block

Here is what the block looks like after is is all trimmed up.

finished Island Pop block

Once the blocks are trimmed up, they are ready to be sewn together to make the quilt top.

Corner Pop and blocks

Next I layered the quilt top, with some Hobbs Premium wool batting. I love this batting as it gives the quilt some puffy definition and is so easy to quilt with. It also gives the quilt a nice drape and doesn’t retain any fold creases.

Hobbs Heirloom Premium Wool


Here are a few more images of the completed Island Pop Table Runner.

Island Pop Table Runner


Completed Runner
Completed Runner
left closeup
left closeup
middle closeup
middle closeup
right closeup
right closeup

Below is the image of my You Tube video for making this quilt. Here is a link to the video if you would like to watch it and see more detail of how I made the quilt:              https://youtu.be/x2aNL1xX5Uo           

You Tube Video
You Tube Video

If you like the video, please be sure to like it, share it with your friends and subscribe so you don’t miss any upcoming videos.


The supplies I used to make this project were provided by:

Island Batik Maple Island collection

Studio 180 Design Corner Pop tool

Aurifil 50 wt Thread

Schmetz 70/10 Quilting needle

Hobbs Batting Heirloom Wool Batting


IB-Aurifil-Schmetz

Studio 180 Design
Studio 180 Design
Hobbs Batting
Hobbs Batting

If you are on TikTok, be sure to check out the video I have posted of the table runner. (Look for Blue Bear Quilts)

Blue Bear hopes you like this table runner. Please let him know how much you love the this table runner by writing to him in the comments!

The other amazing Island Batik Ambassadors are also posting their May Blog Hop Tool Craze projects.  Check out their projects by clicking on the links next to their names to be directed to their blog posts.

WEEK 1

May 1

Celebrate
Celebrate


Susan Deshensky, Lady Blue Quilts

Randi Jones, Randi’s Roost

May 2

holiday-at-home
holiday-at-home


Elita Sharpe, Busy Needle Quilting

Mania Hatziioannidi, Mania for Quilts

May 3

Let it Snow
Let it Snow


Brittany Fisher, Bobbin with Brittany

Pamela Boatright, Pamela Quilts

May 4

Make a Wish
Make a Wish


Denise Looney, For the Love of Geese

Connie Kauffman, Kauffman Designs

May 5

Blog Hop Round-Up Week 1 and Giveaway

WEEK 2

May 8

maple island
maple island


Reed Johnson, Blue Bear Quilts   Thanks for stopping by!

Sandra Starley, Textile Time Travels

May 9

Sandalwood
Sandalwood


Gail Sheppard, Quilting Gail

Lana Russel, Lana Quilts

May 10

Sea Cookies
Sea Cookies


Emily Leachman, The Darling Dogwood

Claudia Porter, Create with Claudia

Anorina Morris, Samelia’s Mum

May 11

Sorbet
Sorbet


Brenda Alburl, Songbird Designs

Jennifer Thomas, Curlicue Creations

May 12

Blog Hop Round-Up Week 2 and Giveaway

WEEK 3

May 15

Summer Twilight
Summer Twilight


Victoria Johnson, Forever Quilting for You

Maryellen McAuliffe, Mary Mack Made Mine

Leah Malasky, Quilted DelightsLisa Pickering, Lisa’s Quilting Passion

May 16

Sunny Meadow
Sunny Meadow


Sarah Pitcher, Pitcher’s Boutique

Renee Atkinson, Pink Tulip Quilting

May 17

Wild Blooms
Wild Blooms


Preeti Harris, Sew Preeti Quilts

Suzy Webster, Websterquilt

Lisa Pickering, Lisa’s Quilting Passion

May 18

End of Blog Hop + Final Round Up

week-2-prize
week-2-prize
The first of the Tool Craze Up Blog Hop giveaways, from Island Batik, started on Sunday, April 30th!
Two lucky winners will each receive a bundle of new collections that will be featured this week – Sorbet by Claudia Pfeil of Claudia Pfeil Design or Sea Cookies, designed Kate Colleran by Kate Colleran Designs, LLC. Don’t miss out on your chance to add these beautiful batiks to your stash. Enter now and every week during the  Tool Craze Blog Hop:

To enter for your chance to win one of the two prizes above, follow the simple Rafflecopter prompts below.

a Rafflecopter giveaway

This giveaway ends on May, 12th at 11:59 pm PDT. Two random winners will be notified by email on May, 13rd and announced on the Island Batik Facebook page on May, 16th. If the winners do not respond within the first three days after being notified, two new random winners will be chosen. Please check your spam folders! If the winners do not respond within the first two days after being notified, two new random winners will be chosen and notified.

Make sure to follow Island Batik on social media to hop along with the Tool Craze Blog Hop. Be sure to check out the Island Batik Blog.

#islandbatikambassador #islandbatik #studio180design #iloveislandbatik #hobbsbatting #aurifil #aurifilthread #schmetzneedles #doyoueq #Janome #tool crazebloghop #electricquilt #eq8 #HancocksofPaducah #fabricsmart


Posted on 4 Comments

Quilt Block Mania-Happy Sunflowers Block- Complimentary Block Pattern for March 2023

Happy Sunflowers

Hello there! March is a month where we begin to think about spring. We love the springtime when the flowers are in bloom. There are some great blocks with the theme of floral for March 2023. I think sunflowers are one of the happiest flowers and they bring so much joy. Our complimentary block of the month for Quilt Block Mania, during the month of March 2023, Happy Sunflowers Block, is great for making a table runner or small quilt. If you like receiving the complimentary blocks from Quilt Block Mania, please share this with your quilting friends on social media (please ask them to sign up for their own copy) so the designers can continue to do this every month. The designers thank you for your support, through your purchases of other patterns, which allow us to offer these complimentary block patterns each month.

SF Cover
GS Cover

During March 2023, we are offering 20% off two of our spring digital download patterns. They are the Spring Friends Table Runner and The Good Shepherd quilt pattern. The link to these patterns is here: downloadable-patterns/

This is the Happy Sunflowers Block. This block features yellow sunflowers with happy faces on a dark green background with a red heart. I placed the flowers on a dark background to make them pop. You certainly may use a lighter background if you prefer. Also, If you don’t like the faces on the flowers, you may leave them off.

Quilt Block Mania has 27 talented quilt designers creating blocks for this month’s theme- Floral.

Happy Sunflowers
Happy Sunflowers

The Happy Sunflowers Block makes a great 33″ square quilt with a 1″ finished light brown inner border, and sashing, and a 3″ finished green outer border.

HSF Quilt
HSF Quilt

The Happy Sunflowers block also makes a cheery 20″ x 46″ table runner with a 1″ finished light brown inner border, and sashing, and a 3″ finished green outer border. .

HSF TR
HSF TR

How to get the block

If you are new to our website and are interested in downloading a complimentary PDF pattern of our Happy Sunflowers Block for March 2023, all you have to do is look for the box on our blog, on the right hand side, that says “Like this content? Sign up for free updates” and sign up to receive our newsletter. When you have done that, you will receive a welcoming email from us that will contain a coupon code and a link back to the complimentary pattern. You will act as though you are purchasing the pattern and in the cart, you will apply the coupon code, which will make the pattern free. You will need to fill out contact information, but no payment method will be necessary. Don’t worry, we do not send out newsletters very often and we never sell email addresses or contact information. Here is what the pattern looks like. It is in a format very similar to most Blue Bear Quilt patterns, so if you see what you like in this complimentary pattern, you will like our other patterns as well.

Please note: This pattern will only be complimentary during the month of March 2023.

HSF Cover
HSF Cover

Current newsletter subscribers, don’t despair! You will be able to download the complimentary pattern as well. You have already been sent a newsletter on March 7th which gave you the coupon code.

Be sure to follow us on our Instagram page, @bluebearquilts, as that is where we occasionally have giveaways.

As you may be aware, I am an Island Batik Ambassador again for 2023. My February project is a puff quilt and if you have not made one of those yet, they are a lot of fun. My last blog post details how I made it and I also have a YouTube video, on my channel, talking about how I made it. Check out my last blog post to see how I made it.

2023-I'm-An-Island-Batik-Ambassador
2023-I’m-An-Island-Batik-Ambassador
Finished Puff Quilt
Finished Puff Quilt

If you like my February Project, stay tuned for more projects in 2023. I think you are going to like the March project, which is a strip quilt.

Please follow me on social media so you don’t miss a thing.

Also, please check out our Tik Tok and YouTube Channels (Blue Bear Quilts) for more quilting fun and inspiration. Please be sure to follow and subscribe so you don’t miss a thing. And thanks for watching!

We are so happy that you stopped by to visit us in the Quilt Block Mania hop and we hope that you like our block. Please stop by to see all of the other designer’s wonderful blocks.

March-Floral-Quilt-Blocks

You can click on the links to the other blocks here.

Chubby Daisy Quilt block by Carolina Moore
Violet by Inquiring Quilter
Dahlia by Inflorescence Designs
Poppy by Boberry Design Co
Summer Poppies
Coronation Bloomd
Rose of Sharon by QuiltFabrication
Irises by Paleofish Designs
Lavender by Palm Creations
Crocuses at Patti’s Patchwork
Tulip by Penny Spool Quilts
Improv Pansy at Lovingly, Lissa
Daisy by Appliques Quilts and More
Cone Flower
Summer Flower by Crafty Staci
Mother Nature’s Memos
Kaye Collins- Big Blossom
Flower Shop
Star Flower Quilt Block
FPP Flower at The (not so) Dramatic Life
Spring Tulip by Around the Bobbin
Pretty Pot
Happy Sunflowers by Blue Bear Quilts
Poppy by Sallys’ Sewing Circle
Reversible Flower Block | Happy Hippie Studio
Primrose Pinwheels by A Piece of Quiet Quilts
Flower power

Posted on 6 Comments

Island Batik Ambassador August Project, Star Mini Quilt for Blue Bear

This is my August 2022 project as an Island Batik Ambassador. This month’s challenge was to make a mini quilt using any technique and Island Batik fabric. The quilt could be no larger than 24″ x 24″. I designed this quilt on my computer using Electric Quilt 8 software. This size of this quilt, which is perfect for Blue Bear, is 12″ x 12″.

Blue Bear’s Star Mini Quilt

I chose to use fabrics from the Island Batik collection called “Jewel Carvings” and I also used their solid black. These colors are so delicious.

Jewel Carvings

When designing a quilt, it is important to make sure that you have a proper mix of light, medium and dark shades in your quilt. One way to determine this is to take a monochromatic picture of your fabrics to more clearly see the shades. Notice how the values go from dark to light when looking at the fabrics from left to right. In the completed quilt, I wish there was a little more value change between the purple and blue. Those are the two fabrics farthest to the left in the monochromatic image, followed by the green and yellow.

monochromatic image

This quilt is comprised of 1-1/2″ unfinished squares and half square triangles. I used a method of making 8 half square triangles at a time. You can find many articles for how to do this if you do a google search. I wanted 1-1/2″ unfinished half square triangles, so that meant that I needed to start with 4-1/2″ squares. For example, if I wanted to make the blue/green half square triangles, I would need to place green and blue 4-1/2″ squares right sides together. The nice thing about using Island Batik fabrics for this project is that you don’t really have to worry about right and wrong sides, even though technically there is a right side. Then I drew lines horizontally, vertically and diagonally in both directions in the middle of the square. Next, I sewed 1/4″ on either side of the drawn diagonal lines.

drawn and sewn lines

Next, I cut on the horizontal, vertical and diagonal lines I drew. You don’t cut on the sewn lines. This creates 8 half square triangle units.

8 half square triangles

Next. I needed to press the half square triangles and I chose to press toward the dark side. When the units are lined up for sewing, you may need to press some of them the other way so that they will nest and not create as much bulk in the seams.

press to the dark side

In order to successfully sew a quilt with such small pieces, it’s important to maintain the proper squared-up size of the unfinished units, which in this case is 1-1/2″. I used the small 1-1/2″ Bloc-Loc ruler to accomplish this. This ruler has grooves on the back of it that slide along the ridge of the pressed over fabric and it allows you to trim up 2 sides of the unit at a time.

Bloc-Loc trim up ruler

I have a YouTube video showing how to to trim up these units using the Bloc-Loc ruler. Here is a link to that video: https://youtu.be/hUHR_SmPLe8

YouTube video

Once the units were all squared up, I laid them out in the positions they would be in the quilt. This is where you would look at which blocks are being sewn together and determine if you need to press them the other direction so that seams will nest.

units lined up

Sewing the units together, I slowed my Janome 6600 down and used a quarter inch foot so that I could obtain an accurate 1/4″ seam. This is crucial when sewing a mini quilt as if you are off by an 1/8th of an inch, that adds up quickly and your quilt will no longer be the correct size. I sewed one row at a time and pressed each row in the opposite direction. When sewing the rows together, I pressed the seams open to reduce bulk. Here is a picture of the back of the quilt and you can see that there are a lot of intersecting seams, which is why all of these measurements being accurate is so important.

row seams are pressed open

Finally, I made a quilt sandwich by placing a piece of Hobbs 80/20 black batting between the quilt top and a piece of black backing. I pinned the layers together to prevent shifting when quilting the layers together. I used Aurifil 50 weight cotton thread in several different colors on the top. I loved how easy it was to find shades of thread color that matched the Island Batik fabric. I slowed my Janome 6600 down again and used the dual action walking foot to stitch in the ditch, which was a breeze. I love domestic machine quilting on a project this size. It’s so easy!

stitching in the ditch

I machine stitched on the black binding. Here is a picture of the completed quilt and a close up of the stitching in the ditch.

Star Mini Quilt
Mini quilt close up

Blue Bear’s Quilt is finished. I think he loves it! He is so thankful as he finally has a quilt that is his size. He can’t use the big people’s quilts. He will now have his own quilt to snuggle up with at night and he loves the fact that the quilt has blue stars that are the same color as him.

Blue Bear with his quilt

Be sure to follow along and subscribe to all our social media (Instagram, Facebook, Twitter and Tic Tok) as I will be making a beautiful Southwestern themed 60 degree star quilt using the Deb Tucker’s Studio 180 Star 60 ruler next month. You won’t want to miss it.

Island Batik
Island Batik

The supplies I used to make this project were provided by:

Island Batik Jewel Carvings collection for the top.

Aurifil 50 wt Thread

Hobbs black 80/20 Blend Batting

Schmetz 70/10 Quilting needle

Thank you Island Batik, Aurifil Thread, Hobbs Batting, and Schmetz Needles.

Hobbs Batting
Hobbs Batting
Aurifil Thread
Aurifil Thread
Schmetz Needles
Schmetz Needles

The other Island Batik Ambassadors have also been busy creating Mini quilts in their August projects. If you would like to see what the other ambassadors have been up to, check out their projects by clicking on the links next to their names to be directed to their blog posts.

Jennifer Thomas, Curlicue Creations
Denise Looney, For the Love of Geese

Pamela Boatright, Pamela Quilts
Andi Stanfield, True Blue Quilts

Megan Best, Bestquilter

Maryellen McAuliffe, Mary Mack Made Mine
Brenda Alburl, Songbird Designs

Emily Leachman, The Darling Dogwood
Leah Malasky, Quilted Delights

Suzy Webster, Websterquilt
Connie Kauffman, Kauffman Designs

Brianna Roberts, Sew Cute and Quirky
Sandra Starley, Textile Time Travels

Michelle Roberts, Creative Blonde
Jane Hauprich, Stitch by Stitch Custom Quilting

Claudia Porter, Create with Claudia

Anorina Morris, Samelia’s Mum
Preeti Harris, Sew Preeti Quilts

Elizabeth DeCroos, Epida Studio
Gail Renna, Quilt Haven Threads

Gail Sheppard, Quilting Gail
Jennifer Fulton, Inquiring Quilter

Mania Hatzioannidi, Mania for Quilts
Lisa Pickering, Lisa’s Quilting Passion

#islandbatikambassador #islandbatik #iloveislandbatik #hobbsbatting #aurifil #aurifilthread #schmetzneedles #doyoueq #EQ8 #electricquilt #Janome #bloc-loc

Posted on 4 Comments

Island Batik Ambassador July Project, Tree of Life From the Underside Quilt

This is my July 2022 project as an Island Batik Ambassador. The first part of this month’s challenge was to use the Accuquilt Tree of Life die to create a unique project. Accuquilt provided the Tree of Life die, and Island Batik provided fabric, to the Ambassadors so they could create their projects in this challenge. This die is a BOB or block on board. What that means is that you are able to cut all of the pieces you need to complete a tree of life block with one pass through the cutting machine.

Tree of Life Die and Fabric

The die has metal blades set in foam and when you place the fabric on the die and cover it with a mat, there is a roller in the cutter that presses down on the fabric and cuts out the needed shapes. Here is a Tik Tok video I did showing how I cut out the fabric.

I designed the quilt in Electric Quilt and this is the design I came up with. It is a bright and colorful design, orienting four tree of life blocks toward the outside corners. The blocks are uniquely colored to create the graphic design of the quilt. It almost has an Art Deco feel to it.

I needed some wonderful solids to make this quilt. Did you know that Island Batik has solids? Well, they do! I chose solids in red, blue, yellow, orange, green and lime. I used stash buster strip rolls for the colors and accented them with white and black to make them shine. The stash busters are 5″ wide strips and are great to work with on this type of project as they are already cut into a smaller size to be able to use with the Accuquilt Die.

Here is how I laid out the blocks after I had cut all of the desired shapes. It is really helpful to lay out your block ahead of time to keep everything organized. The half square triangles were sewn in rows and then the rows were sewn together. The Accuquilt die has great instructions for how to sew the block together.

block lay out

As mentioned above, a great thing about cutting out your shapes with the Acccuquilt Tree of Life die is that all of the shapes you need for one block can be cut with one pass through the cutting machine. You can put 6 layers of fabric on the die, so you could cut out 6 blocks at once. Also, the dog ears are cut off and if you are a really good sewist, there is no trimming that is needed to square up the blocks.

cut out shapes

After I had the quilt top sewn together, using my favorite thread, Auriful, it was time to make a quilt sandwich with some awesome batting (Heirloom 80/20 blend) provided by Hobbs Batting.

quilt sandwich

Time to quilt with my Janome 6600. This machine is a power horse! I knew I wanted to quilt in straight lines, so I used my favorite quilting ruler for that purpose- the Line Tamer by Four Paws Quilting. Your ruler work foot just follows the cut out groove in the ruler and gives you nice straight lines.

Line Tamer

Voila! The quilt is all done. I machine pieced the black binding to the front and then used clips to hold the binding in place on the back while I stitched in the ditch on the front.

finished quilt

Part two of this Christmas in July project was to gift the quilt to someone and bring them a little joy. When I decided on the name of the quilt, I knew who I wanted to give it to as a gift. I named the quilt “Tree of Life From the Underside.” Imagine laying on the ground, under a tree, and looking up at the bottom of the branches spreading out. I felt the quilt gave this perspective of the tree.

I see the tree of life as representing life, liberty and the pursuit of happiness. Many in society are able to stand alongside the tree and enjoy the view from many perspectives. Yet there are others around the world who do not have that same ability and they are kept under the tree and can’t enjoy all of the beauty the tree represents. These people may include the elderly, poor. foreigners, women, gays, jewish people, blacks, asians, indigenous people or people with disabilities. They want to see the tree from all sides and the wonderful things it represents, but they are kept down below the branches.

There is a poem, by Poet Laureate, Amanda Gorman, called “_ _ _ _ _Gated.” In the poem she compares how the pandemic was a leveler, and all were equally prevented from doing what they wanted to do, or told what they had to do. Sharing for a brief time what it feels like to be living in the margins.

Here are a few quotes from the poem. “To be haunted is to be hunted by a history that is still hurting. Needing healing as much as we do. … Call us… colonized, …cleansed, controlled, killed, … contained, concentrated, conditioned… We have yielded centuries of sidewalk, trained in this tradition before we even lived it- what it is to bow our heads & make room for someone else’s pride, that ceding of the walkway…Why is it so perturbing for privileged groups to follow restrictions of place & personhood. Doing so means for once wearing the chains their power has shackled on the rest of us….Meanwhile for generations we’ve stayed home,…kept out of public spaces…kept out of ballot boxes, kept out of office, kept out of the army, kept out of hospitals…kept out of jobs, kept out of schools, kept out of sports…kept out of land, kept out of kept in kept from kept behind kept below kept down kept without life. Some were asked to walk a fraction/ of our exclusion for a year & it almost destroyed all they thought they were. Yet here we are. Still walking, still kept. To be kept to the edges of existence is the inheritance of the marginalized. …If we remember anything, let it be to remember. A road forward we shall have if we keep walking.”

This poem is powerful and it is found in her book called ” Call us what we carry.” If you can find a copy of the book at your local bookstore, or library, I would urge you to do so.

For me, the tree also represents hope. growth and rebirth. The leaves of the tree are all unique and yet they are interconnected. The tree is strong and provides shelter from the storms. Under the tree is also a place for peace and tranquility. Finally it is a place for growth and rebirth. A mighty oak grows from a tiny acorn. Each year the leaves turn brown and die but then are reborn in the Spring with the prospect of new growth. As we keep walking, the tree keeps inspiring growth.

I wanted to give this quilt to someone who treats everyone as equal and places no one in the margins, even as difficult as that may be in a society that likes to create margins. Someone who keeps walking. Someone immediately came to mind. It was a friend, Pastor Joyce Stone. She is a pastor of a church in Florida that not only welcomes all but affirms their very nature. Christ the Cornerstone is a beacon of light for all. When I told Pastor Joyce about the gift, she told me that they have a tree of life in the church where people can place leaves about the things God has done for them in their lives. I knew I had made the right choice for the gift recipient.

I placed a hanging sleeve on the back of the quilt so that it may be hung for all to see. It is my desire that the quilt will stand as a symbol of the hope, growth and rebirth the tree represents. I hope it will inspire those who can stand alongside the tree, and enjoy all of its beauty and freedom, to come to the underside and see the shelter, strength and connectivity the tree provides and invite those living under the tree to come and stand beside the tree with them. I also hope that those who may only see the tree from the underside will keep walking so that one day they will be able to stand alongside the tree and see the life, liberty and happiness it provides from all angles.

Here is a picture of Pastor Joyce with the quilt. Her smile radiates Joy!

Pastor Joyce with quilt
Pastor Joyce and I in front of the Tree of Life in her church

If you would like to see me talking about the quilt, I also have a YouTube video about it on my YouTube channel, Blue Bear Quilts. Here is a link to the video: https://youtu.be/duB3fqtL2ac

YouTube Video
Island Batik
Island Batik

The supplies I used to make this project were provided by:

Island Batik Stash Buster 5″ strip roll for the top.

Accuquilt Tree of Life Die

Aurifil 50 wt Thread

Hobbs 80/20 Blend Batting

Schmetz 70/10 Quilting needle

accuquilt
accuquilt

Thank you Island Batik, Accuquilt, Aurifil Thread, Hobbs Batting, and Schmetz Needles.

Hobbs Batting
Hobbs Batting
Aurifil Thread
Aurifil Thread
Schmetz Needles
Schmetz Needles

The other Island Batik Ambassadors have also been busy creating Christmas in July projects. If you would like to see what the other ambassadors have been up to, check out their projects by clicking on the links next to their names to be directed to their blog posts.

Jennifer Thomas, Curlicue Creations
Denise Looney, For the Love of Geese

Pamela Boatright, Pamela Quilts
Andi Stanfield, True Blue Quilts

Megan Best, Bestquilter

Maryellen McAuliffe, Mary Mack Made Mine
Brenda Alburl, Songbird Designs

Emily Leachman, The Darling Dogwood
Leah Malasky, Quilted Delights

Suzy Webster, Websterquilt
Connie Kauffman, Kauffman Designs

Brianna Roberts, Sew Cute and Quirky
Sandra Starley, Textile Time Travels

Michelle Roberts, Creative Blonde
Jane Hauprich, Stitch by Stitch Custom Quilting

Claudia Porter, Create with Claudia

Anorina Morris, Samelia’s Mum
Preeti Harris, Sew Preeti Quilts

Elizabeth DeCroos, Epida Studio
Gail Renna, Quilt Haven Threads

Gail Sheppard, Quilting Gail
Jennifer Fulton, Inquiring Quilter

Mania Hatzioannidi, Mania for Quilts
Lisa Pickering, Lisa’s Quilting Passion

#islandbatikambassador #islandbatik #iloveislandbatik #hobbsbatting #aurifil #aurifilthread #schmetzneedles #doyoueq #EQ8 #electricquilt #Janome #Accuquilt #AccuquiltGO #ChristmasinJuly #AccuQuiltChristmasInJuly #fourpawsquilting

Posted on Leave a comment

New Timeless Treasures Pattern

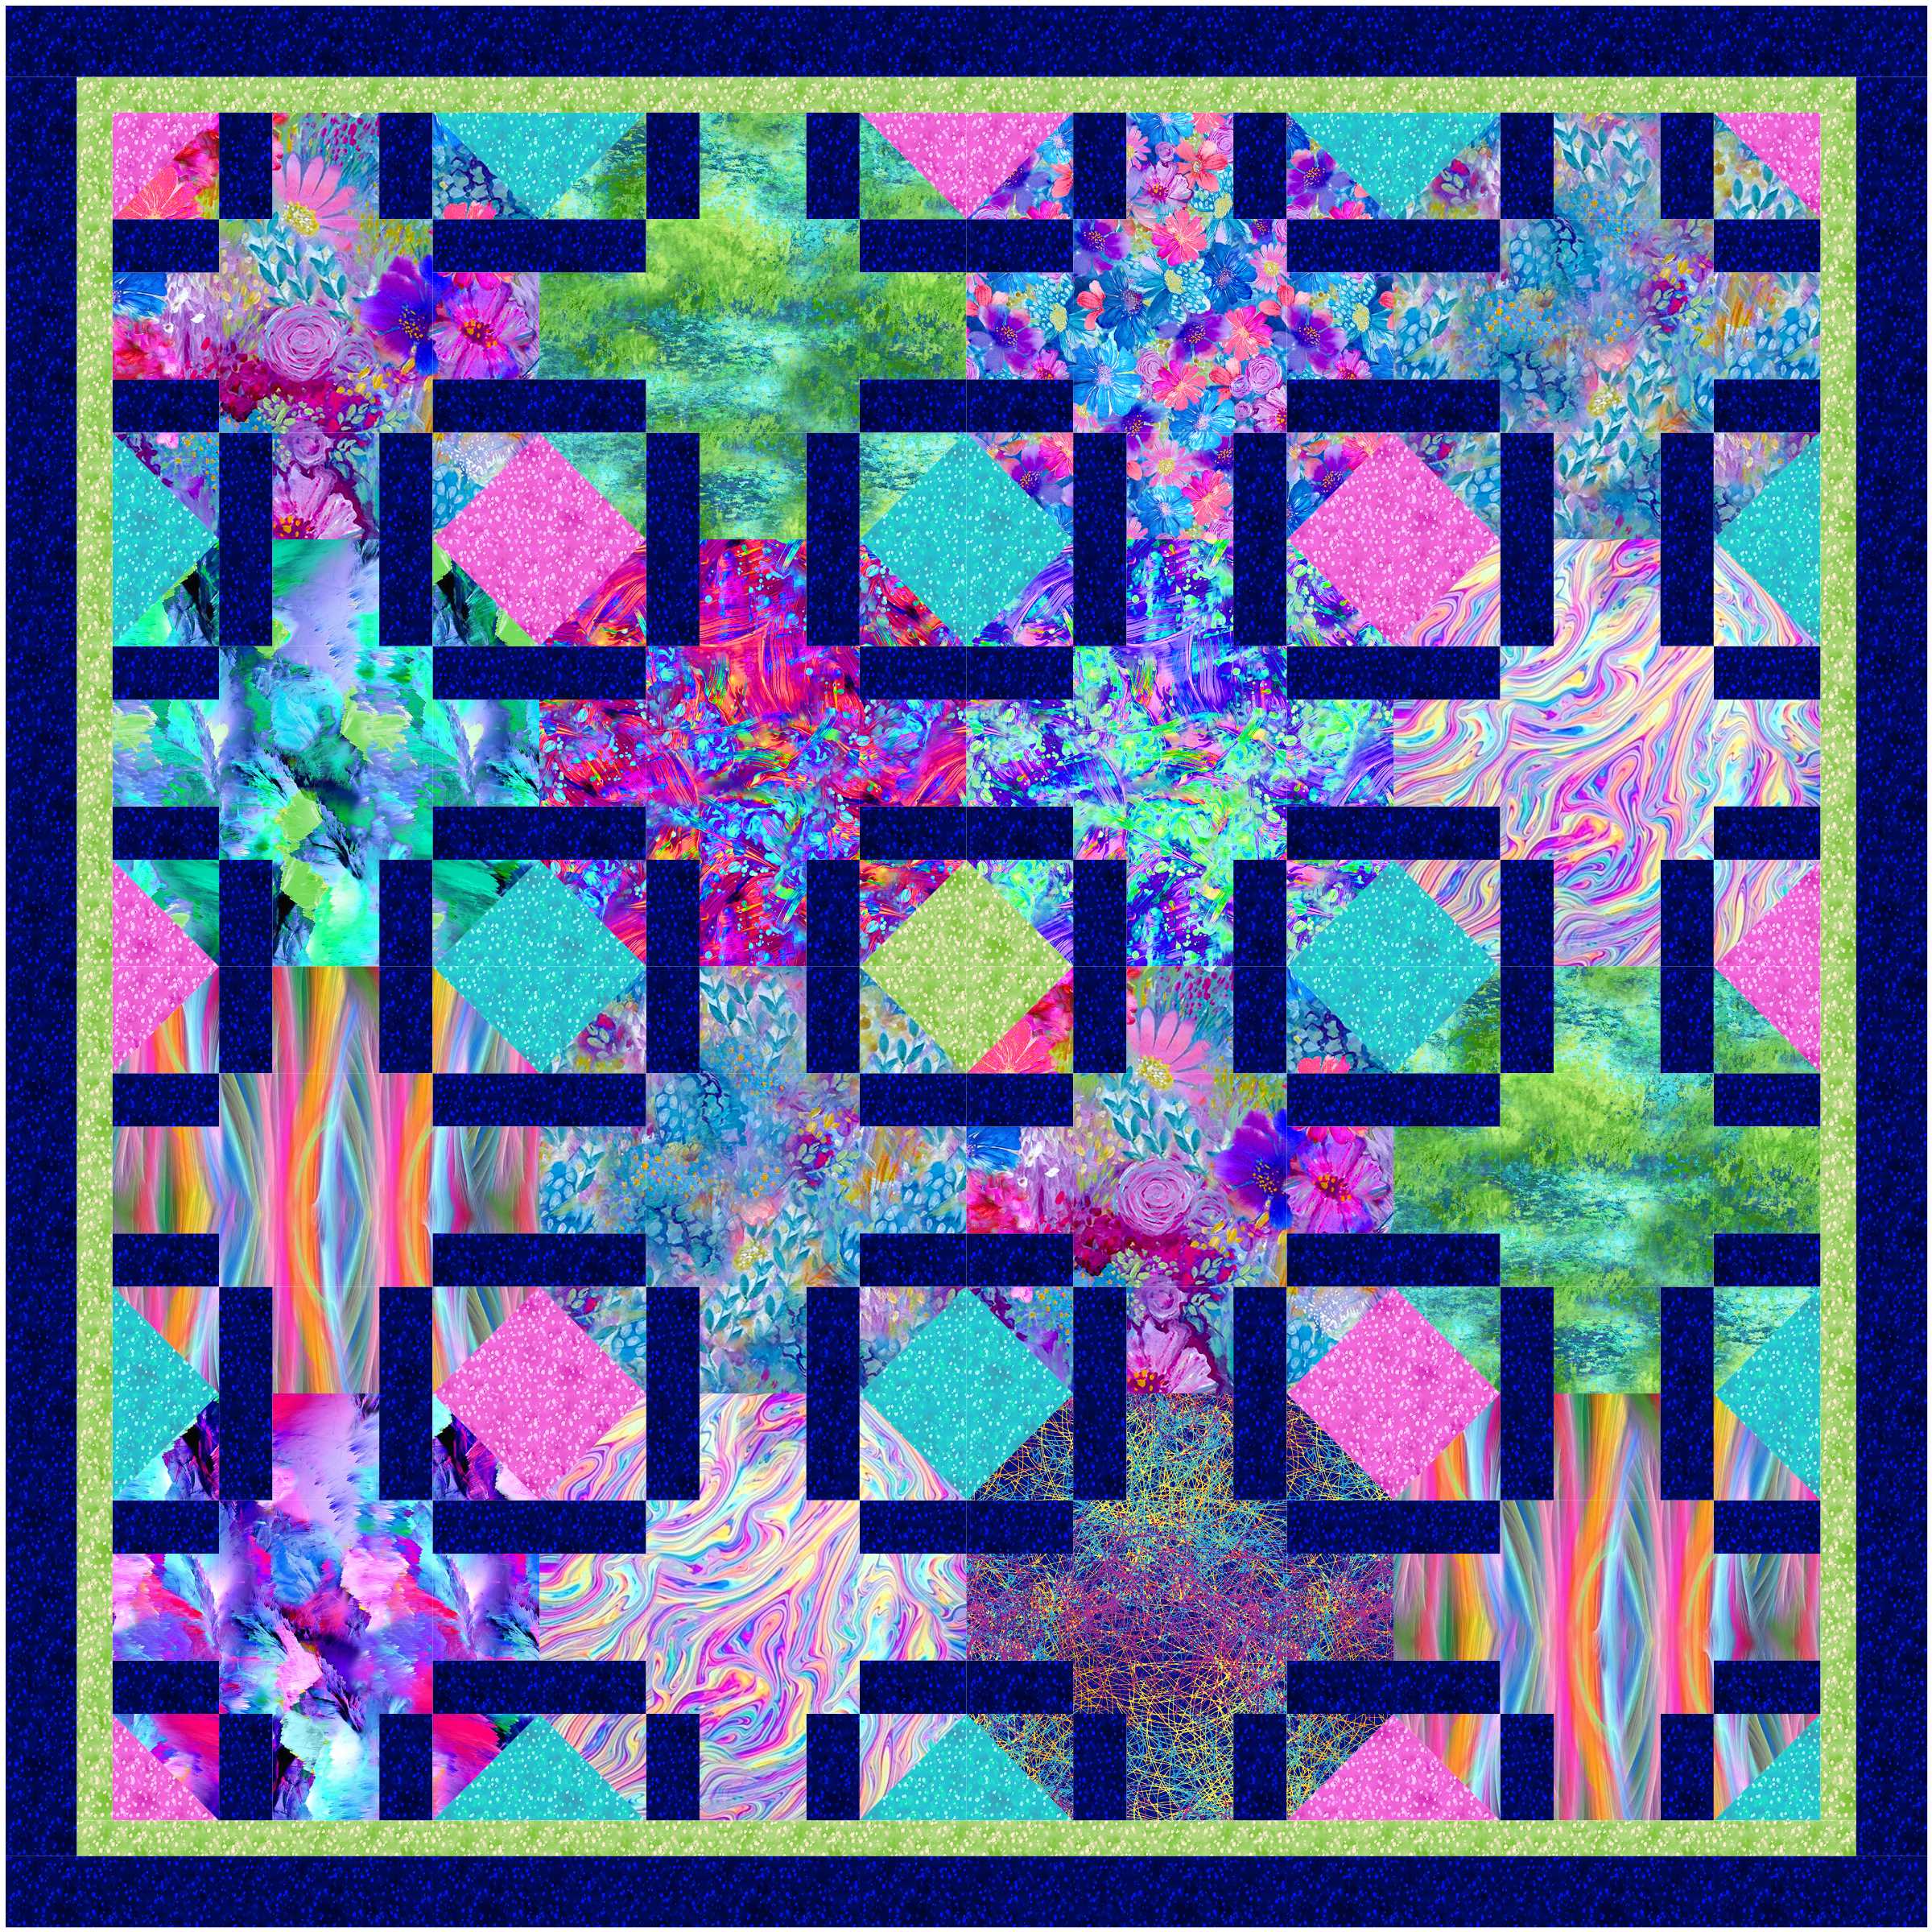
Snow Cones Quilt

We released a new pattern on our website today featuring Painted Paradise fabric from Timeless Treasures. It is called Snow Cones.

Snow Cones Quilt
Snow Cones Quilt

Doesn’t it look like those fruity, slushy, ice cold treats you used to get as a kid in the heat of the summer? We had so much fun designing this quilt. It’s a fairly easy pattern that would be suitable for an advanced beginner quilter. Here is what a couple of the individual blocks look like.

SC Block 1
SC Block 1

SC Block 4
SC Block 4


This is the pattern cover.

Snow Cones Cover
Snow Cones Cover


Our Testers had fun making this pattern. Sharon Buman really got into the spirit of a snow cone quilt when she chose these bright colors. She cut out all of he pieces using her Accuquilt cutter and said that sewing it together was a breeze.

Tester Sample
Tester Sample


Jogi made the quilt in her grand daughter’s school colors and is giving it as a graduation gift. She wanted the quilt to be longer, so she added a piano key border to the top and bottom to turn it into a rectangular quilt. I love how she used white rectangles instead of the navy ones from the original pattern.

Tester Sample
Tester Sample


What do you think? Didn’t they do a great job? Please let us know what you think in the comments and please sign up to receive our newsletters in case you are not already signed up. We should be having some giveaways in the near future and you don’t want to miss out.


I hope you like this fun and festive quilt pattern as much as I do.


Posted on Leave a comment

Patterns, Facebook Live, YouTube Channel and First Fabric Collection

Coco Chic Collection

We have been very busy creating many patterns, which we hope you will enjoy. We’ve done Facebook Lives with other talented designers over the summer. We created a YouTube channel. And, we have our first fabric collection.

We have been busy sewing lots of face masks. We even found a Quilt in a Day scallop ruler which helped cut out the mask shapes. Even the bears got into the act. Silly Reed thought you could wear them on top of your head but Beauregard Bear showed him the correct way.

Reed with masks
Reed with masks

Bear with mask
Bear with mask

QIAD ruler
QIAD ruler


Our Quilt Cruise to Alaska did not happen in June due to the pandemic, but it was fun thinking about the possibility and we hope to schedule another quilt cruise in the future when we can all be together.


We have two new fun summer sailing patterns we created for Accuquillt. One is called Ahoy Mate Table Runner.

Ahoy Mate Table Runner


You can get the free pattern here: https://www.accuquilt.com/go-ahoy-mate-table-runner-pattern.html


The other is called Let’s Go Sailing, which is a fun combination of signal codes.

Let's Go Sailing Quilt
Let’s Go Sailing Quilt


Let's Go Sailing
Let’s Go Sailing


Here is where you will find that free pattern: https://www.accuquilt.com/go-let-s-go-sailing-quilt-pattern.html


We have had a bunch of quilts in magazines. The first one was Firework Flowers in May/June 2020 Love of Quilting magazine.

Firework Flowers Quilt

Firework Flowers
Firework Flowers

Firework Flowers Quilt


This quilt brought some joy to my 4th of July this year.


Next was 50’s Diner in the May/June 2020 McCall’s Quilting magazine.

50's Diner Quilt
50’s Diner Quilt

may/june mccalls 2020


Can’t you just imagine drinking an ice cream soda at the soda fountain with your date?


Have you ever tried curved piecing like you would find in the Drunkard’s Path block? The Waverly Path quilt was in the July/August 2020 issue of Quiltmaker magazine.

Waverly Path
Waverly Path

Waverly Path
Waverly Path

QM July/August 2020
QM July/August 2020


Finally, named after a grand niece, Thoroughly Modern Vivs was in the premier issue of Fons and Porter Quick and Easy Quilts. It was such an honor to be in this magazine with so many esteemed designers.

Modern Vivs Quilt
Modern Vivs Quilt

Quick-Easy
Quick-Easy


We created several patterns for Timeless Treasures new collections. They are There’s a Bear in My Watermelon Patch 2, using their One in a Mellon collection; Patriotic Polka, using their Treats Freedom collection; Adore Him, using the Come Let Us Adore Him collection; Peaceful Valley, using the Winter Blessing collection and Cowboy Claus, which uses the Ho Ho Hoedown collection. These fabric lines are at quilt shops now and you can purchase these quilt patterns on our website.

There's a Bear in my Watermelon Patch 2
There’s a Bear in my Watermelon Patch 2

Patriotic Polka
Patriotic Polka

Adore Him
Adore Him

Peace in the Valley
Peace in the Valley

Cowboy Claus
Cowboy Claus


On Facebook, we did four facebook lives covering a virtual trunk show, accurate cutting, fussy cutting tips and our top 20 favorite quilting notions. We also have a video debuting our first ever fabric collection. If you missed any of these, you can catch them all on our YouTube Channel.

BBQ You Tube
BBQ You Tube


You can see the videos on YouTube on our YouTube channel here: https://www.youtube.com/channel/UCSRJrsvJV2uIdS1aquYw8JA

Speaking of a new fabric collection, our first fabric collection is with QT Fabrics and it is called Coco Chic.

Coco Chic
Coco Chic

Coco Chic Collection

It will be available in quilt shops in January 2021. This fabric collection was inspired by authentic 1920’s fabric from deep in the QT Fabrics archives. Wouldn’t it be fun to have a Great Gatsby or Roaring 20’s party using these fabrics from the time period. We see this fabric being used in quilts, bags, lady’s dresses and men’s shirts. We hope you are as excited about this collection as we are.


Be sure to ask you local quilt shop if they will be carrying Coco Chic. We have designed several quilts using the collection and will have demos on Youtube using the fabrics. Stay tuned for much more regarding this exciting fabric collection.

On August 4th, we will be participating in Quilt Block Mania, A blog hop with other designers, where they all will be giving away a free block pattern with the theme of Back to School. Watch for this coming soon! Keep on quilting. Oh, and Beauregard says Hi.


Posted on Leave a comment

7 Things to do While in Social Isolation.

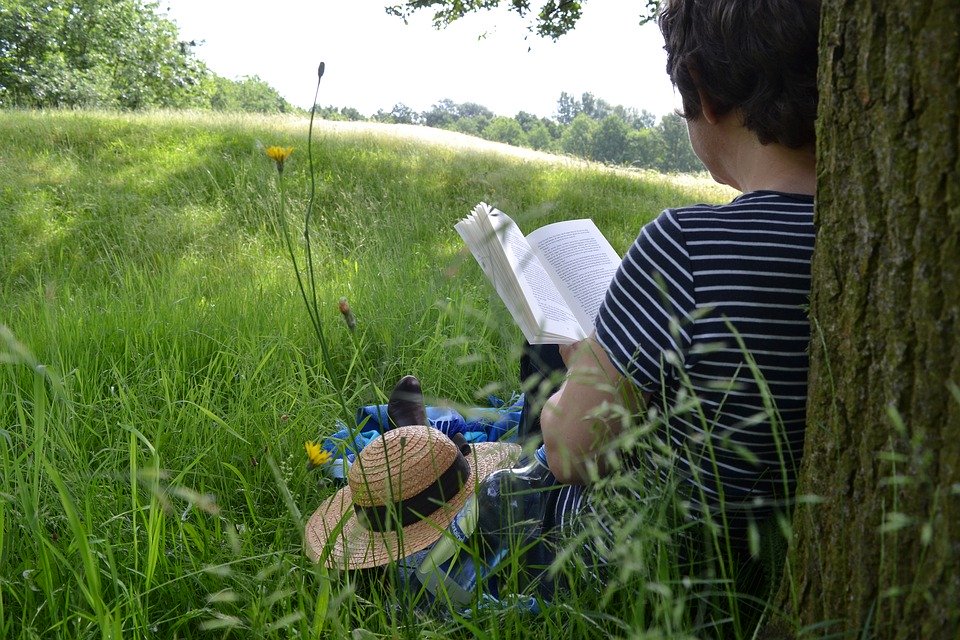
Girl reading book

These are difficult times. We are all concerned about staying healthy, employed and not going crazy. Social isolation is necessary in order for governments around the world to get control of the Coronavirus. There are things you can do to make this time go by a little smoother and more quickly.

Girl reading book
Girl reading book

I thought I would offer 7 tips of what I am doing to get through this. In offering these suggestions, I do not want to diminished the suffering of those who are sick, have lost loved ones, have lost their jobs or businesses. I am also mindful and thankful for the hardships of those on the front lines, like doctors, nurses, firefighters, police, transportation workers, utility workers, food service workers, warehouse and delivery workers and those working in government or other essential services.  This post is just to offer some ideas of what to do with your free time while in isolation.


1. Communicate with your friends and loved ones. We are social beings and still need that human connection with one another. There are many apps on your phone, or computer, that will allow you to video chat with friends and loved ones, such as Skype, Zoom, Facetime and Google Hangouts. The video chat is better than a phone call as it allows you to see facial expressions, show what you are doing or give virtual hugs. Many of these services will allow you to connect with several people at the same time and they all have a free component.

2. Volunteer your services. By volunteering, it will occupy your time and mind and has the effect of making you feel better as you are doing some good in the world. There have been many examples of people that are healthy and able offering to go out and get groceries and other needed supplied for those who are less able or more vulnerable. You could call the elderly that are sheltering in the senior homes with no visitors. One volunteer project for sewists would be to make face masks for healthcare workers as those items are in short supply and are desparately needed. You would need to check with your local health facilities to see if these masks are something they would be able to use and if they have any specifications. Here is a You Tube video tutorial on how to make masks:

3. Listen to music. Music has the ability to sooth the soul. Try listening to different music to see how it affects you. Watch this video of an Italian opera singer singing to his neighbors from his back balcony. It will be a few moments of pure bliss.

4. Exercise to bring your brain positive endorphins. Talk a walk outdoors and maintain your social distance of 6 feet and avoid large crowds of people. There are also exercise videos on You Tube which you can do at home. This is a video for doing exercises in your chair:

https://youtu.be/P-g7TAjjAE8

and this video might be a little more challenging, if you are so inclined and able:

5. Read a good book. There is nothing like a good book to take your mind new places and to forget your cares. There is a company called BookBub, https://www.bookbub.com/welcome, that you can sign up to receive daily emails of digital books that are free, or anywhere from $.99 to $2.99. Also, if you have a current library card, you can download an app called Overdrive or Libby, that allows you to borrow digital books from your library for up to 2 weeks at a time for free.

6. Nourish your spiritual side to find internal peace. For me that comes from attending a church service virtually online, or watching archived sermons, or reading a devotional or the Bible. For you, your nourishment may come from a different source. “Here is an example of a devotional that I recently read from the book 365 Devotions to Embrace what Matters Most by John Michalak.  Peace Through Surrender. Here’s a simple definition of war: War is a conflict where the strength and weaknesses of each side are exposed so that one side eventually conquers, and the other side surrenders, resulting in peace. The wars you face will expose your weaknesses. They will give you the opportunity to accept the things you cannot change, and if you choose to see it, they will expose God’s strength and the need to surrender to His strength. Surrendering is scary. But know that God is more than just some distant higher power. He is someone who loves you deeply. He is someone who will stand faithful when you’re ready to give up. He will hold your troubles in safekeeping and offer you a peace that passes understanding. Will you surrender your troubles to Him?” “Do not be anxious about anything, but in every situation, by prayer and petition, with thanksgiving, present your requests to God. And the peace of God, which transcends all understanding, will guard your hearts and your minds in Christ Jesus.”- Philippians 4:6-7.

7. Learn a new hobby or a new technique in your current hobby. If you are a quilter, you could learn how to make a mini quilt with Sue Bouchard from Quilt in a Day. Here is a video on how to make a mini red, white and blue star quilt:


You could take up knitting by watching this video:

Or, you might even take up the Ukulele by watching this video:

I hope I have given you some ideas that you can use while you are hunkering down. Please take this virus seriously and stay safe and healthy for yourself and your loved ones. We will get through this by being smart, caring and compassionate. Hang in there and keep on quilting.

Posted on Leave a comment

Patterns Designed For Accuquilt

Storm at Sea Life Medley Quilt

Over the years, we have created a number of patterns for Accuquilt. I thought it would be fun to share them all in a post. They are all available on their website as a free download. The patterns on their website may be found here: https://www.accuquilt.com/patterns.html

The first pattern that we created for Accuquilt was Hexagon Illusions and it was made by cutting larger hexagons from an ombre fabric and then cutting smaller hexagons from the same section of the fabric and rotating them 180 degrees and appliquéing them onto the larger hexagons.

Hexagon Illusions
Hexagon Illusions


Elephant Cuddles was the next pattern and it was made from Minky.

Elephant Cuddles
Elephant Cuddles


Holiday Northwoods Medley Placemats are created with a reverse appliqué technique.

Holiday Northwoods Medley Placemats


Lilac Table Topper uses the die that cuts perfect 1″ finished squares.

Lilac Table Topper
Lilac Table Topper


Fall Frolic Table Runner was made with beautiful Jinny Beyers Denim fabric from RJR Fabrics.

Fall Frolic Table Runner


Cleapatra’s Garden Gate featured the Cleapatra’s Fan die.
Cleopatra's Garden Gate
Cleopatra’s Garden Gate


Have you ever heard of crumb quilting? That was the technique used in Spring Medley Mug Rugs. You sew small scraps of fabric together and then apply fusible webbing before cutting out the appliqué shapes on the die. Accuquilt also supplies the embroidery files as a free download on their website.

Spring Medley Mug Rugs


Fun at Sea Life Medley is a great quilt pattern for showcasing your appliqué shapes.

Fun at Sea Life Medley Quilt


With that same die, we also created Storm at Sea Life Medley.

Storm at Sea Life Medley Quilt


Antique Americana was made using the very versatile Hattie’s Choice die. This patriotic quilt is perfect for the 4th of July, Veteran’s Day or a Quilt of Valor.

Antique Americana
Antique Americana


A perfect quilt for a hot summer day would be Orange Cream Soda. It features the Studio Setting Triangles dies.

Orange Cream Soda
Orange Cream Soda


A modern take on the Glorified Nine Patch block resulted in Sherbet Dreams.

Sherbet Dreams
Sherbet Dreams


Fall is Coming is a great quilt for fall which uses Kimberly Einmo’s Solidish Fabrics from Timeless Treasures Fabrics.

Fall is Coming
Fall is Coming


Love Letters also used Kimberly Einmo’s Solidish Fabrics from Timeless Treasures Fabrics. This would be a great Valentines quilt.

Love Letters
Love Letters


In the mood to create something scary? Then you might want to make the Boo! Halloween Medley Table Runner.

Boo Halloween Table Runner
Boo! Halloween Table Runner


Ahoy Mate and Let’s Go Sailing were created using the GO! Nautical Medley die and is the perfect pattern and die for all of you water lovers.

Ahoy Mate Table Runner


Let's Go Sailing
Let’s Go Sailing


The Retro Twist Wall Hanging was made with the Starry Path die. This is the perfect wall hanging for your mid century modern home.

Retro Twist Wall Hanging


The Go! Yuletide Gnome Wall Hanging is a great decoration to make for the holidays. Who doesn’t love a little gnome?


Gnome

Yuletide Gnome Wall Hanging


Your kids will love the Deco Dino Table Runner.

Deco Dino Table Runner


Stay tuned for more fun and inspiring designs we create for Accuquilt.