Posted on Leave a comment

Patterns Designed For Accuquilt

Storm at Sea Life Medley Quilt

Over the years, we have created a number of patterns for Accuquilt. I thought it would be fun to share them all in a post. They are all available on their website as a free download. The patterns on their website may be found here: https://www.accuquilt.com/patterns.html

The first pattern that we created for Accuquilt was Hexagon Illusions and it was made by cutting larger hexagons from an ombre fabric and then cutting smaller hexagons from the same section of the fabric and rotating them 180 degrees and appliquéing them onto the larger hexagons.

Hexagon Illusions
Hexagon Illusions


Elephant Cuddles was the next pattern and it was made from Minky.

Elephant Cuddles
Elephant Cuddles


Holiday Northwoods Medley Placemats are created with a reverse appliqué technique.

Holiday Northwoods Medley Placemats


Lilac Table Topper uses the die that cuts perfect 1″ finished squares.

Lilac Table Topper
Lilac Table Topper


Fall Frolic Table Runner was made with beautiful Jinny Beyers Denim fabric from RJR Fabrics.

Fall Frolic Table Runner


Cleapatra’s Garden Gate featured the Cleapatra’s Fan die.

Cleopatra's Garden Gate
Cleopatra’s Garden Gate


Have you ever heard of crumb quilting? That was the technique used in Spring Medley Mug Rugs. You sew small scraps of fabric together and then apply fusible webbing before cutting out the appliqué shapes on the die. Accuquilt also supplies the embroidery files as a free download on their website.

Spring Medley Mug Rugs


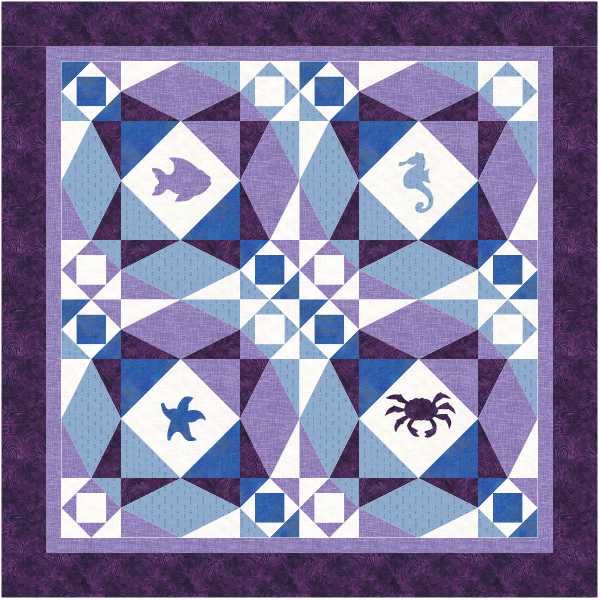
Fun at Sea Life Medley is a great quilt pattern for showcasing your appliqué shapes.

Fun at Sea Life Medley Quilt


With that same die, we also created Storm at Sea Life Medley.

Storm at Sea Life Medley Quilt


Antique Americana was made using the very versatile Hattie’s Choice die. This patriotic quilt is perfect for the 4th of July, Veteran’s Day or a Quilt of Valor.

Antique Americana
Antique Americana


A perfect quilt for a hot summer day would be Orange Cream Soda. It features the Studio Setting Triangles dies.

Orange Cream Soda
Orange Cream Soda


A modern take on the Glorified Nine Patch block resulted in Sherbet Dreams.

Sherbet Dreams
Sherbet Dreams


Fall is Coming is a great quilt for fall which uses Kimberly Einmo’s Solidish Fabrics from Timeless Treasures Fabrics.

Fall is Coming
Fall is Coming


Love Letters also used Kimberly Einmo’s Solidish Fabrics from Timeless Treasures Fabrics. This would be a great Valentines quilt.

Love Letters
Love Letters


In the mood to create something scary? Then you might want to make the Boo! Halloween Medley Table Runner.

Boo Halloween Table Runner
Boo! Halloween Table Runner


Ahoy Mate and Let’s Go Sailing were created using the GO! Nautical Medley die and is the perfect pattern and die for all of you water lovers.

Ahoy Mate Table Runner


Let's Go Sailing
Let’s Go Sailing


The Retro Twist Wall Hanging was made with the Starry Path die. This is the perfect wall hanging for your mid century modern home.

Retro Twist Wall Hanging


The Go! Yuletide Gnome Wall Hanging is a great decoration to make for the holidays. Who doesn’t love a little gnome?


Gnome
Yuletide Gnome Wall Hanging


Your kids will love the Deco Dino Table Runner.

Deco Dino Table Runner


Stay tuned for more fun and inspiring designs we create for Accuquilt.


Posted on 1 Comment

Tutorial For Sewing the Accuquilt Hattie’s Choice Block

Hattie's Choice block

We have a pattern on our website called Fit For a King and we also designed the pattern called Antique Americana on the Accuquilt website, so I thought it might be fun to do a tutorial for sewing this block. Here are photos of those two quilts.

Fit For a King Quilt Pattern
Antique Americana
Antique Americana


Here is what the Accuquilt Die looks like.

Hattie's Choice
Hattie’s Choice


The die has three shapes on it labeled A, B & C. Now at first glance, you may think that shape “A” is an equilateral triangle, and the die packaging would lead you to believe that it is an equilateral triangle, but it is not. When piecing this shape, there is a correct orientation for laying it out and piecing it.

Look at one of the shape A’s laid over another one, as in the photo below,  and you can see that they are not the same on all sides.

Shape A laid over another


There is a distinct orientation for correctly piecing shape “A.” You need to identify the top of Shape” A and stack them all with the top on top.

Shape A next to shape B


The next photo shows the correct orientation of shape A on the right side of the shape B Diamond. You flip shape A over to the left on top of shape B per the photo below. Notice the orientation of shape A on top of shape B for sewing.

shape A flipped onto shape B


It helps if you sew with leaders and enders. These are scraps of fabric you start sewing on before sewing on your quilt pieces and stop on after you have sewn your chain of quilt pieces. This prevents the corners of your pieces from getting jammed down in the feed dogs.  This next picture shows the 1/4″ seam sewn. Notice how the seam starts on the top point and ends by going through the bottom point.

Leader
Leader
Seam on 1st shape A and B


Next press the seam toward the triangle.

press toward shape A triangle


Place another shape A onto the B diamond. Notice the orientation of the top on shape A.

Adding 2nd shape A
Adding 2nd shape A


Look at the 1/4″ seam below. Notice how the it starts at the top point and ends by going through the bottom point.

Seam on 2d shape A
Seam on 2d shape A


Press toward second shape A. Second photo is view from the back. Make 4 of these combined units.

Press toward 2d shape A
View from the back
View from the back


Layout these combine units with shape Cs to the left of them.

Adding shape C
Adding shape C


Flip the combined units onto shape C as depicted below. Note how they are sewn from point to point.

Combined units laid out on Shape C
1/4" seam
1/4″ seam


Press toward shape C. View from the back. Make 4 of these units.

pressed toward shape C
back view
back view


Lay out the 4 units per the photo below.

4 units laid out
4 units laid out


Place one of the units on top of another and sew along the right edge with a 1/4 ” seam. Second photo below is view of seam from back.

units laid out on top of each other
combined units showing 1/4" seam
combined units showing 1/4″ seam


Press seam toward shape C.

Press toward shape C


Lay out two half units.

Two half units
Two half units


Flip one half unit onto the other and pin where the diamonds intersect. Note the 1/4″ seam line in the second photo.

half units flipped onto each other.
1/4" seam on half units
1/4″ seam on half units


Press the center seam open.

Center seam pressed open


Voila! You have a completed Hattie’s Choice block. In a perfect world, these blocks would measure 8.5″, but you can see that mine are only 8.25.” This will be fine as long as all of your blocks are consistently the same measurement.

Hattie's Choice block
Hattie’s Choice block
size of unfinished block