Posted on 4 Comments

Island Batik Ambassador- June 2023 Project- Twisted Tango Table Runner- Part of the Fly Away Challenge

Twisted Tango Runner

The Island Batik Ambassadors are going up, up and away. This month’s challenge is called Fly Away and the Island Batik Ambassadors are making whatever project they want using flying geese with Island Batik fabric.  Flying geese are a very popular quilt block unit and I am sure you will see many creative ways to use this unit in your quilts. Links to the other Ambassador’s blogs may be found at the bottom of this post.

Fly Away Challenge
Fly Away Challenge


Since I could use any Island Batik fabric I wanted, I selected their Baroque collection of 10″ squares. Island Batik fabrics may be found at your local quilt shop that carries Island Batik, such as Fabric Smart in St. Petersburg FL. You may also find them online at www.fabric-smart.com or call them at 727-914-8850. Another online option for you to shop for this fabric would be Hancocks of Paducah: Hancocks of Paducah

Baroque Batik
Baroque Batik

The Baroque collection, from Island Batik, I was given, has many beautiful jewel tones and the collection was paired with a light and dark blue batik. These colors are just so bright and vibrant.


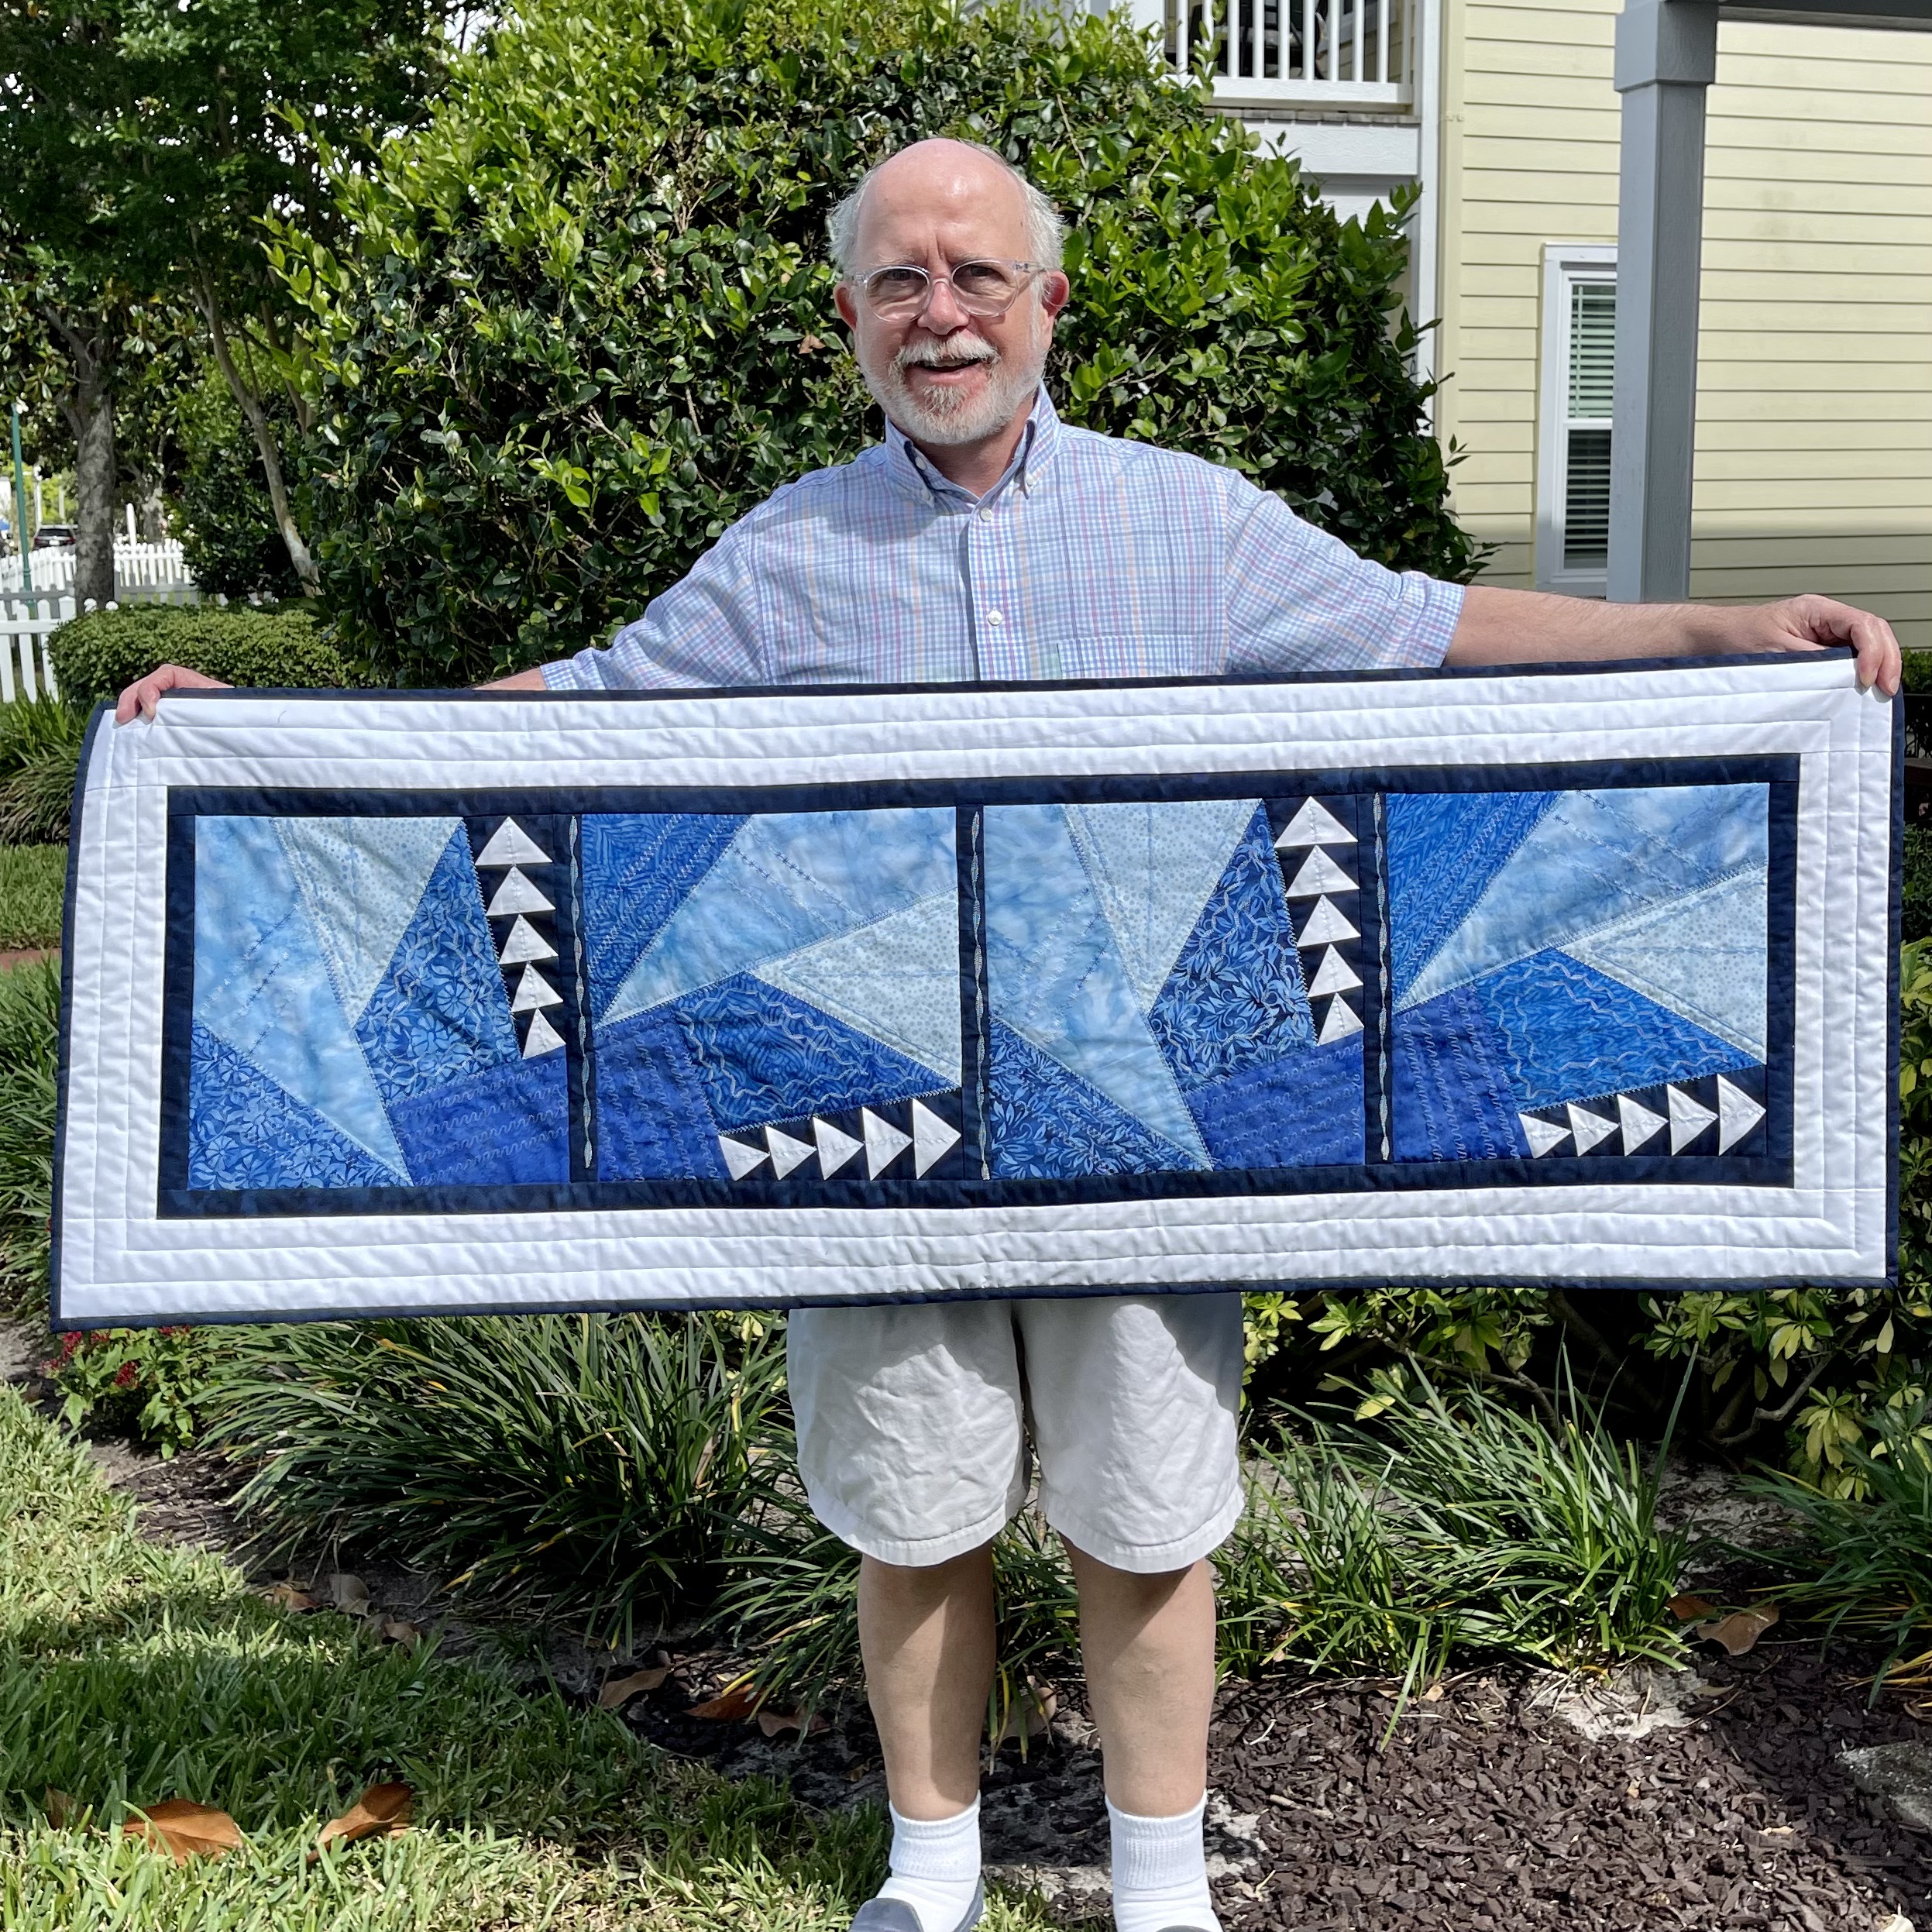
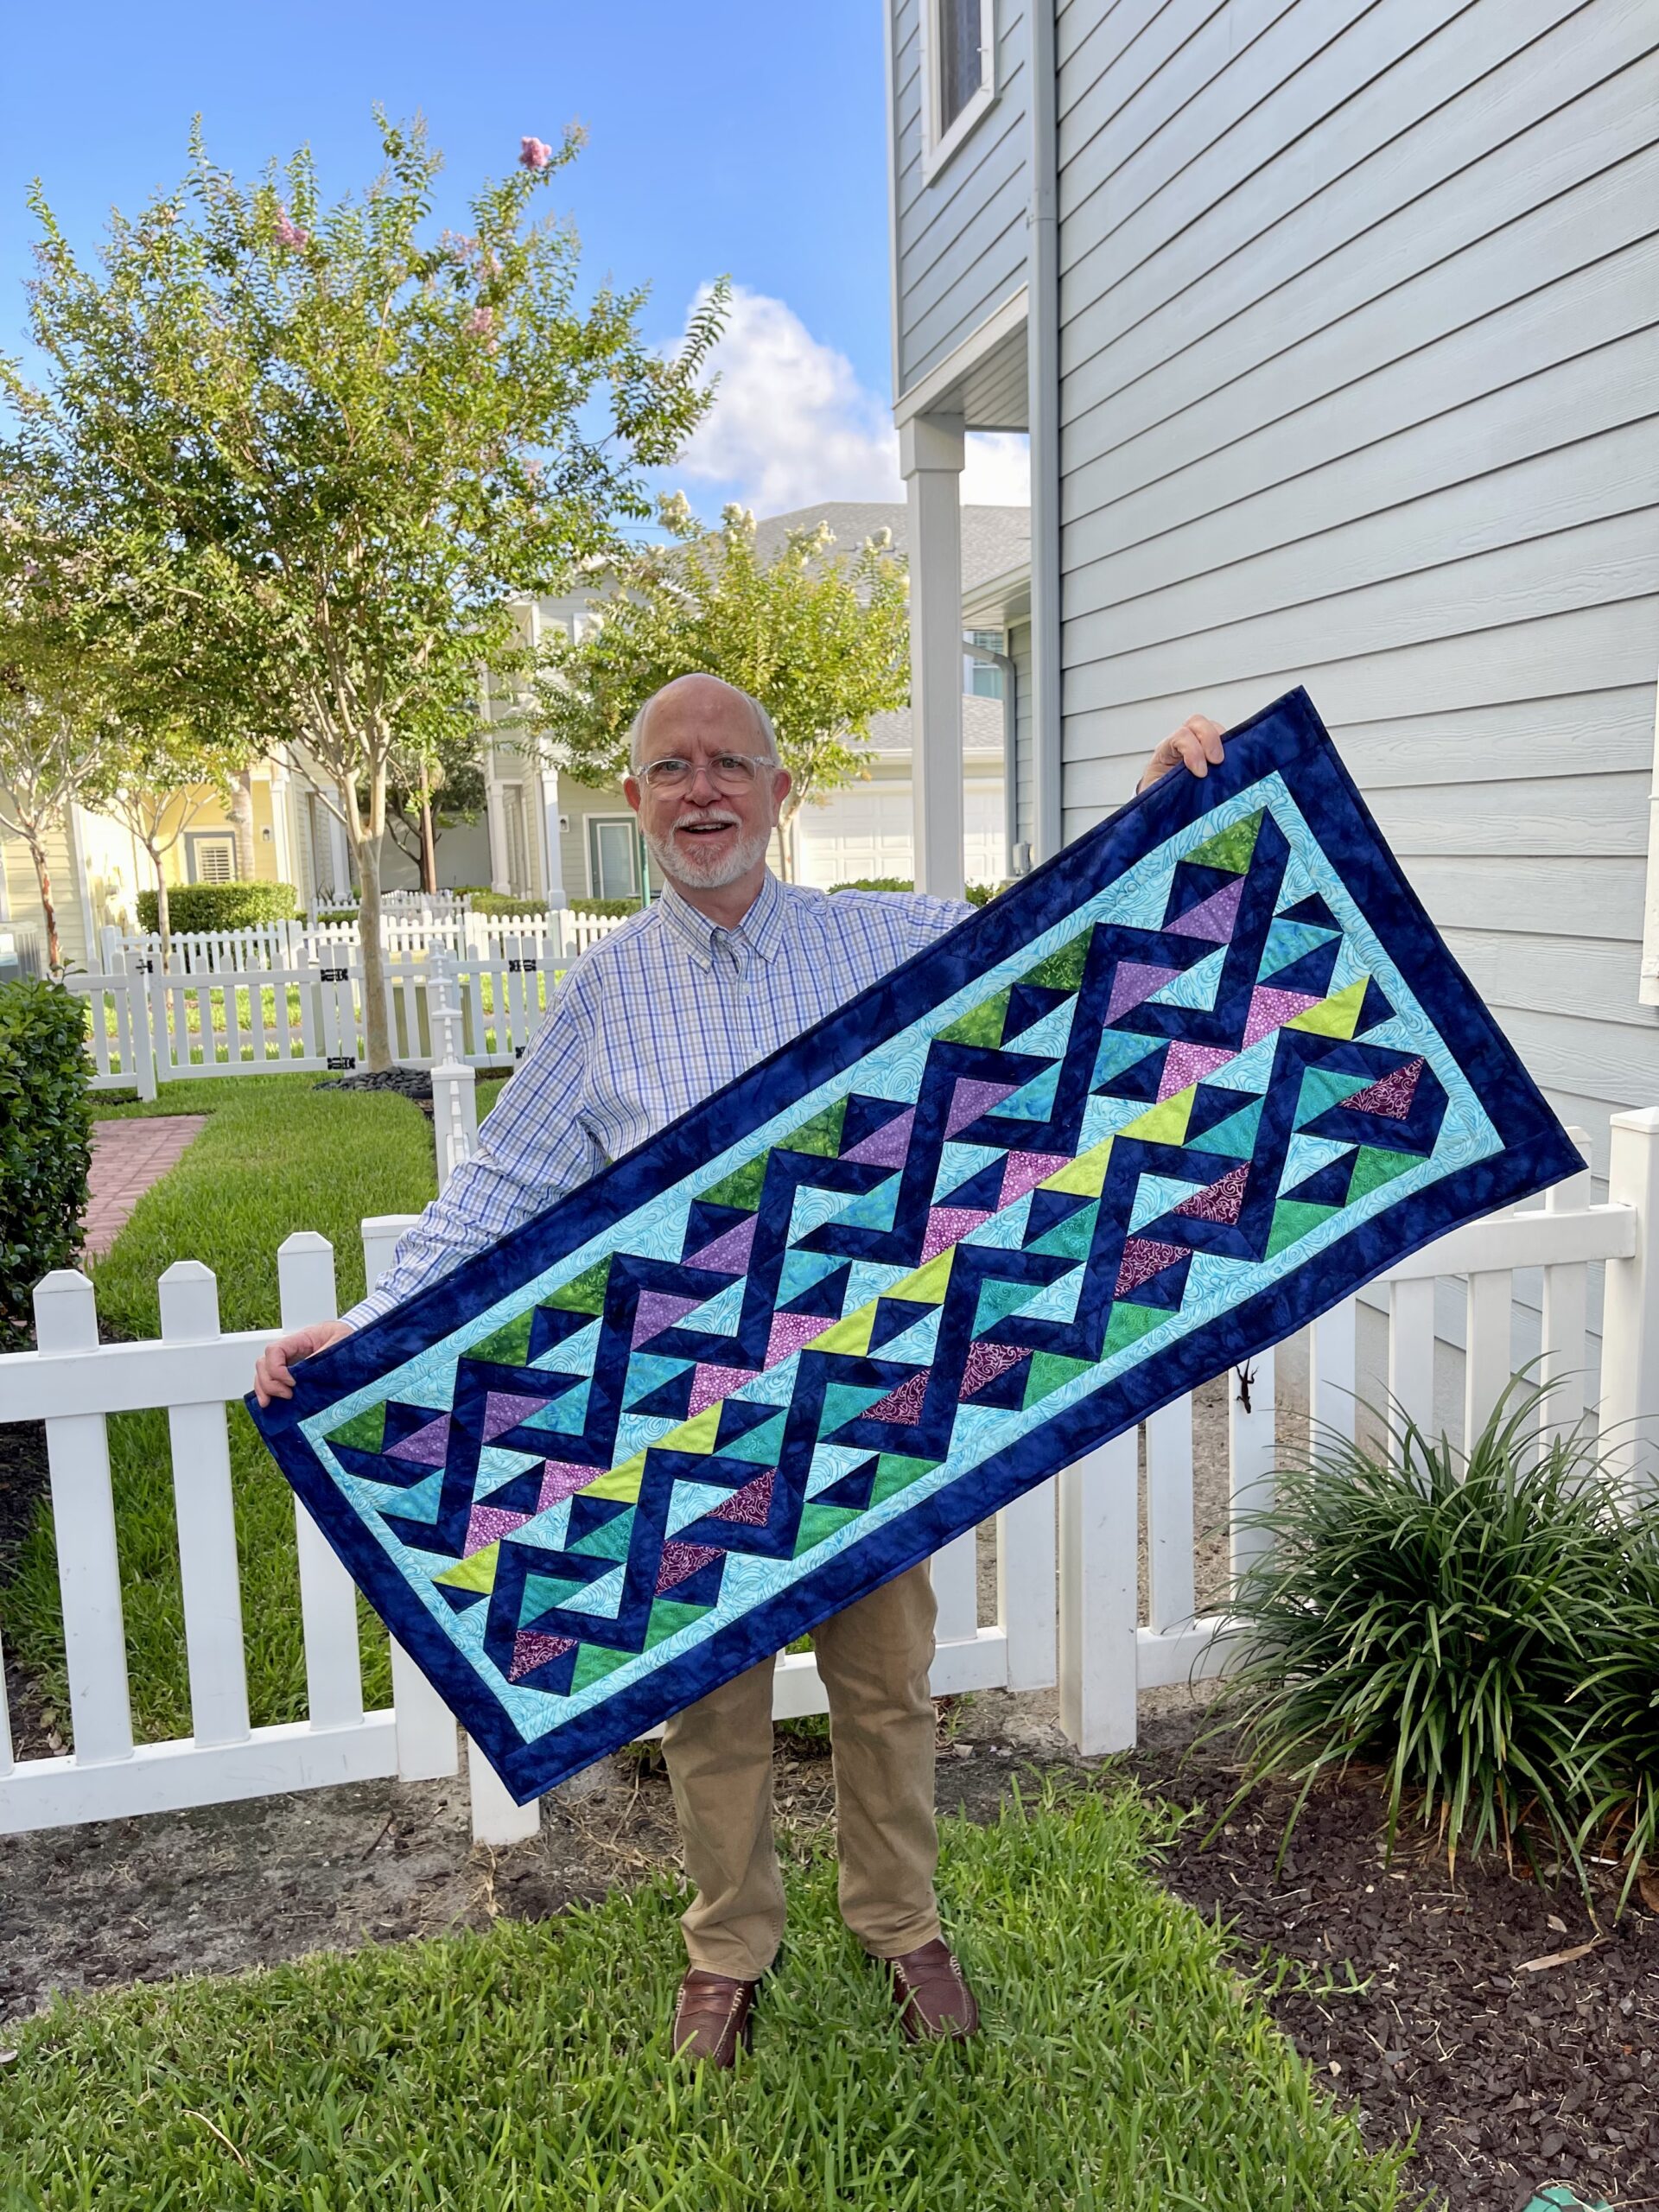
The quilt I made, Twisted Tango Table Runner, is a large table runner- 22″ x 54.” The dark blue sky pieces created twisted shapes, or dancers, that appear to be doing the tango. They are framed with the colorful jewel tones and the light blue.  The light blue inner border and dark blue outer border bring it all together in perfect harmony.

the finished runner
the finished runner

I used my Electric Quilt 8 software to design this quilt.

EQ design
EQ design

The photos, below,  are alternative versions I thought of doing. In the first one, the jewel tones would have created a solid ribbon across the runner, but I did not have enough fabric to choose that option. In the second alternative, the dark blue fabric would have become the geese and the jewel tones would have been the sky, creating more of a 3d pyramid look. I like Alternative 2, but I felt that the one I chose was a bit more modern.

EQ design alternative 1
EQ design alternative 2

The easy part about making this runner is that the tool I used to make the flying geese units allows you to make 4 perfect units at a time and since this required quite a few units, I was very happy about that. The tool I used to accomplish this is the Quilt in a Day Mini Flying Geese Ruler. A rotating mat is also very helpful for turning the units when you are trimming them. 

QIAD Mini Flying Geese Ruler

To start out, you need a large square, which is the sky and a small square which is the goose, or center triangle.

Large and small squares

Then you pin the two fabrics together and cut them diagonally as shown in the picture below.

Cut 2 squares diagonally

Next, you sew the edges that you just cut with a quarter inch seam. This method is slightly different than the Quilt in a Day method in that it eliminates the step of having to draw a line down the middle first.

Quarter inch seam


The two pieces are pressed to the dark


Press to the dark
Press to the dark

Those squares are then placed right sides together and the seams are not nesting, but are offset. You are lining up the outside lines of the squares and not the seam lines. The light and dark pieces are touching each other when they are placed together. The pieces are then pinned together like before and then cut down the middle diagonally. Finally, you sew with a quarter inch seam along the edges you just cut.

Place squares together
Another quarter inch seam

Press to either side. To get this unit to lay flat, it is necessary to clip to the seam line where there was an overlap between the two seams. 

Press open
Press open


Cut seam in back
Cut seam in back

Finally, you take the Mini Flying Geese Ruler and place the green lines for the goose on the goose seam lines of the unit and cut the unit in half. Then you trim the other three sides of the unit by rotating the mat. The ruler stays in the same spot the whole time with the green goose seam lines on top of the goose seam lines in the unit. When you have trimmed up both of the squares, you end up with four perfectly trimmed up flying geese units.

Trim up the unit
Trim up the unit
4 units at once
4 units at once.

Once all of your geese are trimmed up, they are sewn together in rows and every other row is offset by half of a block. Those are called half drop blocks. When sewing the units together, it helps to nest the seams and then clip to the seam line so the units lay flat. 

Line up the rows
Line up the rows

Because the alternate rows were half drop blocks, it is necessary to trim up the sides of the runner so they are even.

Trim the ends
Trim the ends

Finally, It is necessary to measure your quilt top’s  width and height in three places and make your borders the average of those three numbers so that your quilt, or table runner, top will be nice and square. One of the final things I did was to layer the top with a batik backing and a layer of Hobbs Premium 80/20 Batting and then pin basted the table runner together. I quilted it by outlining the dark blue dancers and the independent dark blue triangles. Finally the dark blue binding was machine sewn on.

Measure for borders
Measure for borders


Pin basting
Pin basting

Here is the finished Twisted Tango Table Runner.

the finished runner
the finished runner

For further details, I have a YouTube video about this quilt. Here is a link to the YouTube video where you can watch and see more details of how I made the table runner:    Making a Making the Twisted Tango Table Runner

YouTube Video
YouTube Video

If you like the video, please be sure to like it, share it with your friends and subscribe so you don’t miss any upcoming videos.


The supplies I used to make this project were provided by:

Island Batik Baroque collection batik fabrics.

Aurifil 50 wt Thread- Passionflower Color Builders Set

Schmetz 70/10 Quilting needle

Hobbs Batting Hobbs Thermore Batting


IB-Aurifil-Schmetz

Hobbs-logo


If you are on TikTok, be sure to check out the video I have posted about the quilt. (Look for Blue Bear Quilts)

Also, please follow me on Instagram (Blue Bear Quilts) as that is where I occasionally have giveaways. 

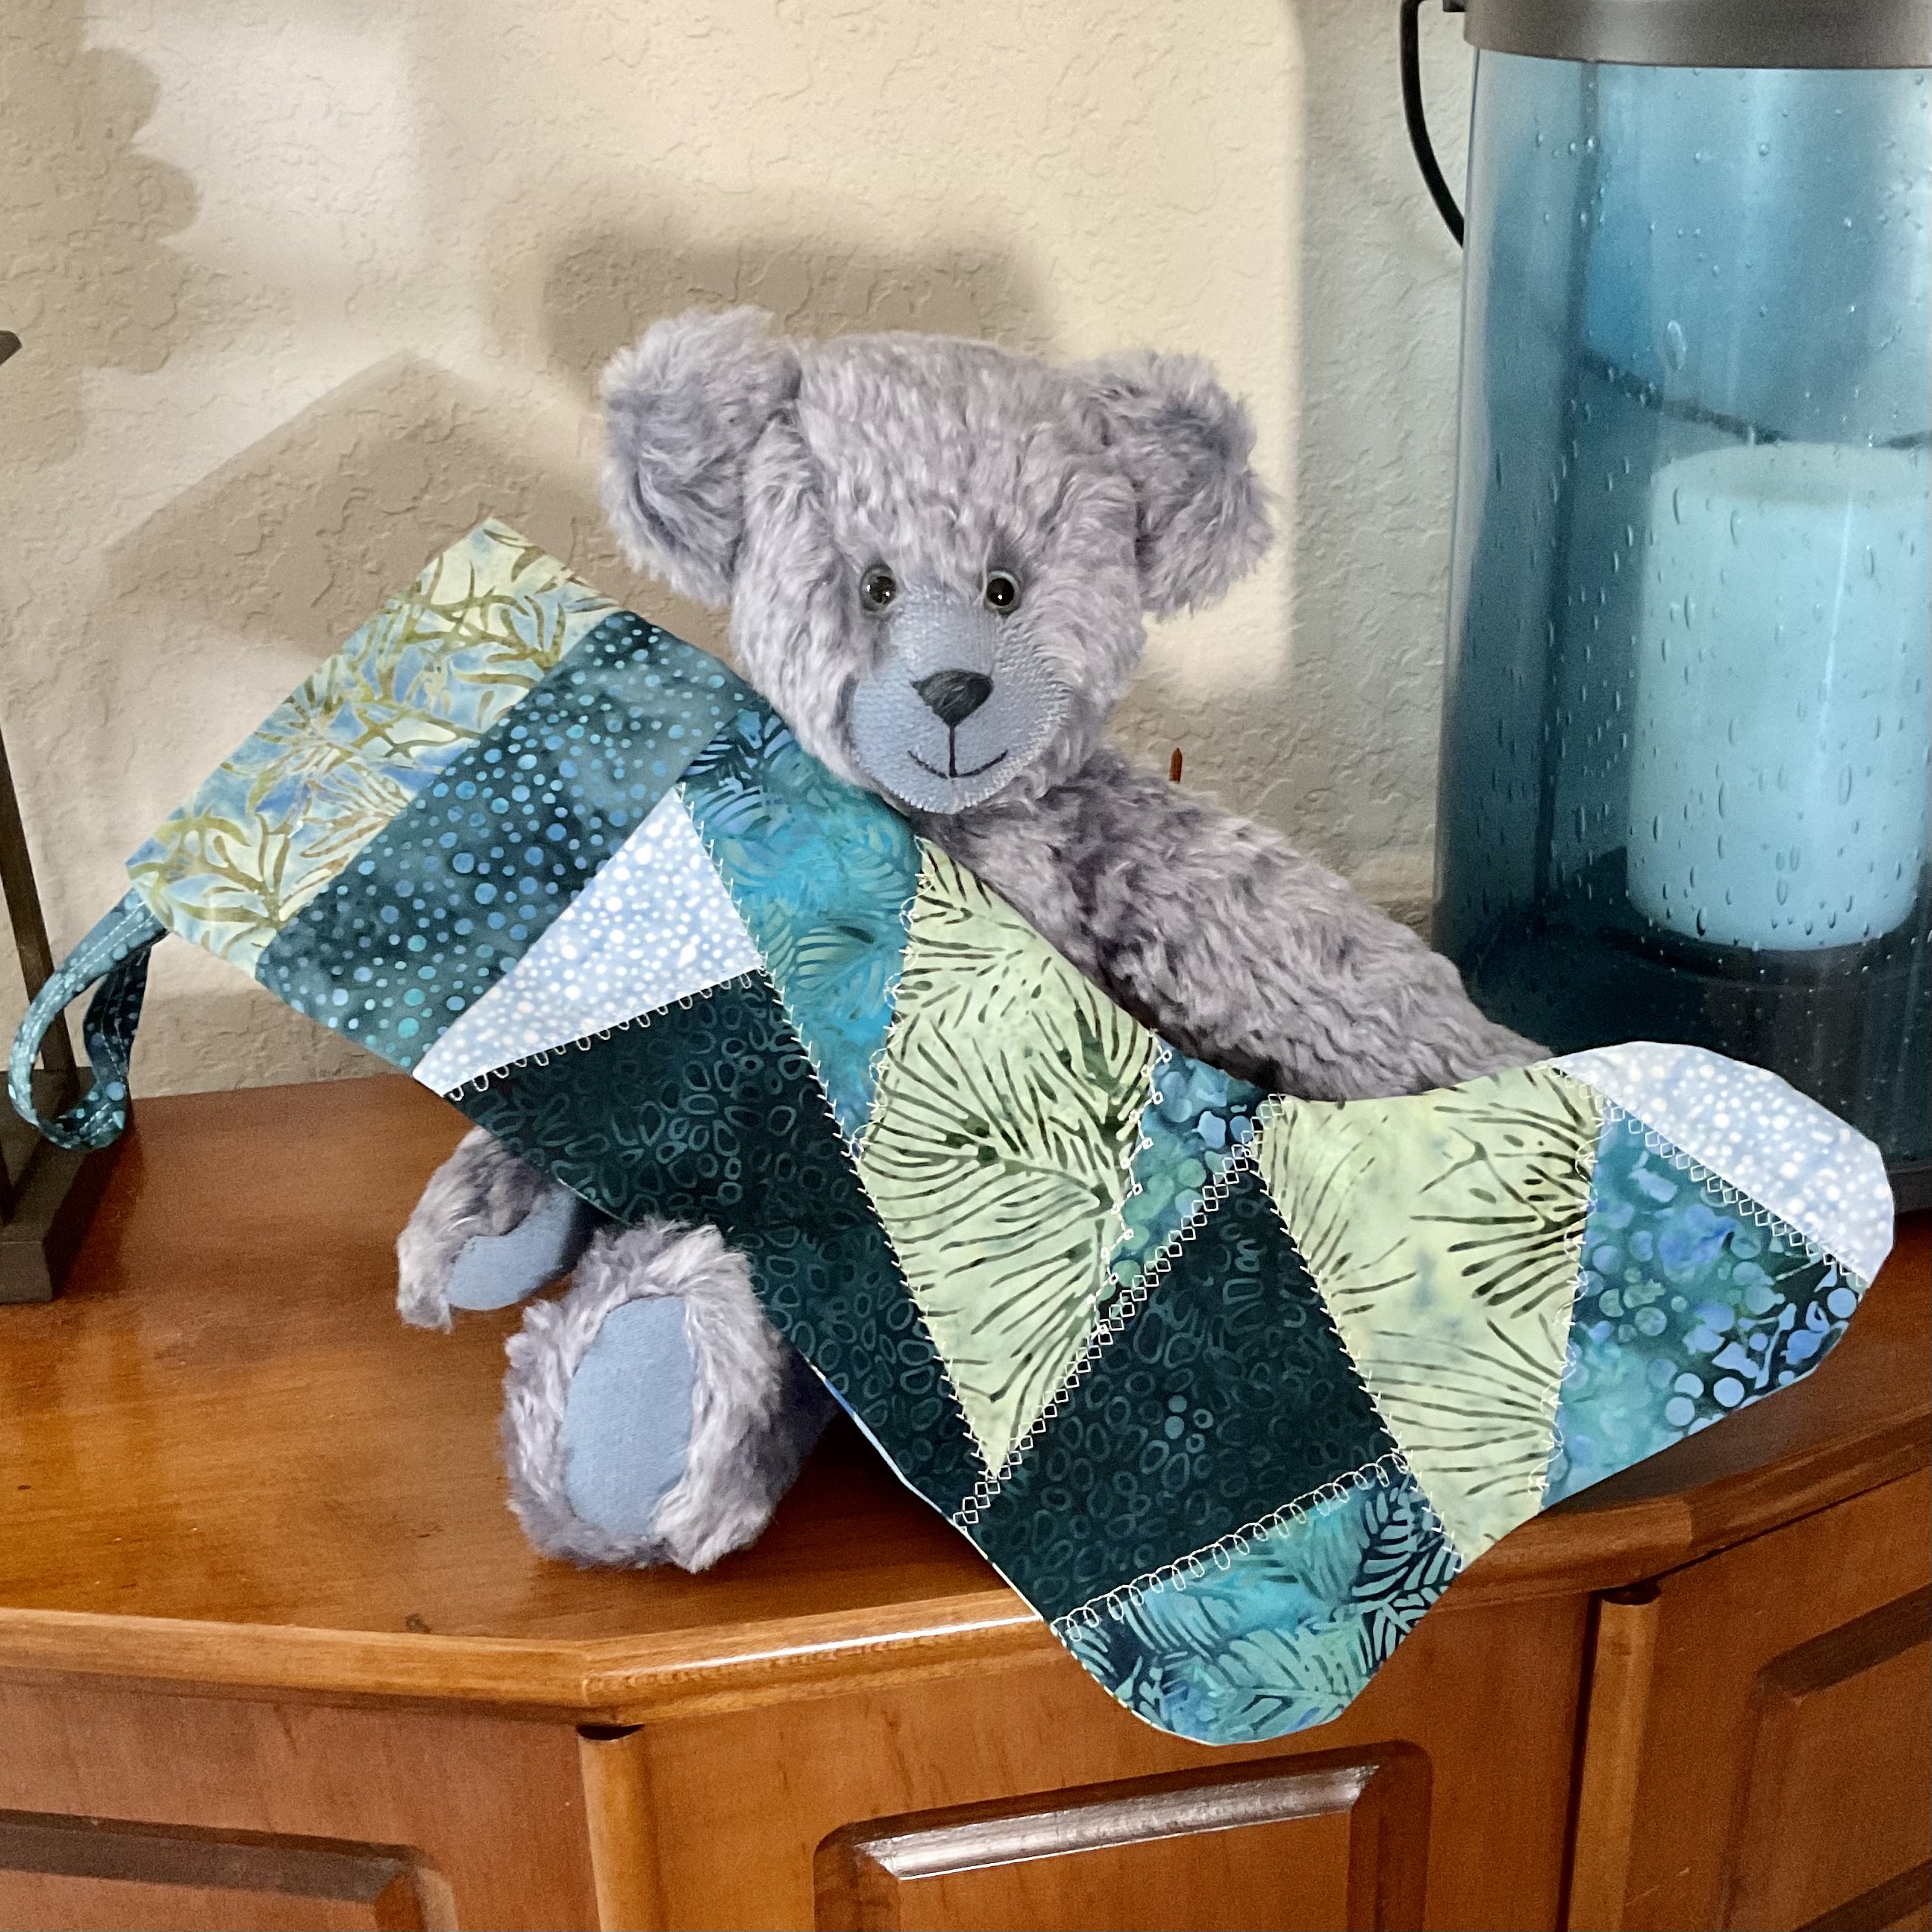
Blue Bear hopes you like this Twisted Tango table runner. Please let him know how much you love it by writing to him in the comments!

The other amazing Island Batik Ambassadors are also posting their June flying geese projects.  Check out their projects by clicking on the links next to their names to be directed to their blog posts.

Emily Leachman, The Darling Dogwood

Sarah Pitcher, Pitcher’s Boutique

Claudia Porter, Create with Claudia

Brenda Alburl, Songbird Designs

Elita Sharpe, Busy Needle Quilting

Reed Johnson, Blue Bear Quilts   Thanks for stopping by!

Suzy Webster, Websterquilt

Preeti Harris, Sew Preeti Quilts

Renee Atkinson, Pink Tulip Quilting

Denise Looney, For the Love of Geese

Gail Sheppard, Quilting Gail

Anorina Morris, Samelia’s Mum

Sandra Starley, Textile Time Travels

Susan Deshensky, Lady Blue Quilts

Randi Jones, Randi’s Roost

Brittany Fisher, Bobbin with Brittany

Lisa Pickering, Lisa’s Quilting Passion

Victoria Johnson, Forever Quilting for You

Mania Hatziioannidi, Mania for Quilts

Lana Russel, Lana Quilts

Pamela Boatright, Pamela Quilts

Jennifer Thomas, Curlicue Creations

Maryellen McAuliffe, Mary Mack Made Mine

Leah Malasky, Quilted Delights

Connie Kauffman, Kauffman Designs

#islandbatikambassador #islandbatik #iloveislandbatik #hobbsbatting #aurifil #aurifilthread #schmetzneedles #doyoueq #Janome #electricquilt #eq8 #HancocksofPaducah #fabricsmart #flyinggeese #flyawaychallenge


Posted on 3 Comments

Island Batik Ambassador- April 2023 Project- Crazy Quilt Table Runner- Part of the Crazy Quilts Challenge

April Crazy Quilt

The Island Batik Ambassadors are going crazy this month. This month’s challenge is called Crazy Quilts and the Island Batik Ambassadors are making their version of a crazy quilt with Island Batik fabric and different Aurifil Color Builders thread sets.  I am koo koo for Krazy Quilts and I know you are going to see some fun projects this month. Links to the other Ambassador’s blogs may be found at the bottom of this post.

Crazy Quilts Challenge

Since I could use any Island Batik fabric I wanted, I selected a shaded variety of blue batiks I had in my stash. As you will see, I was given a beautiful set of blue Aurifil threads to use and I thought they would go well with these blue batiks. Island Batik fabrics may be found at your local quilt shop that carries Island Batik, such as Fabric Smart in St. Petersburg FL. You may also find them online at www.fabric-smart.com or call them at 727-914-8850. Another online option for you to shop for this fabric would be Hancocks of Paducah: Hancocks of Paducah

blue batiks
blue batiks

The idea behind this challenge was to make a crazy quilt using one of the Aurifil Color Builder sets each of the ambassadors were given. I was given the Passionflower Color Builder set. It contains a light blue spool, a light blue variegated spool and a dark blue variegated spool. This 50 weight cotton Aurifil thread works beautifully with my Janome 6600 and creates fantastic stitches with little lint or thread breakage. Aurifil thread is my go-to thread of choice. These lovely blues will ignite the passion for stitching in anyone.

Aurifil Passionflower Color Builders set

The quilt I made, Crazy Quilt Table Runner, is a large table runner- 20″ x 60.” This beautiful runner has shades of blue and is highlighted with navy and white.  I wanted to put a modern spin on the crazy quilt, so I paper pieced it and incorporated some flying geese to give it a more modern feel. 

I used my Electric Quilt 8 software to design this quilt.

IB April Crazy Quilt TR

The photo, below, is an alternative version I thought of doing, which would have spun the blocks in a 2 x 2 grid and made a small table topper. The actual finished quilt looks slightly different that the computer image. This is due to the fact that I did not input the actual batiks I was using into the software. I could have, but didn’t feel the need to do so as I knew I had batiks in the same shades as the colors I was using in the EQ software.

IB April quilt alternative layout

Once I had the pattern designed, the fabric and thread picked out, it was time to get started. This is what the block pattern looks like when it is printed out. It is a large block, so I had to combine 4 pages together to make the paper foundation. You will notice that the pattern is reversed and that is because you put the fabric pieces on the other side and sew on the side with the lines. This was paper pieced and you cover one section of the pattern at a time, add another piece to the back and then sew on the lines. Then you trim with an Add a Quarter ruler and add the next piece. You keep doing this until the paper is covered. This is similar to regular crazy quilting, only regular crazy quilting is usually sewn onto a fabric foundation, like muslin, and the pieces are randomly sewn on. In paper piecing, the angles are random, but they are predetermined in the pattern and normal crazy quilting doesn’t usually have something as organized as the flying geese in this pattern. Later in this blog entry, you will find a link to my YouTube video showing  how I made this quilt. It is a very detailed video on paper piecing and how I added the decorative stitches.

Foundation paper piece pattern

Once I had the blocks all pieced, it was time to get out that beautiful Aurifil Color Builder set called Passionflower. In order for your decorative stitches to stand out, it is necessary to audition the threads on top of the fabric to see if they have enough contrast to stand out. You will see in the next picture that the light blue variegated thread has good contrast with the darker blue fabric.

testing out the thread on the fabric

Once the decorative stitching was applied to the top of the block, using the paper foundation as a stabilizer, it was time to remove the paper from the back of the block. Next, I added the sashing and the borders. Finally, I made a quilt sandwich with the quilt top, Hobbs Thermore batting, and a light blue batik backing fabric. Hobbs Thermore batting is an excellent choice for a table runner as it is a thin batting that lays nice and flat and is easy to quilt on. Here are a couple more closeup pictures of the decorative stitching. The Schmetz Needles I used in this project did a great job of piecing the block and stitching the decorative stitches. It is important to change your needles fairly frequently, especially after you have made a large project or are stitching through paper like I did in this project. You can see in the first photo below that I did some decorative stitching, to the quilt top only, in the middle of the block sections. In photos of the finished project below, you can see that I also applied some decorative stitches to quilt the table runner, along with some stitching in the ditch.

quilt top
quilt top
stitching closeup
stitching closeup
more decorative stitches

Here is the finished crazy quilt table runner. I did simple quilting in the border as I wanted the decorative stitching to be the focal point. 

April Crazy Quilt
April Crazy Quilt

The next photo is showing what the decorative stitching looks like on the blue backing fabric. I wasn’t sure it was going to work by using decorative stitching to quilt some of the quilt, but it worked out fine.

Here are a couple more pictures of the finished table runner.

finished table runner

crazy quilt table runner

table runner close up

For further details, I have a YouTube video about this quilt. 

Here is a link to the YouTube video where you can watch and see more details of how I made the quilt:    Making a Crazy Quilt Table Runner

YouTube video
YouTube video

If you like the video, please be sure to like it, share it with your friends and subscribe so you don’t miss any upcoming videos.

The supplies I used to make this project were provided by:

Island Batik Blue batik fabrics.

Aurifil 50 wt Thread- Passionflower Color Builders Set

Schmetz 70/10 Quilting needle

Hobbs Batting Hobbs Thermore Batting


IB-Aurifil-Schmetz

Hobbs-logo

If you are on TikTok, be sure to check out the video I have posted about the quilt. (Look for Blue Bear Quilts)

Also, please follow me on Instagram (Blue Bear Quilts) as that is where I occasionally have giveaways. 

Blue Bear hopes you like this crazy quilted table runner. Please let him know how much you love it by writing to him in the comments!

The other amazing Island Batik Ambassadors are also posting their April crazy quilt projects.  Check out their projects by clicking on the links next to their names to be directed to their blog posts.

Emily Leachman, The Darling Dogwood

Sarah Pitcher, Pitcher’s Boutique

Claudia Porter, Create with Claudia

Brenda Alburl, Songbird Designs

Elita Sharpe, Busy Needle Quilting

Reed Johnson, Blue Bear Quilts   Thanks for stopping by!

Suzy Webster, Websterquilt

Preeti Harris, Sew Preeti Quilts

Renee Atkinson, Pink Tulip Quilting

Denise Looney, For the Love of Geese

Gail Sheppard, Quilting Gail

Anorina Morris, Samelia’s Mum

Sandra Starley, Textile Time Travels

Susan Deshensky, Lady Blue Quilts

Randi Jones, Randi’s Roost

Brittany Fisher, Bobbin with Brittany

Lisa Pickering, Lisa’s Quilting Passion

Victoria Johnson, Forever Quilting for You

Mania Hatziioannidi, Mania for Quilts

Lana Russel, Lana Quilts

Pamela Boatright, Pamela Quilts

Jennifer Thomas, Curlicue Creations

Maryellen McAuliffe, Mary Mack Made Mine

Leah Malasky, Quilted Delights

Connie Kauffman, Kauffman Designs

#islandbatikambassador #islandbatik #iloveislandbatik #hobbsbatting #aurifil #aurifilthread #schmetzneedles #doyoueq #Janome #electricquilt #eq8 #HancocksofPaducah #fabricsmart


Posted on 6 Comments

Island Batik Ambassador- November Project- Crazy Quilt Stocking- Part of the Creative Christmas Stockings Challenge

Blue Bear with Stocking

 This month’s challenge is called Creative Christmas Stockings and the Island Batik Ambassadors will all be making stockings and can choose whatever fabric they like from Island Batik.  Maybe some will do unusual piecing or appliqué; maybe some will make stockings in unusual shapes or small gift bags.  I can’t wait to see what the other Ambassadors are going to come up with this month. At the bottom of this blog, I have links to the other designer’s blogs so you can see what they made.

Creative Christmas Stockings

I wanted to make a crazy quilt stocking with a blue wintery theme. I chose the Mountain Gems line by Kathy Engle as my main fabric. Just look at this gorgeous collection of batik fabrics. The Mountain Gems collection may be found at your local quilt shop that carries Island Batik, such as Fabric Smart in St. Petersburg FL. You may find them online at www.fabric-smart.com or call them at 727-914-8850.

Mountain Gems
Mountain Gems


Mountain Gems fabric

I chose to make a crazy quilt stocking using the Crazier 8 templates from Creative Grids and the Studio Stocking Die set from Accuquilt. Crazy quilting is where the shapes are cut at odd angles and then sewn together. Decorative stitches are then sewn over the seam lines, so they show, on the good side of the fabric. Blue Bear and Beauregard Bear are thrilled with their new stocking. 

Blue Bear with Stocking


Beauregard with Stocking


The Crazier Eight templates were used to make crazy quilt blocks and the Accuquilt Studio cutter and die set were used to cut out the stocking shapes. The Studio dies look different from the Accuquilt GO! dies in that they are made of wood with steel blades and foam surrounding the steel blades. They are used in the Studio cutter, which is a more industrial and manual cutter that can cut up to 12 layers of fabric at a time. This is great for quilt shops or designers that need to cut a lot of fabric. If you would like to see a video of how I cut out shapes with an Accuquilt cutter, there is a video on my You Tube channel-Blue Bear Quilts. Here is the link to the You Tube video: https://youtu.be/3-hp6QzFkOo. In this video, I am using an electric GO! Big Cutter, as opposed to the Studio Cutter I used to make this stocking which is manual, but the concept is the same.

Creative Grids Crazier 8 templates and Accuquilt Studio Stocking dies


The great thing about the Crazier 8 template set is that you can cut out the shapes you need for an 8″ block from 10″ squares and you can buy the Mountain Gems fabric in 10″ squares. The squares need to be cut in half diagonally as you can see in the next photo.

10" squares cut in half diagonally
10″ squares cut in half diagonally

In the next photo, you can see how shapes A, B and C are cut out from one half of the fabric, with the Creative Grids Crazier 8 templates, and shapes D and E are cut out from the other half. This makes it easy to cut multiple layers of fabric at a time. The templates also cut off the dog ears which make lining up the pieces easy to sew and no trimming when done. A rotating mat is helpful when cutting out these shapes.

fabric cut with Crazier 8 templates


block sewn together
block sewn together

The photo above shows a Crazier 8 block sewn together. You sew shapes A, B and C together first and then sew shapes D and E together. Finally, you sew the two halves together. Next I sewed three blocks together to create a blocky stocking shape.

three blocks sewn together

Then I applied byAnnies.com Fusible Stabilizer to the back, which was used to stabilze the decorative stitching that I would be putting on the front of the fabric. I had to make one of these for the front of the stocking and one for the back. The decorative stitching had already been done in this photo. And the next photo shows a close up of the decorative stitching I did using my Janome 6600.

stabilizer on the back


close up of crazy quilt stitching

Now that the crazy stitching is all done, it’s time to cut out the stocking shapes. I have my two crazy patchwork pieces, one is a mirror image of the other, and two pieces for a fabric lining. I lay them over the stocking die and crank them through the machine and perfect stocking shapes are cut out.

fabric on Studio cutter and die

One needed to be laid on the die right side up and the other wrong side up. The same thing would be true for the lining fabric, but its is not as crucial with batik fabric as both sides look good. 

cut out stocking an reverse

I also made a pieced cuff for the stocking by sewing strips on both sides of another piece of fabric and then cutting out the cuff with the other Accuquilt die that is part of the set. 

pieced top of stocking cut out

Unfortunately I forgot to take photos of sewing the stocking together. You start by sewing the interior curve of both the outside pieces, and the lining, from the top of the cuff down to the top of the curve. You then sew the top of the exterior pieces to one side of the cuff and the top of the lining pieces to the other side of the cuff. Next, you flip them right sides together and pin all the way around and leave a small opening. You sew 1/4″ all the way around, except for the opening. Finally you turn everything right side out, stitch the opening closed, and then stuff the lining into the stocking. 

I hope you have enjoying reading how I created this Christmas Stocking. Stay tuned for next month when I reveal a lone star quilt.

The supplies I used to make this project were provided by:

Island Batik Mountain Gems fabric.

Aurifil 50 wt cotton thread

Schmetz 70/10 quilting needle

byAnnie fusible stabilizer


Island Batik
Island Batik
Schmetz Needles
Schmetz Needles
Aurifil Thread
Aurifil Thread


If you are on TikTok, be sure to follow me there for more quilting antics. (Look for Blue Bear Quilts)

Blue Bear and Beauregard Bear hope you like their stocking. Please let them know how much you love them by writing to them in the comments!

The other amazing Island Batik Ambassadors are also posting their November Challenge stockings.  Check out their projects by clicking on the links next to their names to be directed to their blog posts.

Gail Renna, Quilt Haven Threads

Michelle Roberts, Creative Blonde Gifts

Sandra Starley, Textile Time Travels

Jennifer Thomas, Curlicue Creations

Brenda Alburl, Songbird Designs

Jennifer Fulton, Inquiring Quilter

Lisa Pickering, Lisa’s Quilting Passion

Suzy Webster, Websterquilt

Denise Looney, For the Love of Geese

Gail Sheppard, Quilting Gail

Preeti Harris, Sew Preeti Quilts

Connie Kauffman, Kauffman Designs

Megan Best, Bestquilter

Maryellen McAuliffe, Mary Mack Made Mine

Elizabeth DeCroos, Epida Studio

Jane Hauprich, Stitch by Stitch Custom Quilting

Emily Leachman, The Darling Dogwood

Andi Stanfield, True Blue Quilts

Leah Malasky, Quilted Delights

Claudia Porter, Create with Claudia

Mania Hatziioannidi, Mania for Quilts

Reed Johnson, Blue Bear Quilts

Pamela Boatright, Pamela Quilts

Anorina Morris, Samelia’s Mum

Brianna Roberts, Sew Cute and Quirky


Make sure to follow Island Batik on social media. Be sure to check out the Island Batik Blog.

#islandbatikambassador #islandbatik #iloveislandbatik #byannie #aurifil #aurifilthread #schmetzneedles #Janome #creativegrids #Accuquilt #Bluebearquilts