Posted on 6 Comments

Island Batik Ambassador- November Project- Crazy Quilt Stocking- Part of the Creative Christmas Stockings Challenge

Blue Bear with Stocking

 This month’s challenge is called Creative Christmas Stockings and the Island Batik Ambassadors will all be making stockings and can choose whatever fabric they like from Island Batik.  Maybe some will do unusual piecing or appliqué; maybe some will make stockings in unusual shapes or small gift bags.  I can’t wait to see what the other Ambassadors are going to come up with this month. At the bottom of this blog, I have links to the other designer’s blogs so you can see what they made.

Creative Christmas Stockings

I wanted to make a crazy quilt stocking with a blue wintery theme. I chose the Mountain Gems line by Kathy Engle as my main fabric. Just look at this gorgeous collection of batik fabrics. The Mountain Gems collection may be found at your local quilt shop that carries Island Batik, such as Fabric Smart in St. Petersburg FL. You may find them online at www.fabric-smart.com or call them at 727-914-8850.

Mountain Gems
Mountain Gems


Mountain Gems fabric

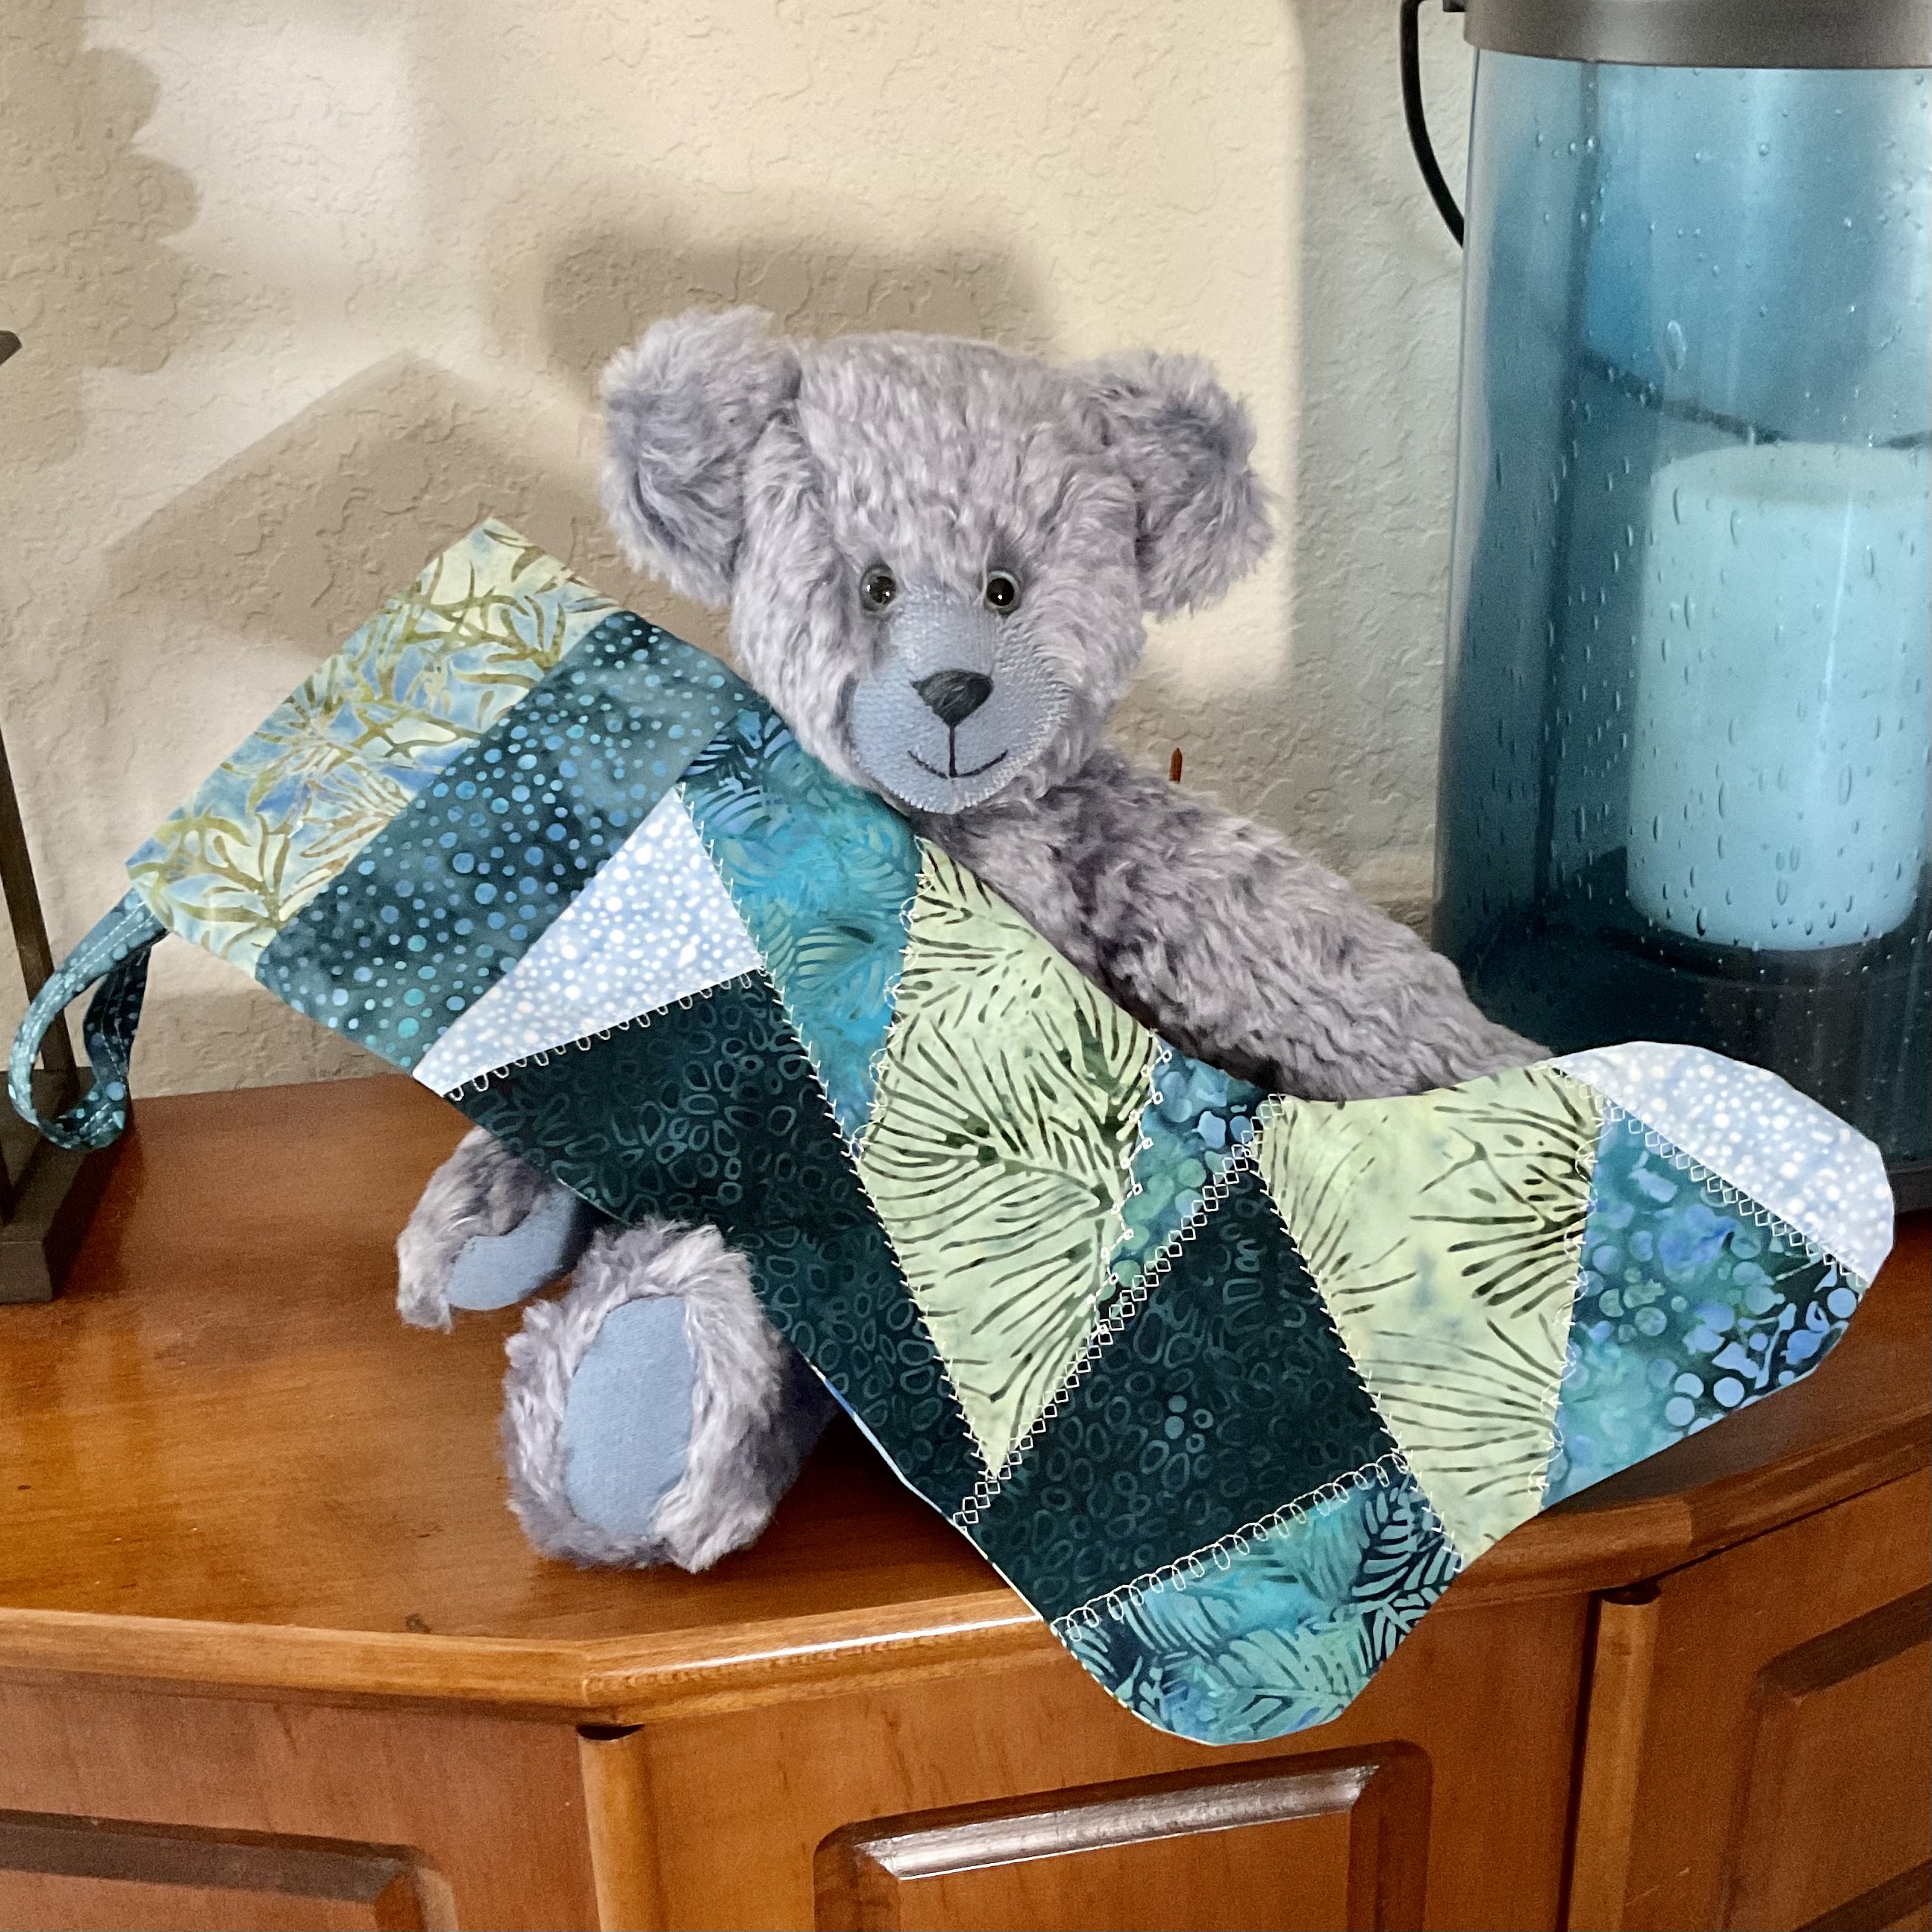
I chose to make a crazy quilt stocking using the Crazier 8 templates from Creative Grids and the Studio Stocking Die set from Accuquilt. Crazy quilting is where the shapes are cut at odd angles and then sewn together. Decorative stitches are then sewn over the seam lines, so they show, on the good side of the fabric. Blue Bear and Beauregard Bear are thrilled with their new stocking. 

Blue Bear with Stocking


Beauregard with Stocking


The Crazier Eight templates were used to make crazy quilt blocks and the Accuquilt Studio cutter and die set were used to cut out the stocking shapes. The Studio dies look different from the Accuquilt GO! dies in that they are made of wood with steel blades and foam surrounding the steel blades. They are used in the Studio cutter, which is a more industrial and manual cutter that can cut up to 12 layers of fabric at a time. This is great for quilt shops or designers that need to cut a lot of fabric. If you would like to see a video of how I cut out shapes with an Accuquilt cutter, there is a video on my You Tube channel-Blue Bear Quilts. Here is the link to the You Tube video: https://youtu.be/3-hp6QzFkOo. In this video, I am using an electric GO! Big Cutter, as opposed to the Studio Cutter I used to make this stocking which is manual, but the concept is the same.

Creative Grids Crazier 8 templates and Accuquilt Studio Stocking dies


The great thing about the Crazier 8 template set is that you can cut out the shapes you need for an 8″ block from 10″ squares and you can buy the Mountain Gems fabric in 10″ squares. The squares need to be cut in half diagonally as you can see in the next photo.

10" squares cut in half diagonally
10″ squares cut in half diagonally

In the next photo, you can see how shapes A, B and C are cut out from one half of the fabric, with the Creative Grids Crazier 8 templates, and shapes D and E are cut out from the other half. This makes it easy to cut multiple layers of fabric at a time. The templates also cut off the dog ears which make lining up the pieces easy to sew and no trimming when done. A rotating mat is helpful when cutting out these shapes.

fabric cut with Crazier 8 templates


block sewn together
block sewn together

The photo above shows a Crazier 8 block sewn together. You sew shapes A, B and C together first and then sew shapes D and E together. Finally, you sew the two halves together. Next I sewed three blocks together to create a blocky stocking shape.

three blocks sewn together

Then I applied byAnnies.com Fusible Stabilizer to the back, which was used to stabilze the decorative stitching that I would be putting on the front of the fabric. I had to make one of these for the front of the stocking and one for the back. The decorative stitching had already been done in this photo. And the next photo shows a close up of the decorative stitching I did using my Janome 6600.

stabilizer on the back


close up of crazy quilt stitching

Now that the crazy stitching is all done, it’s time to cut out the stocking shapes. I have my two crazy patchwork pieces, one is a mirror image of the other, and two pieces for a fabric lining. I lay them over the stocking die and crank them through the machine and perfect stocking shapes are cut out.

fabric on Studio cutter and die

One needed to be laid on the die right side up and the other wrong side up. The same thing would be true for the lining fabric, but its is not as crucial with batik fabric as both sides look good. 

cut out stocking an reverse

I also made a pieced cuff for the stocking by sewing strips on both sides of another piece of fabric and then cutting out the cuff with the other Accuquilt die that is part of the set. 

pieced top of stocking cut out

Unfortunately I forgot to take photos of sewing the stocking together. You start by sewing the interior curve of both the outside pieces, and the lining, from the top of the cuff down to the top of the curve. You then sew the top of the exterior pieces to one side of the cuff and the top of the lining pieces to the other side of the cuff. Next, you flip them right sides together and pin all the way around and leave a small opening. You sew 1/4″ all the way around, except for the opening. Finally you turn everything right side out, stitch the opening closed, and then stuff the lining into the stocking. 

I hope you have enjoying reading how I created this Christmas Stocking. Stay tuned for next month when I reveal a lone star quilt.

The supplies I used to make this project were provided by:

Island Batik Mountain Gems fabric.

Aurifil 50 wt cotton thread

Schmetz 70/10 quilting needle

byAnnie fusible stabilizer


Island Batik
Island Batik
Schmetz Needles
Schmetz Needles
Aurifil Thread
Aurifil Thread


If you are on TikTok, be sure to follow me there for more quilting antics. (Look for Blue Bear Quilts)

Blue Bear and Beauregard Bear hope you like their stocking. Please let them know how much you love them by writing to them in the comments!

The other amazing Island Batik Ambassadors are also posting their November Challenge stockings.  Check out their projects by clicking on the links next to their names to be directed to their blog posts.

Gail Renna, Quilt Haven Threads

Michelle Roberts, Creative Blonde Gifts

Sandra Starley, Textile Time Travels

Jennifer Thomas, Curlicue Creations

Brenda Alburl, Songbird Designs

Jennifer Fulton, Inquiring Quilter

Lisa Pickering, Lisa’s Quilting Passion

Suzy Webster, Websterquilt

Denise Looney, For the Love of Geese

Gail Sheppard, Quilting Gail

Preeti Harris, Sew Preeti Quilts

Connie Kauffman, Kauffman Designs

Megan Best, Bestquilter

Maryellen McAuliffe, Mary Mack Made Mine

Elizabeth DeCroos, Epida Studio

Jane Hauprich, Stitch by Stitch Custom Quilting

Emily Leachman, The Darling Dogwood

Andi Stanfield, True Blue Quilts

Leah Malasky, Quilted Delights

Claudia Porter, Create with Claudia

Mania Hatziioannidi, Mania for Quilts

Reed Johnson, Blue Bear Quilts

Pamela Boatright, Pamela Quilts

Anorina Morris, Samelia’s Mum

Brianna Roberts, Sew Cute and Quirky


Make sure to follow Island Batik on social media. Be sure to check out the Island Batik Blog.

#islandbatikambassador #islandbatik #iloveislandbatik #byannie #aurifil #aurifilthread #schmetzneedles #Janome #creativegrids #Accuquilt #Bluebearquilts


Posted on Leave a comment

New Patterns Aplenty

It has been a busy summer at Blue Bear Quilts. We taught our Pixie Party Quilt and Quilt in a Day’s Autumn Leaves table runner, in August, at Affinity For Quilts in White Bear Lake Minnesota. Everyone had a great time and some beautiful quilts are in the making.

Pixie Party Class
Pixie Party Class

Autumn Leaves Table Runner

While we were in Minnesota, we ran into the editors from one of our favorite magazines. Quilt Folk. They were kind enough to pose for a photo. If you have not discovered this magazine, you need to. It has gorgeous pictures of quilts on premium matte paper and really interesting articles about everything Quilt Folk might be involved in. We also went to the Great Minnesota Stae Fair and I had to have photo with my favorite lumberjack, Paul Bunyan.

Quilt Folk magazine
Quilt Folk magazine

Paul Bunyan
Paul Bunyan


We had a couple more of our quilt designs show up in magazines. Canoe Junction made the cover of the September/ October issue of Love of Quilting magazine. It uses Flower Garden Gatherings Fabrics from Moda. Winter Visitor is featured in the November/ December issue of McCall’s Quilting magazine. It uses the Cardinal Woods flannel collection from Northcott Fabrics.

Canoe Junction
Canoe Junction

Canoe Junction in Love of Quilting

Winter Visitor
Winter Visitor


Speaking of lumberjacks, don’t forget about our Quilt Cruise to Alaska’s Inside Passage June 6-13, 2020 aboard the Holland America Eurodam. We will be making the beautiful Northern Star Garden Quilt, a pattern that was designed exclusively for this cruise. It involves shapes that have been precut for you with Accuquilt, a no tear-out the paper, paper pieced center star and Hawaiian (should be called Alaskan) appliqué snowflakes in the border. A different technique for each day were are quilting, while the ship is at sea. When the ship is at sea, it is up to you as to how much time you want to spend sewing. When the ship is in port, you will be able to go into the the ports of Juneau, Ketchikan, Sitka and Victoria, BC with your family and friends. This is a trip of a lifetime to one of the most beautiful places on Earth. The trip is over half full, so don’t miss out and sign up today. Here is the link if you are interested in joining us on this cruise. https://quiltretreatatsea.com/quiltinginthewild/

Quilt Cruise to Alaska

Alaskan beauty in fabric

Northern Star Garden

We have created some wonderful free patterns for Accuquilt, which we hope you will enjoy making. They all were designed with Timeless Treasures Fabrics. Speaking of which, we have several new patterns, which will be making their debut at Fall Quilt Market for Timeless Treasures Fabrics. More to come on these patterns at a later date. A couple of them do involve panels, however. The first Accuquilt pattern is Antique Americana, which involves the use of the Hattie’s Choice die. Here is the link for the pattern.   https://www.accuquilt.com/go-antique-americana-throw-quilt-pattern.html  Then, we have Orange Cream Soda which involved the use of the Studio 6″ setting triangles. Here is the link for that pattern.   https://www.accuquilt.com/studio-orange-cream-soda-throw-quilt-pattern.html  Sherbet Dreams involves the use of the Glorified Nine Patch die. Here is the link. https://www.accuquilt.com/go-sherbet-dreams-throw-quilt-pattern.html   Love Letters uses the Studio 8″ setting triangles. Here is the link for Love Letters. https://www.accuquilt.com/studio-love-letters-throw-quilt-pattern.html And finally,  Fall is Coming, which uses the Studio 8″ setting triangles. The link to Fall is Coming.  https://www.accuquilt.com/studio-fall-is-coming-throw-quilt-pattern.html


Antique Americana
Antique Americana

Orange Cream Soda
Orange Cream Soda

Sherbet Dreams
Sherbet Dreams

Love Letters
Love Letters


Fall is Coming
Fall is Coming

Last, but certainly not least, we have two new patterns making their debut with QT Fabrics at Quilt Market, In Houston, October 2019. They are Fit For a King, which utilizes the Accuquilt Hattie’s Choice die and Kings and Queens. You will be able to purchase these patterns from QT Fabrics, if you are a quilt shop and also from our website, very soon. Fit for a King uses QT Fabrics basic lines, Quilting Illusions and Color Blends. Kings and Queens uses a fat quarter bundle from QT Fabrics Illuminations collection, which will be arriving in shops around April 2020. Kings and Queens pattern is perfect for those fat quarter bundles you would love to turn into a beautiful quilt.

Fit For a King
Fit For a King

Kings and Queens
Kings and Queens

Well, that’s it for now. Happy Quilting till we come back and share more of what’s happening at Blue Bear Quilts.

Posted on 4 Comments

Free Tutorial-Quilted Holiday Star Ornaments (No Sew)

Quilted Star Ornament

Quilted Holiday Star Ornaments (No Sew)


You could make one of these every year year.  Keep them for yourself, or give them as a gift. Once you learn the technique, you can put photos on fabric in the middle or use something small that you have cross-stitched or embroidered.  Have fun making these as they do not need to be perfect to look fantastic!

Quilted Star Ornament – Supply List

(1) 3” Styrofoam ball

(1) 1/8th yard dark fabric

(1) 1/8th yard light fabric

(1) 1/4th yard 2d dark fabric

(1) box dressmakers pins 1 1/16th inch, at least 300 count

(1) box extra-fine glasshead pins in color of your choice

(1) 1/4th yard decorative silky ribbon to create hanger


Quilted Star Ornament – Preparing Fabric

  1. You need 2.5″ squares of coordinating and contrasting fabric.  You will need 3 coordinating fabrics and one of them should be a light color and the other two can be a darker color. Press your fabrics, and then using a cutting mat and rotary cutter, cut 2.5″ strips and then sub-cut the strips into 2.5″ squares.  For a 3” Styrofoam ball, you will need 10 squares of the first dark color and 16 squares, each, of the light colored fabric and the 2nd dark colored fabric.

    2.5" squares
    2.5″ squares
  2. Now, it’s time for the pressing of the prairie points. But first, set aside 2 squares from the first dark color, of which you started with 10, that you will not be pressing.

a. Fold the all the rest of the 2.5″ squares in half to make rectangles that are 1.25” x 2.5.” Press with your iron on steam setting. Do not iron, just press.

Half Rectangles
Half Rectangles

b. Then fold the just made rectangles again to make squares that are 1.25” x 1.25”.

1.25" folded squares
1.25″ folded squares

c. Once you have the small, twice folded, squares, you open them back up to the rectangle and then fold the upper, left and right, corners in to meet the center crease line in the middle of the rectangle. Be precise when lining up the edges to the center; the closer (without overlapping the edges) the better. This makes a neat equilateral triangle (a prairie point) with the folded edges meeting in the center of the front of the triangle. When you have formed the prairie point, you carefully press. Be careful not to burn your fingers. You will end up with 40 small prairie points and 2 squares that have not been pressed.

Prairie Points
Prairie Points

Prairie Points close up

Prairie Points and squares

Quilted Star Ornament – Pinning the Pieces

To create the quilted look, you pin the prairie points to the foam ball in concentric layers.

Start by placing the two unfolded squares, evenly spaced apart, one at the top and one at the bottom, on the foam. Pin each corner of the squares to the foam and have the corners from each square almost meet each other, evenly spaced apart.

Squares on opposite sides

Round 1 of Prairie Points (1st Dark color that has 8 remaining squares)

  1. Place your first prairie point directly on the 2.5″ square just placed at the top of the foam. Match the wide edge of the prairie point triangle with the corners of the square. Pin the bottom wide corners of the prairie point to the foam, first, and then the upper point. Then pin, to the foam, the upper point of the prairie point in between the two folds, a little below the top edge of the prairie point. You want to place the pin right in the creased edge of the fold so that the fold will cover it. Pull the folded flaps over this pin to hide it. When finished with a prairie point, the two pins at the bottom of the triangle will be showing and the pin at the upper point will be covered by the folded edges.

    First Prairie Point
    First Prairie Point
  2. Using the same method, complete the second prairie point directly across from the first one. The upper points of these two prairie points will meet in the middle of the unfolded square on the foam ball.

    Second Prairie Point
    Second Prairie Point
  3. Using the same method, place the 3rd prairie point in the empty space beside the two just placed prairie points.
  4. Pin the 4th prairie point in the remaining open space on the unfolded square to finish this round. You will have 4 prairie points in the center of the foam ball and all points should match up and not be overlapping each other at the center. They may overlap each other a little at the bottom of the prairie points. You will repeat this process on the opposite side of the ball and can do so now or after you have finished all 3 rounds on the top first.

    Completed Round 1 on one side
    Completed Round 1 on one side

Round 2 of Prairie Points (Light color that has 16 squares)


  1. In this next round, you can decide how large you want your center star to be by deciding how much of the first round you want to leave showing. A good approximation is to start the 2nd round about ½” below the top of the first round. You should be able to fit 3 rounds without using more than half of the foam ball’s space.
  2. To start round two, this time, place the prairie point’s upper point pin in first, right in the middle of the fold line of the first prairie point, from the previous round, about ½” from the top of the round 1 prairie point and then pin down the outer corners of the prairie point. It helps to put a pin anywhere on the prairie point, while pinning this center point first, and then remove this temporary pin. Use the same technique from round 1 of placing the upper point pin between the two folds a little below the top edge of the prairie point and pull the folded flaps over the upper point pin to hide it. Then pin the outside corners of the prairie point. These outside corners will overlap each other.

    Round 2, 1st Prairie Point
    Round 2, 1st Prairie Point
  3. Place the second prairie point, of round 2, completely opposite of the one placed in # 2 above. Just like last time, pin the center, hide the pin, and then pin the corners of the prairie point.
  4. Using the same method, place the third prairie point, of round 2, 90 degrees from prairie points 1 and 2 just created.
  5. Using the same method, place the 4th prairie point, of round 2, directly opposite of the piece created in # 4 above.
  6. Now there are 4 long sections of the first round (dark color) that are exposed and are creating an “x.”

    Round 2 "X"
    Round 2 “X”

    You will now be placing a prairie point in each of the legs of that “x.” Place a 5th light color prairie point in one of the areas not covered by the previous 4 pieces from round 2. Place this prairie point in the line formed where the edges of the round 1 prairie points meet and just slightly below the level where the previous 4 round 2 prairie points were placed.

    Round 2, 5th Prairie Point
    Round 2, 5th Prairie Point

    You are adding another layer to round 2, of the same color, and are now going to start forming your star. Just like before, pin the center point, hide the pin, and then pin the corners of the prairie point.

  7. Place the 6th prairie point completely opposite of the one placed in # 6 above.
  8. Place the 7th prairie point 90 degrees from pieces 6 and 7 above.
  9. Place the 8th prairie point directly opposite piece # 8. You will now see your first star formed from the dark color of round 1.

    Completed Round 2 on one side
    Completed Round 2 on one side


Round 3 of Prairie Points (2d Dark color that has 16 squares)


  1. Now you will place a third round of prairie points on top of round 2. Start with the first prairie point that you placed in round two and going about ½” from the upper point of the round 2 prairie point, place the point pin of the round 3 prairie point first, in the folds of the round 2 prairie point, just like you did for the last round, and then pin down the outer corners of the round 3 prairie point.

    Round 3, 1st Prairie Point
    Round 3, 1st Prairie Point
  2. Place the second prairie point completely opposite the one in # 1 above.
  3. Place the third prairie point 90 degrees from the prairie points created in # 1 and 2 above.
  4. Place the fourth prairie point directly opposite of prairie point # 3 above.
  5. Now there are 4 prairie points of the second round (light color) that are not covered by round 3. You will next place a prairie point in each of those 4 prairie points. Place a 5th dark color prairie point in one of the areas not covered by the previous 4 pieces from round 3. Place this prairie point in the center line of the round 2 prairie point and just slightly below the level where the previous 4 round 3 prairie points were placed. You are adding another layer to round 3, of the same color, and are now going to start forming your second star. Just like before, pin the upper center point, hide the pin, and then pin the corners of the prairie point.

    Round 3, 5th Prairie Point
    Round 3, 5th Prairie Point
  6. Place the 6th prairie point completely opposite of the one created in # 5 above.
  7. Place the 7th prairie point 90 degrees from prairie points # 5 and 6 from above.
  8. Place the 8th prairie point directly opposite of the one created in # 7. You will now see your second star.

    Completed Round 3 on one side
    Completed Round 3 on one side

Optionally, If you have room for another layer without going over the half way point of the foam ball, switch colors and repeat steps from round 3. You would need to cut 16 additional 2.5” squares of the new color.

When finished with one side of the foam ball, flip over the ornament and repeat all steps. If you repeated each round on the opposite side as you went, this step is already completed.


Quilted Star Ornament – Finishing Steps

Where the top and bottom edges meet is where you will place a fabric strip or ribbon. Usually the edges don’t match up perfectly. You can make the fabric strip the width needed to make sure you cover it all. Notice my edges and how at one spot the prairie points overlap each other and in another spot there is a gap.

Ornament Unfinished Edge


Finishing the Ornament

If you used a different sized ball, wrap a measuring tape around the ornament to determine the size of ribbon or fabric needed to cover the edge. For the 3” foam ball, I used a 12″ x 2.5” strip of fabric. You can use whatever color of fabric you want, but if you used the same fabric as in the round three prairie points, it will create a more harmonious look.

Coordinating Fabric Strip

Fold the strip in half, wrong sides together and press. Open the strip and fold both long edges of the strip toward the center line so that they meet in the center and then press. Fold each end of the strip in about a ½ “ and press. You end up with a 1.25″ finished strip to wrap around the ornament.

Determine the top of your ornament, if you have a preference. Wrap the fabric strip around the edge of your ornament and secure with the glass head pins at the intersections of the prairie points. When you come to the top, lay your hanger ribbon under the fabric strip and secure the ribbon and fabric strip to the ornament with four glass head pins. Tie your hanger ribbon in a knot at the top.

Attaching Strip and Ribbon

Optionally, you can attach the fabric strip and the hanger ribbon with a glue gun, if you prefer.

Keep in mind this is a handmade item and is not going to be perfect. The imperfections are what make it unique and special. There are no rules for the colors that are used or the spacing used between the rounds. Make it yours! You can make these into hanging ornaments, or decorative balls to place in a bowl or basket. The first round does not need to be prairie points. You can substitute a photo on fabric for the center square, or use a small piece of cross-stitch or embroidery as the center. To do this, you would skip the placement of the round one prairie points and start with round two after you have placed your photo or needlework.

Your ornament is ready to hang on your tree or give as a gift.

Folded Fabric Star Ornament

Please let me know if you have any questions and please share any ornaments that you make with the hashtag #bluebearquilts.