Posted on Leave a comment

Island Batik Ambassador- January Project- Step by Step Quilt

South Seas Shuffle Quilt

I am so excited to be an Island Batik Ambassador for 2022.


Each month, I will be sharing a different project using upcoming fabric lines from Island Batik.

Unboxing video
Unboxing video


If you would like to see my unboxing video, where I show all of the fabric and batting Island Batik and Hobbs sent to me, here is a link to my YouTube video: https://youtu.be/Q-MN2HbI6dg. Be sure to subscribe and click the bell so the you will be notified when I post more videos.

For the month of January, the challenge was to create a step by step quilt using the Island Batik basic line of Gradations.

01 - Step by Step Challenge
01 – Step by Step Challenge


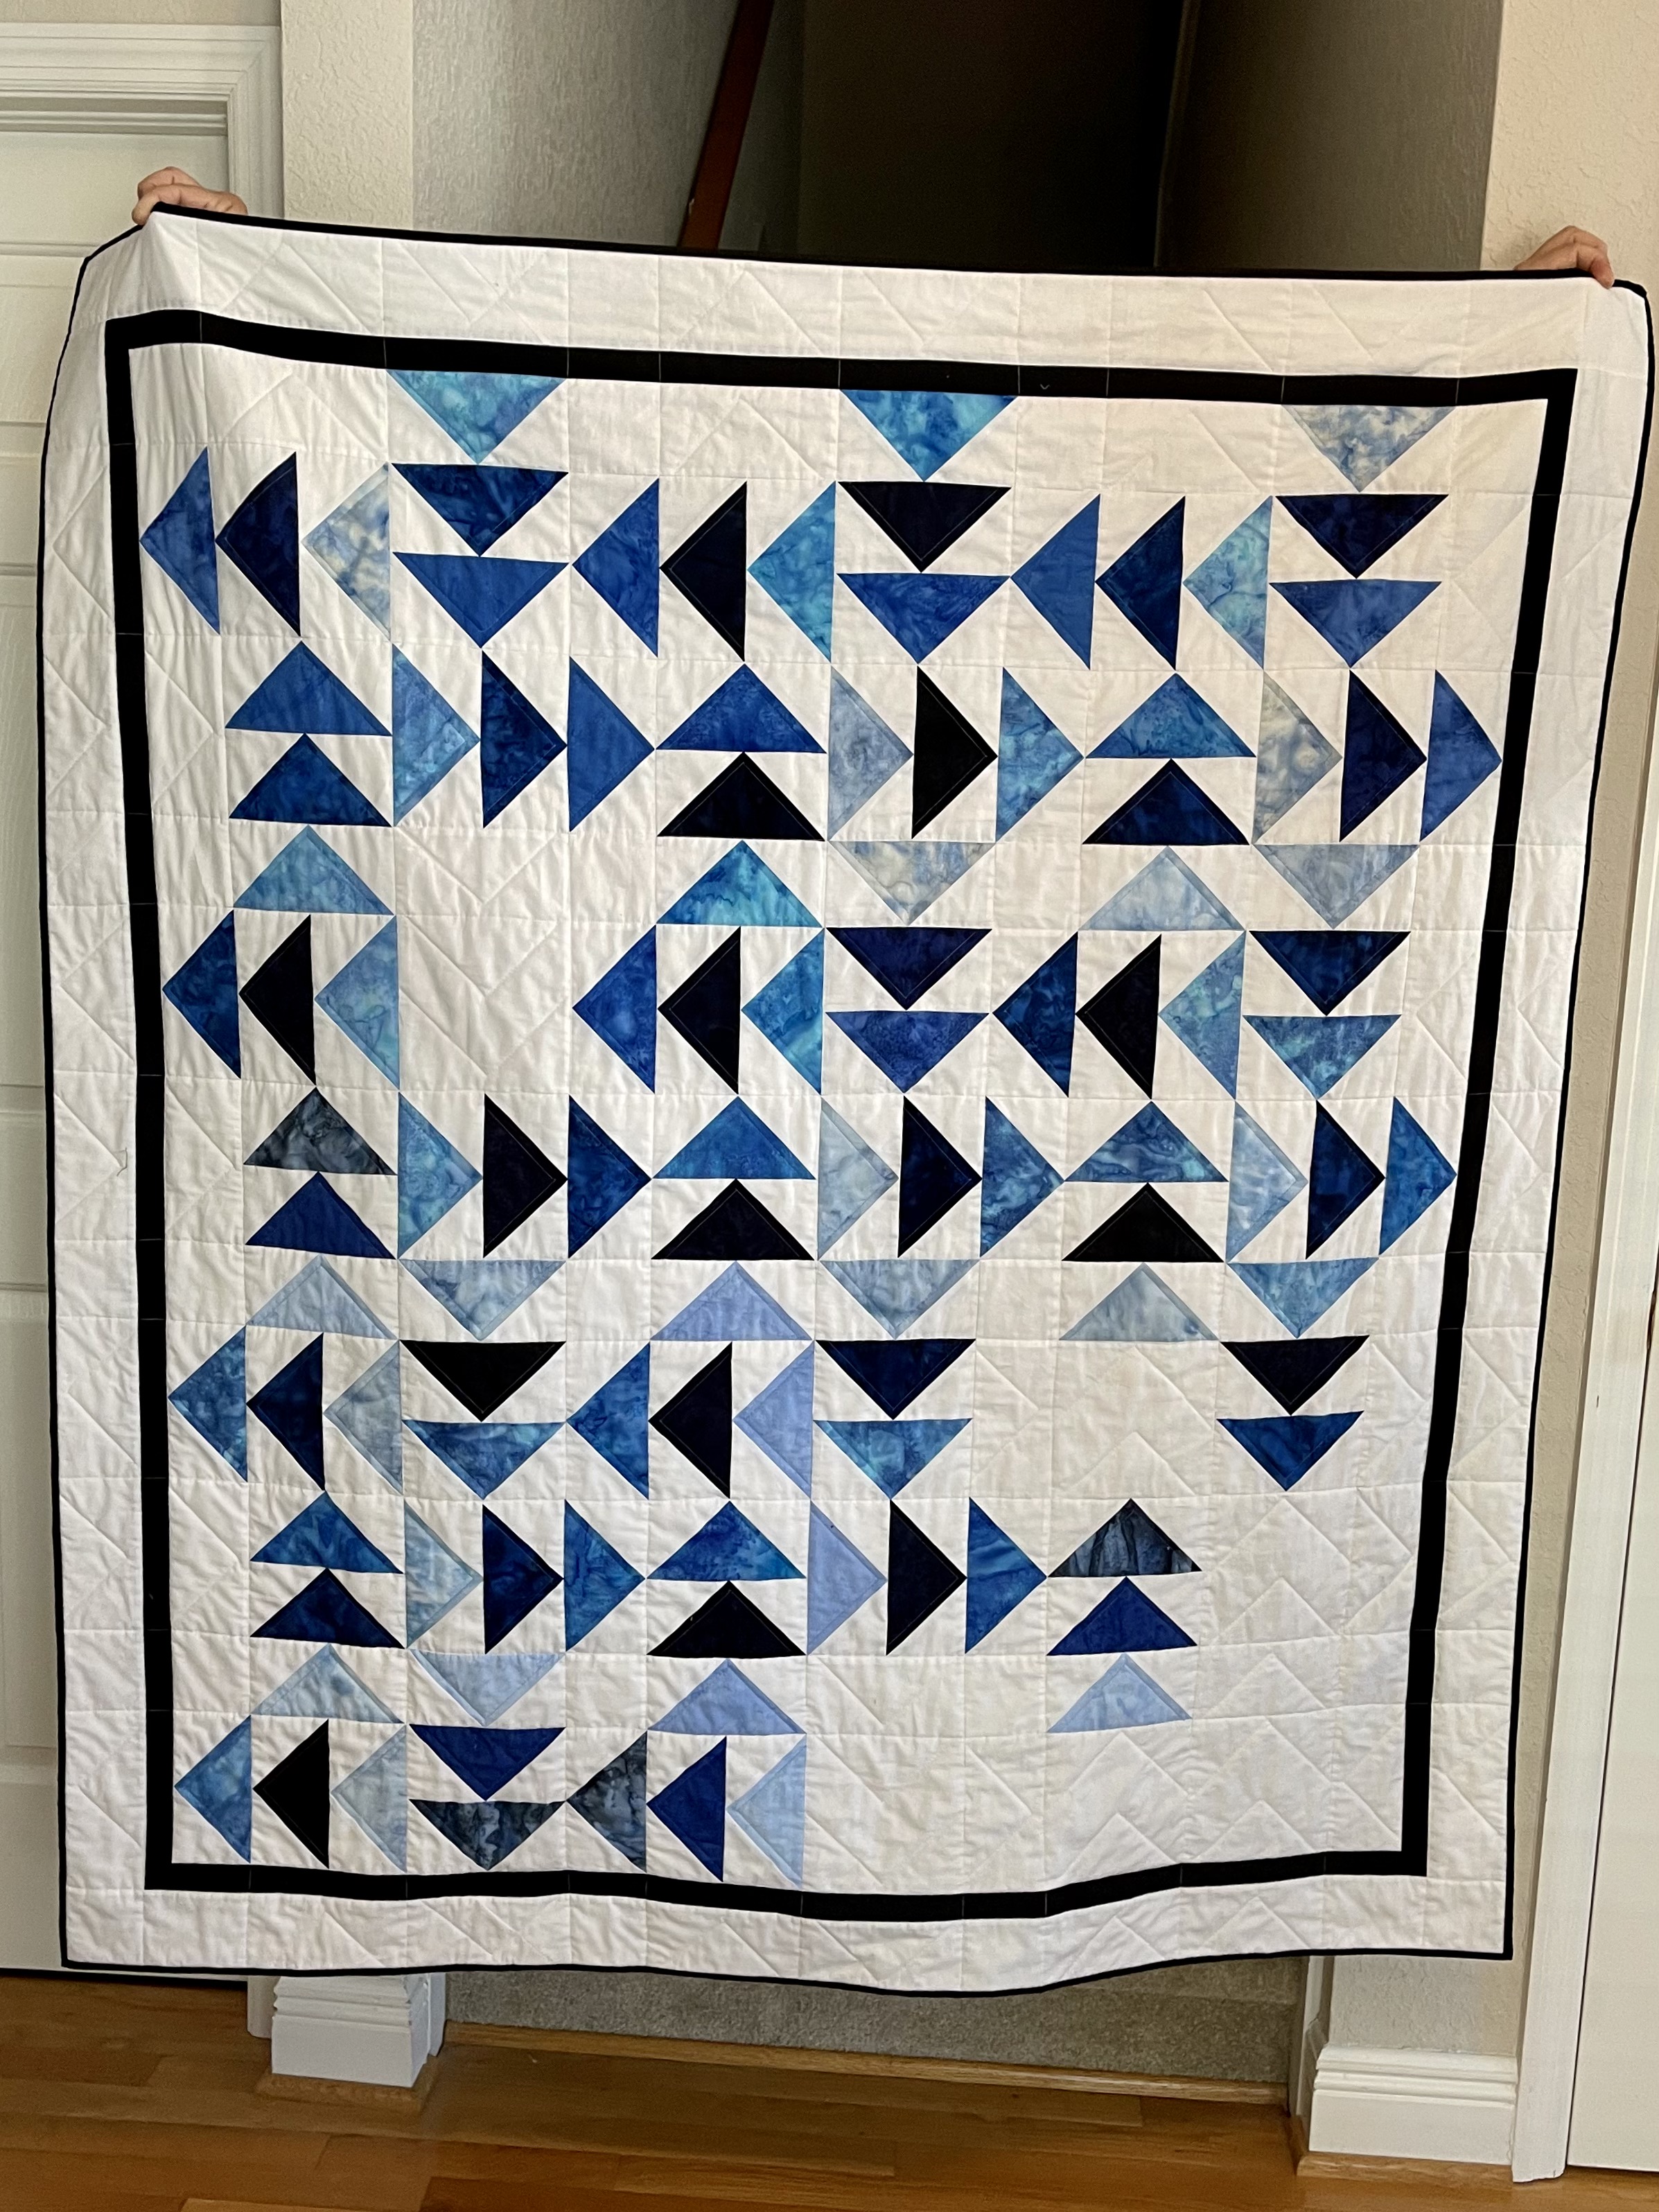
The quilt I made is called South Seas Shuffle. It is a large lap quilt size 56″ x 62.”

South Seas Shuffle Quilt.
South Seas Shuffle Quilt


This is a modern quilt using the traditional flying geese block. It’s modern in that the geese are going in many directions, there are large white negative spaces and there are partial seam blocks in the construction of the quilt. I will have a pattern coming out in February 2022 for this quilt after the testers are done testing the pattern. I also will have a YouTube video for how to sew the partial seam block unit in this quilt. The batik bundle I was provided was Brilliant Blues. Look at this glorious selection of blue batiks. Island Batik developed ten different colorways of gradations with 20 steps in each. There are so many quilt projects that make use of gradations in color and value. Yardage for the Gradation Batiks may be found at your local quilt shop that carries Island Batik, such as Fabric Smart in St. Petersburg FL. You may find them online at www.fabric-smart.com or call them at 727-914-8850.

BB Bundle
BB Bundle
Brilliant Blues
Brilliant Blues


The idea behind the step by step challenge was to incorporate the gradation of light, medium and dark colors into a quilt. Sometimes it is difficult to determine if a color should be placed into the light, medium, or dark category. In order to do that, it helps to place them next to each other. If it is still too difficult to determine, a little trick is to take a picture of them and then use the filters in your phone’s camera app to turn the picture into a B&W monochromatic picture. Then it is easier to see the differences in values. Squinting at the photos and fabrics helps as well. In the photos below, it looks like the 1st and 3rd batiks might be about the same value, but in the B&W photo, you can see the the 3rd batik is clearly lighter that the 1st. So in the color photo, the 1st batik is the dark, the 2nd and 3rd are the mediums and the 4th batik is the light value. The value of a fabric can change when you place different lights and darks next to it.

Color values
Color values
black and white image


I downloaded the images of the fabric collection into my Electric Quilt software, which is the software I use to design quilts. This is what the quilt looked like in the software.

South Seas Shuffle Quilt in EQ8


I used the measurements of the Accuquilt Flying Geese die to create the size of the blocks. Then the EQ8 software told me how much yardage I needed of each fabric and gave me the rotary cutting diagrams for the non-Accuquilt pieces.

Each one of the flying geese blocks has a blue batik with a light, medium and dark value. This creates the gradation in colors. I cut the blue batik quarter square triangles, which are in the flying geese blocks, using the Accuquilt cutter and die. Since the Accuquilt cutter and die cuts off the dog ears, it is easy to line up the pieces for sewing and there is no trimming that needs to be done after the pieces are sewn together.


When the quilt top was all sewn together, I took it outside to let the sun shine through the quilt as I knew these brilliant blue batiks would sing in the sunshine and wow did they.

SSS see through
SSS see through


Looking at this photo on my iPhone, I discovered something new called Lookup -Artwork. When I clicked on that, it showed me different artist’s works that were similar in feel to my quilt. I was amazed by what they came up with, so I though I would share those other artist’s works with you.

Other's Artwork
Other’s Artwork
Other's Artwork
Other’s Artwork
Other's Artwork
Other’s Artwork
Other's Artwork
Other’s Artwork
Other's Artwork
Other’s Artwork


To quilt the quilt on my Bernina 770 QE, I did stitch in the ditch with the edgestitch #10D foot.

Stitch in the ditch quilting


I did some quilting in the negative white spaces to mimic the flying geese that were in the other blocks. I used the Creative Grids “Chevy” ruler, designed by Angela Walters, to do this quilting.

Negative space quilting


I also wanted to do some echo quilting, which means quilting next to the seam lines, within the blue flying geese. So, I switched to a blue Aurifil thread and then used the Line Tamer ruler by Fourpawsquilting.com to get straight lines with my echo quilting.

Four Paws ruler
Four Paws ruler
Echo quilting
Echo quilting


I used a new Schmetz 70/10 quilting needle. Using new needle on a new quilting project just makes your life so much easier.


I used Hobbs Heirloom 80/20 Bleached batting as the quilt top had a lot of white in it and I did not want the batting to show through the fabrics. This batting was very easy to quilt on my Bernina. It is fairly thin and gives your quilt a beautiful drape and also lays fairly flat. It is also light weight and breathable so it makes a good batting for a summer quilt or if used in a warmer climate.  It’s loft is 1/8″; it’s shrinkage is 3-5% and the maximum stitch distance when quilting is 4.”

HobbsHeirloom8020Bleached


What I liked about using Island Batik fabrics:

  1. The colors are so vibrant.
  2. There is a wonderful texture in the fabrics.
  3. They have very little fraying after they have been cut.
  4. They produce very little lint in your sewing machine.
  5. They are tightly woven, yet very light. I had been working with the batiks for awhile and then switched to regular quilting cotton. I thought the quilting cotton was so heavy that I had a double layer, but I did not. The light weight of the batiks would make for an overall lighter quilt, depending on your batting and how much quilting you put onto the top.

The supplies I used to make this project were provided by:

Island Batik Foundations Fabrics: Brilliant Blues, White, and Black for the top and Pearl for the backing.

Aurifil 50 wt Thread (white. black and blue)

Hobbs Heirloom 80/20 Bleached Batting

Schmetz 70/10 Quilting needle

Accuquilt Go! Big Cutter and die #55456 Flying Geese 


Thank you Island Batik, Aurifil Thread, Hobbs Batting, Schmetz Needles and Accuquilt.

Island Batik
Island Batik
Aurifil Thread
Aurifil Thread
Schmetz Needles
Schmetz Needles
Hobbs Batting
Hobbs Batting
accuquilt
accuquilt


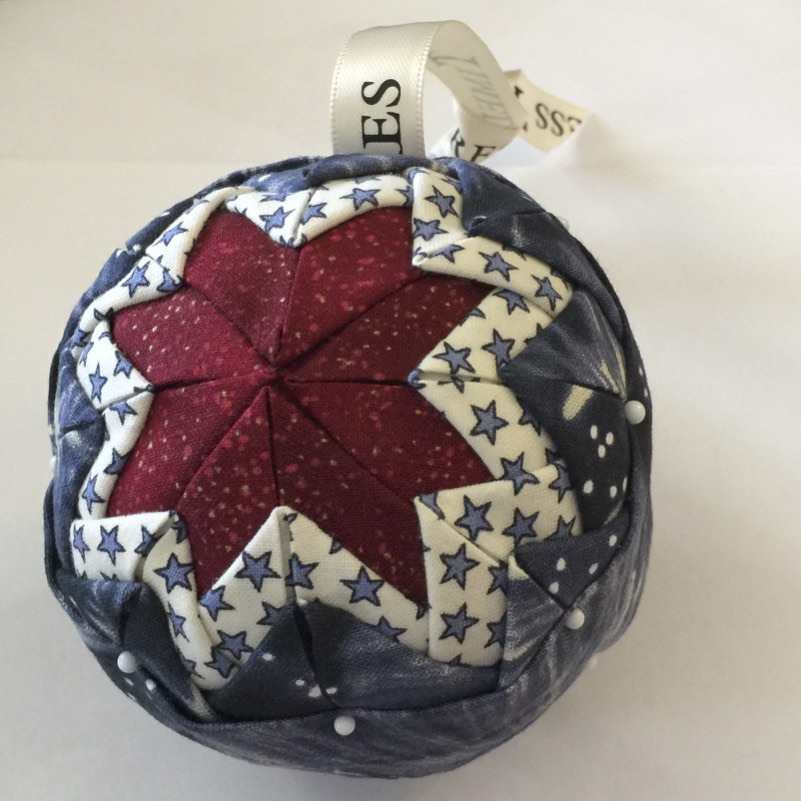
Blue Bear likes this quilt because of its fabulous blue colors. He hopes you like it too!

Blue Bear with quilt

The other amazing Island Batik Ambassadors are also posting their first quilts of the year. They are all making wonderful gradation quilts in a rainbow of colors. Check out their projects by clicking on the links next to their names to be directed to their blog posts.

Brenda Alburl ~ Songbird Designs

Megan Best ~ Bestquilter

Pamela Boatright ~ Pamelaquilts

Elizabeth DeCroos ~ Epida Studio

Jennifer Fulton ~ Inquiring Quilter

Preeti Harris ~ Sew Preeti Quilts

Mania Hatziioannidi ~ Mania for quilts

Jane Hauprich ~ Stitch By Stitch Custom Quilting

Connie Kauffman ~ Kauffman Designs

Emily Leachman ~ The Darling Dogwood

Denise Looney ~ For The Love Of Geese

Leah Malasky ~ Quilted Delights

Maryellen McAuliffe ~ Mary Mack Made Mine

Anorina Morris – sameliasmum.com

Lisa Pickering ~ Lisa’s Quilting Passion

Claudia Porter ~ Create with Claudia

Gail Renna ~ Quilt Haven Threads

Brianna Roberts ~ Sew Cute And Quirky

Michelle Roberts ~ Creative Blonde

Gail Sheppard ~ Quilting Gail

Andi Stanfield ~ True Blue Quilts

Sandra Starley ~ Textile Time Travels

Jennifer Thomas ~ Curlicue Creations

Suzy Webster ~ Websterquilt

#islandbatikambassador #islandbatik #iloveislandbatik 

 #hobbsbatting #accuquilt #accuquiltgo #aurifil #aurifilthread #schmetzneedles #doyoueq #bernina 


Posted on 14 Comments

Greek Isles Modern Quilt

For the 2017 Blogger’s Quilt Festival, I thought I would share Blue Bear’s most popular pattern, Greek Isles Modern. 

This pattern is much easier than it looks. It is made with 2.5″ strips of white and 2.5″ strips of light, medium and dark batiks, that you may obtain from jelly rolls, or cut on your 2.5″ strip die with your Accuquilt Go! Cutter. The blocks are all constructed the same way, and placement is what determines the pattern. At 70 x 90,” it is the perfect quilt to curl up with on the couch for binge watching your favorite Netflix shows.

Here is a picture of Kim at Keep Me in Stitches in Largo, Florida, quilting this beauty; followed by a close up of her fantastic quilting.


Here are several more photos of the quilt out and about.


I have taught this class several times and here are some of my students interpretations of the quilt. Click on the links for short videos. They did a fantastic job!

4D1F584E-4BF0-4F0B-9EC4-06091ACAE8FC

IMG_0865

If you would like to purchase this pattern, it is available on our website here, www.bluebearquilts.com, or on Craftsy here- https://www.craftsy.com/quilting/patterns/greek-isles-modern-quilt/490532

Greek Isles Modern Quilt Cover

Sharing at the Blogger’s Quilt Festival hosted by Amy’s Creative Side.

Posted on 4 Comments

Free Tutorial-Quilted Holiday Star Ornaments (No Sew)

Quilted Star Ornament

Quilted Holiday Star Ornaments (No Sew)


You could make one of these every year year.  Keep them for yourself, or give them as a gift. Once you learn the technique, you can put photos on fabric in the middle or use something small that you have cross-stitched or embroidered.  Have fun making these as they do not need to be perfect to look fantastic!

Quilted Star Ornament – Supply List

(1) 3” Styrofoam ball

(1) 1/8th yard dark fabric

(1) 1/8th yard light fabric

(1) 1/4th yard 2d dark fabric

(1) box dressmakers pins 1 1/16th inch, at least 300 count

(1) box extra-fine glasshead pins in color of your choice

(1) 1/4th yard decorative silky ribbon to create hanger


Quilted Star Ornament – Preparing Fabric

  1. You need 2.5″ squares of coordinating and contrasting fabric.  You will need 3 coordinating fabrics and one of them should be a light color and the other two can be a darker color. Press your fabrics, and then using a cutting mat and rotary cutter, cut 2.5″ strips and then sub-cut the strips into 2.5″ squares.  For a 3” Styrofoam ball, you will need 10 squares of the first dark color and 16 squares, each, of the light colored fabric and the 2nd dark colored fabric.

    2.5" squares
    2.5″ squares
  2. Now, it’s time for the pressing of the prairie points. But first, set aside 2 squares from the first dark color, of which you started with 10, that you will not be pressing.

a. Fold the all the rest of the 2.5″ squares in half to make rectangles that are 1.25” x 2.5.” Press with your iron on steam setting. Do not iron, just press.

Half Rectangles
Half Rectangles

b. Then fold the just made rectangles again to make squares that are 1.25” x 1.25”.

1.25" folded squares
1.25″ folded squares

c. Once you have the small, twice folded, squares, you open them back up to the rectangle and then fold the upper, left and right, corners in to meet the center crease line in the middle of the rectangle. Be precise when lining up the edges to the center; the closer (without overlapping the edges) the better. This makes a neat equilateral triangle (a prairie point) with the folded edges meeting in the center of the front of the triangle. When you have formed the prairie point, you carefully press. Be careful not to burn your fingers. You will end up with 40 small prairie points and 2 squares that have not been pressed.

Prairie Points
Prairie Points
Prairie Points close up
Prairie Points and squares

Quilted Star Ornament – Pinning the Pieces

To create the quilted look, you pin the prairie points to the foam ball in concentric layers.

Start by placing the two unfolded squares, evenly spaced apart, one at the top and one at the bottom, on the foam. Pin each corner of the squares to the foam and have the corners from each square almost meet each other, evenly spaced apart.

Squares on opposite sides

Round 1 of Prairie Points (1st Dark color that has 8 remaining squares)

  1. Place your first prairie point directly on the 2.5″ square just placed at the top of the foam. Match the wide edge of the prairie point triangle with the corners of the square. Pin the bottom wide corners of the prairie point to the foam, first, and then the upper point. Then pin, to the foam, the upper point of the prairie point in between the two folds, a little below the top edge of the prairie point. You want to place the pin right in the creased edge of the fold so that the fold will cover it. Pull the folded flaps over this pin to hide it. When finished with a prairie point, the two pins at the bottom of the triangle will be showing and the pin at the upper point will be covered by the folded edges.

    First Prairie Point
    First Prairie Point
  2. Using the same method, complete the second prairie point directly across from the first one. The upper points of these two prairie points will meet in the middle of the unfolded square on the foam ball.

    Second Prairie Point
    Second Prairie Point
  3. Using the same method, place the 3rd prairie point in the empty space beside the two just placed prairie points.
  4. Pin the 4th prairie point in the remaining open space on the unfolded square to finish this round. You will have 4 prairie points in the center of the foam ball and all points should match up and not be overlapping each other at the center. They may overlap each other a little at the bottom of the prairie points. You will repeat this process on the opposite side of the ball and can do so now or after you have finished all 3 rounds on the top first.

    Completed Round 1 on one side
    Completed Round 1 on one side

Round 2 of Prairie Points (Light color that has 16 squares)


  1. In this next round, you can decide how large you want your center star to be by deciding how much of the first round you want to leave showing. A good approximation is to start the 2nd round about ½” below the top of the first round. You should be able to fit 3 rounds without using more than half of the foam ball’s space.
  2. To start round two, this time, place the prairie point’s upper point pin in first, right in the middle of the fold line of the first prairie point, from the previous round, about ½” from the top of the round 1 prairie point and then pin down the outer corners of the prairie point. It helps to put a pin anywhere on the prairie point, while pinning this center point first, and then remove this temporary pin. Use the same technique from round 1 of placing the upper point pin between the two folds a little below the top edge of the prairie point and pull the folded flaps over the upper point pin to hide it. Then pin the outside corners of the prairie point. These outside corners will overlap each other.

    Round 2, 1st Prairie Point
    Round 2, 1st Prairie Point
  3. Place the second prairie point, of round 2, completely opposite of the one placed in # 2 above. Just like last time, pin the center, hide the pin, and then pin the corners of the prairie point.
  4. Using the same method, place the third prairie point, of round 2, 90 degrees from prairie points 1 and 2 just created.
  5. Using the same method, place the 4th prairie point, of round 2, directly opposite of the piece created in # 4 above.
  6. Now there are 4 long sections of the first round (dark color) that are exposed and are creating an “x.”
    Round 2 "X"
    Round 2 “X”

    You will now be placing a prairie point in each of the legs of that “x.” Place a 5th light color prairie point in one of the areas not covered by the previous 4 pieces from round 2. Place this prairie point in the line formed where the edges of the round 1 prairie points meet and just slightly below the level where the previous 4 round 2 prairie points were placed.

    Round 2, 5th Prairie Point
    Round 2, 5th Prairie Point

    You are adding another layer to round 2, of the same color, and are now going to start forming your star. Just like before, pin the center point, hide the pin, and then pin the corners of the prairie point.

  7. Place the 6th prairie point completely opposite of the one placed in # 6 above.
  8. Place the 7th prairie point 90 degrees from pieces 6 and 7 above.
  9. Place the 8th prairie point directly opposite piece # 8. You will now see your first star formed from the dark color of round 1.

    Completed Round 2 on one side
    Completed Round 2 on one side


Round 3 of Prairie Points (2d Dark color that has 16 squares)


  1. Now you will place a third round of prairie points on top of round 2. Start with the first prairie point that you placed in round two and going about ½” from the upper point of the round 2 prairie point, place the point pin of the round 3 prairie point first, in the folds of the round 2 prairie point, just like you did for the last round, and then pin down the outer corners of the round 3 prairie point.

    Round 3, 1st Prairie Point
    Round 3, 1st Prairie Point
  2. Place the second prairie point completely opposite the one in # 1 above.
  3. Place the third prairie point 90 degrees from the prairie points created in # 1 and 2 above.
  4. Place the fourth prairie point directly opposite of prairie point # 3 above.
  5. Now there are 4 prairie points of the second round (light color) that are not covered by round 3. You will next place a prairie point in each of those 4 prairie points. Place a 5th dark color prairie point in one of the areas not covered by the previous 4 pieces from round 3. Place this prairie point in the center line of the round 2 prairie point and just slightly below the level where the previous 4 round 3 prairie points were placed. You are adding another layer to round 3, of the same color, and are now going to start forming your second star. Just like before, pin the upper center point, hide the pin, and then pin the corners of the prairie point.

    Round 3, 5th Prairie Point
    Round 3, 5th Prairie Point
  6. Place the 6th prairie point completely opposite of the one created in # 5 above.
  7. Place the 7th prairie point 90 degrees from prairie points # 5 and 6 from above.
  8. Place the 8th prairie point directly opposite of the one created in # 7. You will now see your second star.

    Completed Round 3 on one side
    Completed Round 3 on one side

Optionally, If you have room for another layer without going over the half way point of the foam ball, switch colors and repeat steps from round 3. You would need to cut 16 additional 2.5” squares of the new color.

When finished with one side of the foam ball, flip over the ornament and repeat all steps. If you repeated each round on the opposite side as you went, this step is already completed.


Quilted Star Ornament – Finishing Steps

Where the top and bottom edges meet is where you will place a fabric strip or ribbon. Usually the edges don’t match up perfectly. You can make the fabric strip the width needed to make sure you cover it all. Notice my edges and how at one spot the prairie points overlap each other and in another spot there is a gap.

Ornament Unfinished Edge


Finishing the Ornament

If you used a different sized ball, wrap a measuring tape around the ornament to determine the size of ribbon or fabric needed to cover the edge. For the 3” foam ball, I used a 12″ x 2.5” strip of fabric. You can use whatever color of fabric you want, but if you used the same fabric as in the round three prairie points, it will create a more harmonious look.

Coordinating Fabric Strip

Fold the strip in half, wrong sides together and press. Open the strip and fold both long edges of the strip toward the center line so that they meet in the center and then press. Fold each end of the strip in about a ½ “ and press. You end up with a 1.25″ finished strip to wrap around the ornament.

Determine the top of your ornament, if you have a preference. Wrap the fabric strip around the edge of your ornament and secure with the glass head pins at the intersections of the prairie points. When you come to the top, lay your hanger ribbon under the fabric strip and secure the ribbon and fabric strip to the ornament with four glass head pins. Tie your hanger ribbon in a knot at the top.

Attaching Strip and Ribbon

Optionally, you can attach the fabric strip and the hanger ribbon with a glue gun, if you prefer.

Keep in mind this is a handmade item and is not going to be perfect. The imperfections are what make it unique and special. There are no rules for the colors that are used or the spacing used between the rounds. Make it yours! You can make these into hanging ornaments, or decorative balls to place in a bowl or basket. The first round does not need to be prairie points. You can substitute a photo on fabric for the center square, or use a small piece of cross-stitch or embroidery as the center. To do this, you would skip the placement of the round one prairie points and start with round two after you have placed your photo or needlework.

Your ornament is ready to hang on your tree or give as a gift.

Folded Fabric Star Ornament

Please let me know if you have any questions and please share any ornaments that you make with the hashtag #bluebearquilts.


Posted on Leave a comment

Quilt Block of the Week- September 5, 2016

Week 4- September 5, 2016

Jacob’s Ladder


Happy Labor Day. I hope everyone is enjoying their time off with their families.

This week’s block is the Jacob’s Ladder. It has a Biblical reference as it refers to the story of Jacob found in Genesis 28: 10-12. The block also has many other names such as “Road To California, “Double Hour Glass” and “Covered Wagon,” suggesting that they were popular with the early pioneers headed west. Here is an example of what the block historically looked like.

Traditional Jacob's Ladder Quilt Block
Traditional Jacob’s Ladder Quilt Block

Notice that the block is a nine patch construction, which was discussed in a previous post, containing 5 four patch blocks, also discussed in a previous post, and 4 new blocks that are called half square triangles (HST.) See example below. This block is documented as having been made into a quilt at the beginning of the 20th century. It was originally made with two contrasting colors, a light and a dark. The block often has another name, ” Underground Railroad,” associated with it, but it has not been documented that this block existed around the time of pre Civil War, when the Underground Railroad was happening, and may have gotten the name later as a remembrance.

Example of half square triangle

This is an excellent block for a novice quilter as sewing the HSTs together is easy as you just have to sew two triangles together. It can be a little tricky to get those points on the end to match up, so one of my favorite tools to create the Jacob’s Ladder patches is my Accuquilt Fabric Cutter. It precision die cuts the pieces so they are perfectly cut. On the triangles, it cuts off the dog ears (the points that stick out) so that the ends are easy to align. Here is a link to the Accuquilt website, where you will find the fabric cutters and lots of fun dies. http://www.accuquilt.com.

Two “Go! Dies” that could be used to make this block are the 2.5″ square and the 2″ finished half square triangle.  You will notice that the dies are two-tone, making it easy for you to place the fabric on the die. Then you place a plastic mat over the fabric and run the die, with the fabric and mat on it, through the cutter. There are manual and electric fabric cutters. Here is a picture of a “Go! Fabric Cutter” and the square and triangle dies. (Click on the thumbnails to make the pictures larger.) They are frequently on sale.


Continue reading Quilt Block of the Week- September 5, 2016

Posted on Leave a comment

New easy pattern for your holiday and Christmas gift giving

New Easy Pattern just in time for the holidays.

Snow Angels Quilt Pattern

The Bear has just released a new pattern called, “Snow Angels.” It is part of their BB Sew Easy Series of patterns that are designed for beginners. The pattern involves a center panel that is surrounded by half square triangles. This would be a great gift to give someone that is new to quilting and just getting started. It is also great for more experienced quilters to have a quick project that they can sew up as gifts for someone special on their holiday gift giving list.

Here is a link where you can download this adorable pattern for just $7.95:

https://www.etsy.com/listing/468515609/snow-angels-quilt-pattern-baby-quilt?ref=shop_home_feat_4

During the Dog Days of the summer, this pattern looks very refreshing!

Posted on Leave a comment

Blue Blear Quilt Kits & More’s first pattern

Blue Bear Quilt Kits & More’s first pattern has gone live on Craftsy. It is a perfect quilt for a newborn baby or a young toddler. Children will be so excited to show everyone the teddy bears dancing around the blue stars on their very own quilt. This is a beginner quilt project and if you can sew a 1/4″ seam and a blanket stitch, you can make this quilt in a weekend. Blue Bear will have the kits available for this quilt pattern in their Etsy store very soon.


Check it out!

http://www.craftsy.com/pattern/quilting/home-decor/dancing-bears–easy-childrens-quilt/200240?fresh=true&NAVIGATION_PAGE_CONTEXT_ATTR=PATTERN