Posted on 2 Comments

Island Batik Ambassador- September 2023 Project- Out of This World Quilt- Part of the Pieced To Perfection Blog Hop

Me with the quilt

This month’s blog hop is called Pieced To Perfection as the Island Batik Ambassadors will all be making a quilt project using different upcoming fabric collections from Island Batik and paper piecing. I am looking forward to seeing all the wonderful projects that will be created during this month’s Island Batik blog hop, as paper piecing allows such perfect points in your piecing. If you dread paper piecing because of all the paper you have to rip out, be sure to read this month’s post and watch my accompanying YouTube video to see how to do a method that uses freezer paper and then there is no paper that needs to be removed later. This is game changing! Since this month is a blog hop, you can check out the Island Batik blog and enter each week to win a fat quarter bundle of some of the fabrics the Ambassadors are using in their projects. I will show the other fabric collections later in this blog along with a link to the giveaway from Island Batik and links to other ambassador’s blogs.

Pieced To Perfection Blog Hop


Check out the fabric I was given to use: Pin Dot Floral by Kathy Engle from Island Batik. Just look at this gorgeous pastel collection of batik fabrics with a floral theme.  The Pin Dot Floral collection may be found at your local quilt shop that carries Island Batik, such as Boutique4quilters in Melbourne, FL and Fabric Smart in St. Petersburg FL. This collection should be in your local quilt shop this Fall. You may find them online at https://www.boutique4quilters.com/ or call them at (321) 768-2060 or www.fabric-smart.com or call them at (727) 914-8850. Another online option for you to shop for this fabric would be Hancocks of Paducah: Hancocks of Paducah

Pin Dot Floral 2
Pin Dot Floral 2

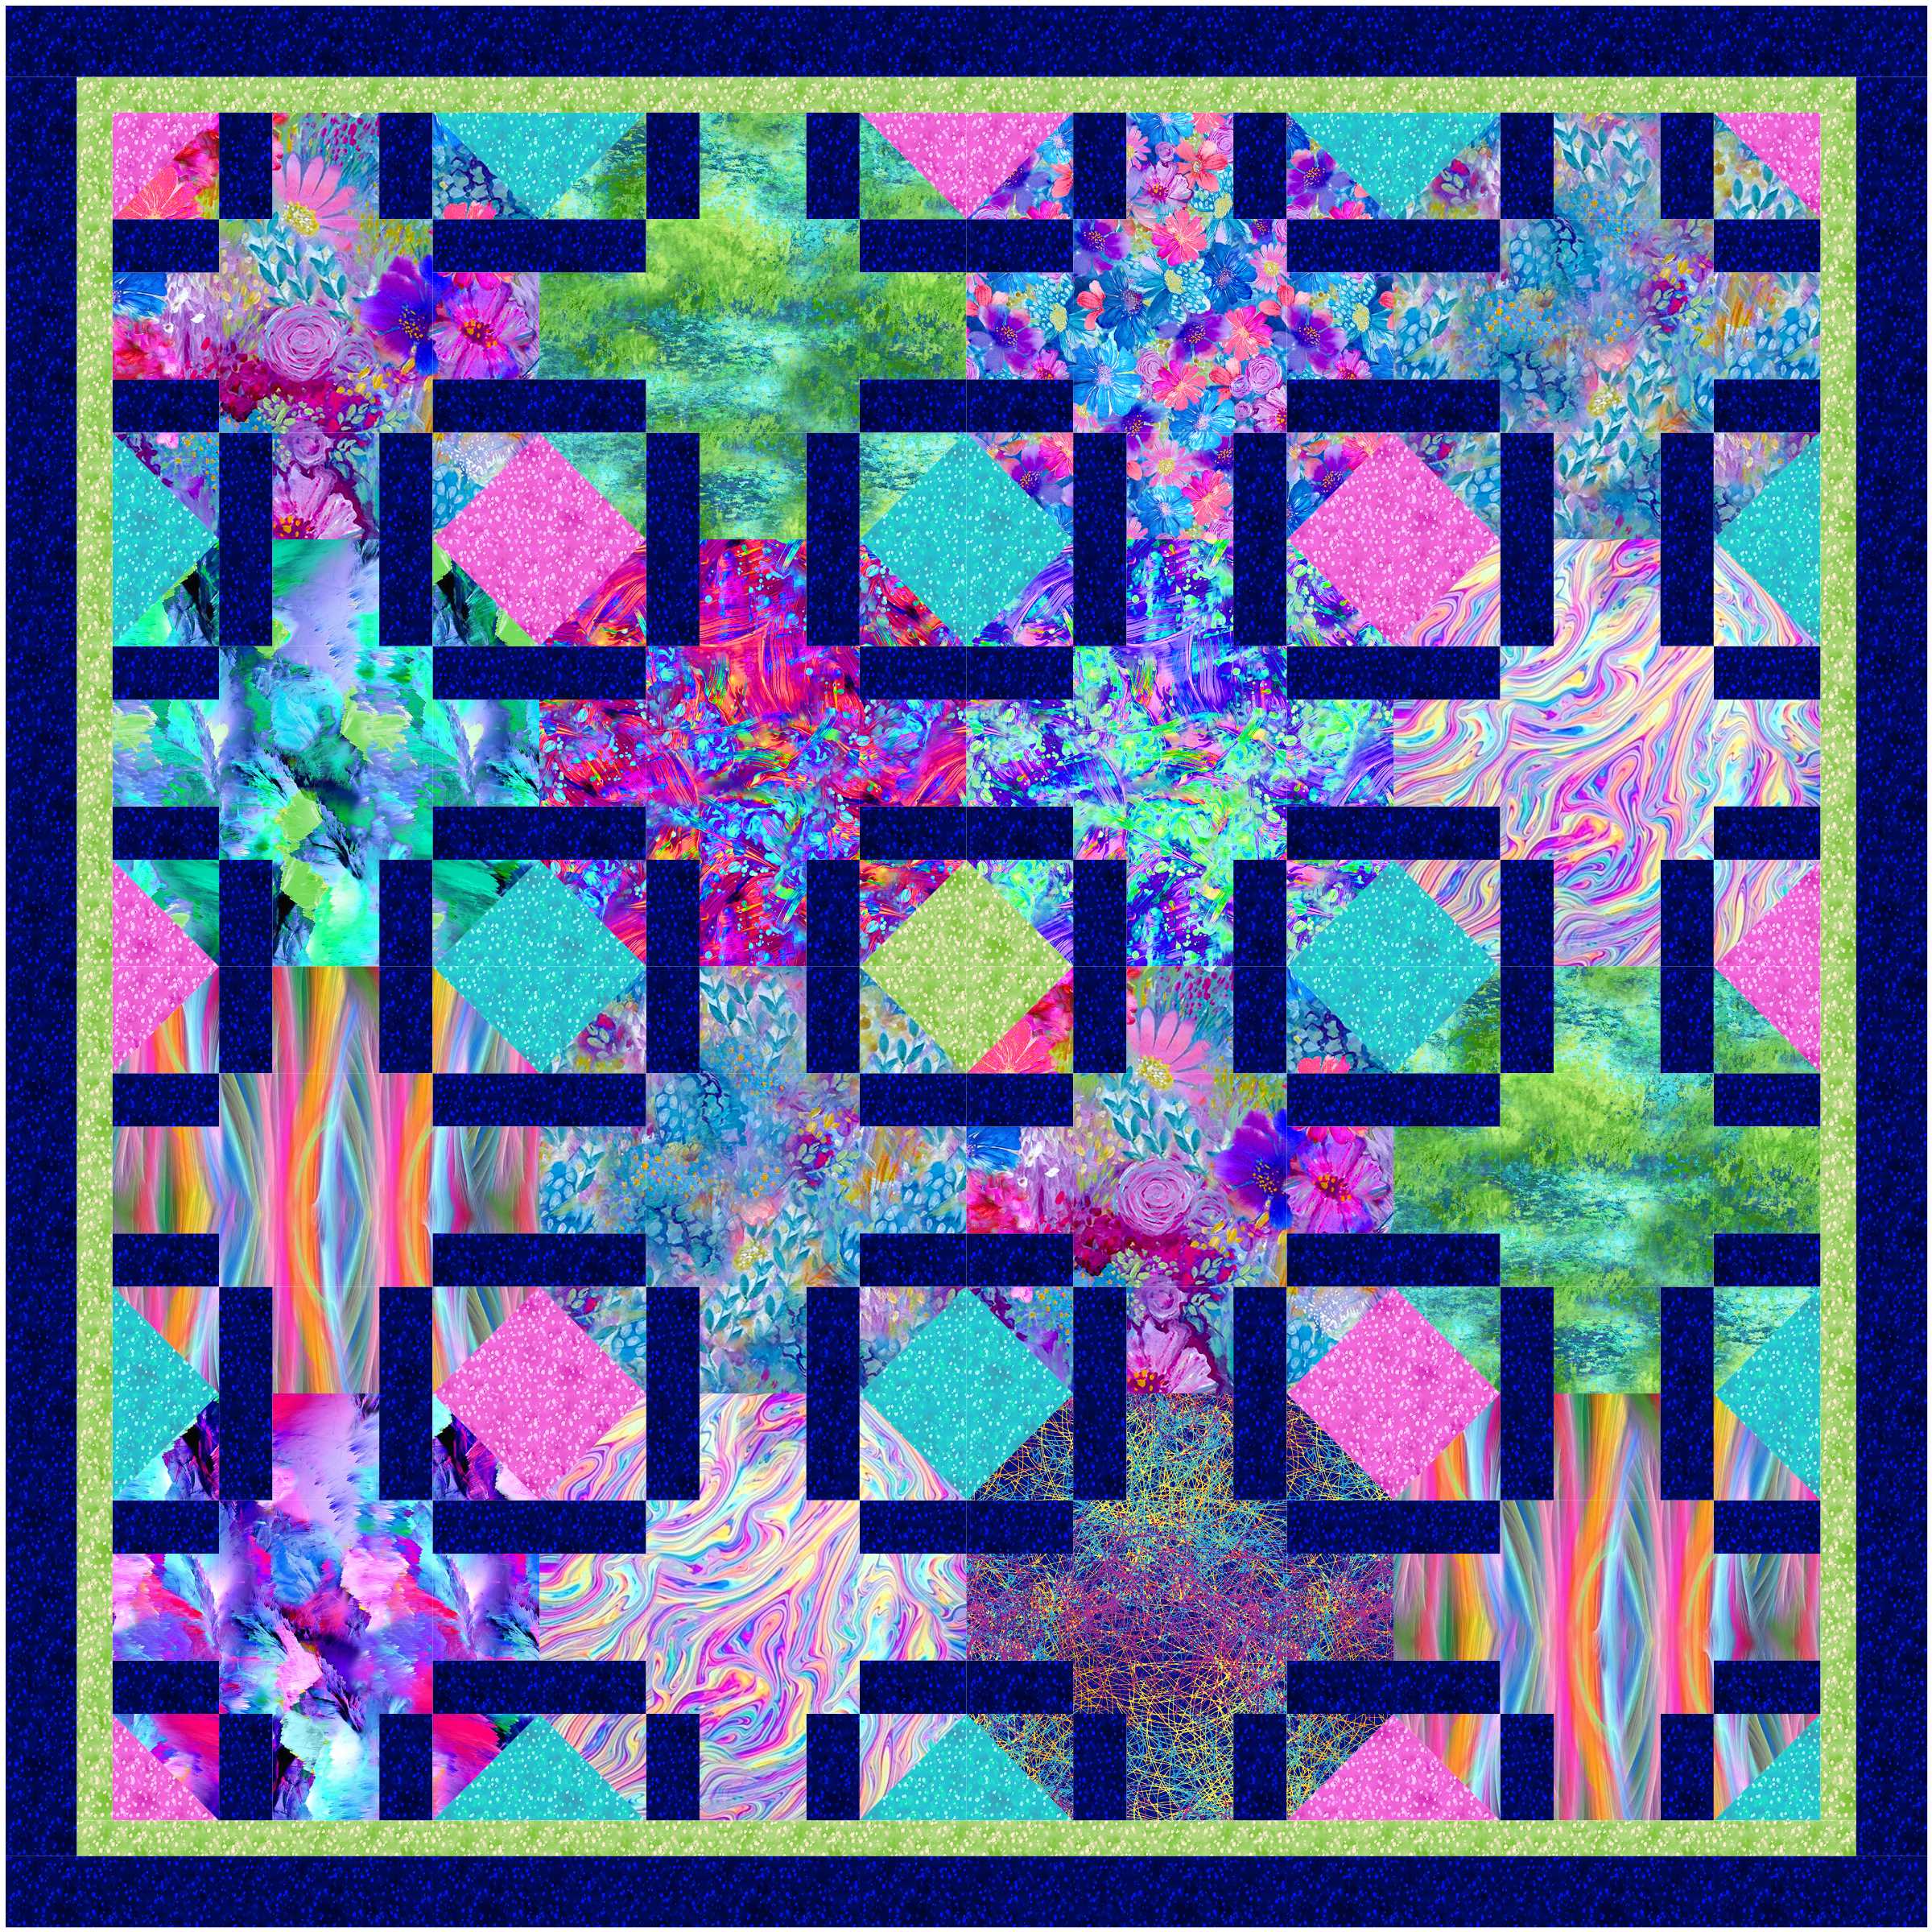
The quilt I made is 57″ x 57.” It has various shades of pink, blue and green, along with  black and white. The Pin Dot Floral collection has many floral elements like leaves, ferns, berries, flowers and butterflies. I named this project “Out of This World”, as it has a retro spaceship feel to it and there is an optical illusion that gives the quilt a rounded or global image. Making this quilt was easy and fun using the freezer paper piece method. I will have a pattern for the Out of This World quilt available on my website later this fall.

Out of This World Quilt

Here is a closeup of the Pin Dot Floral batik bundle I was provided. Aren’t these fabrics just glorious?

Pin Dot Floral Fabric
Pin Dot Floral Fabric 

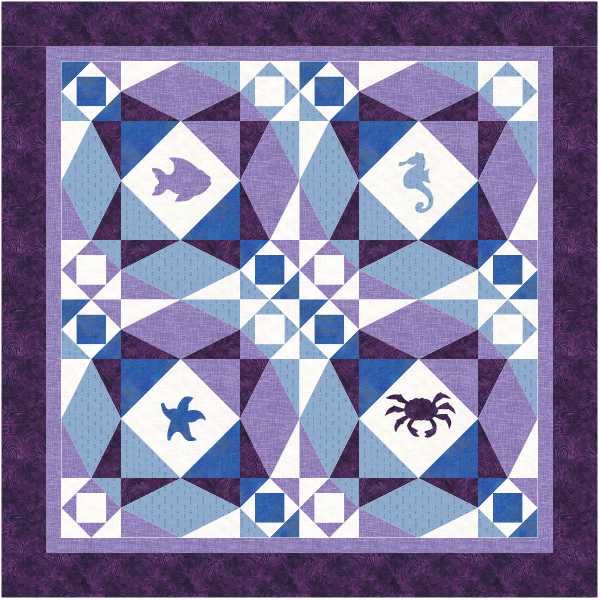
I used Electric Quilt 8 software to design this quilt, which is shown in the 1st photo below. The second set of 4 photos, below, are alternative versions of the quilt which I thought of making and they all use the same block. This block is so easy to work with and you can see that it created a stunning array of quilts. The 6th photo, below, is a recolored version of a Quilt of Valor I designed for Love of Quilting magazine a few years ago, which can also be made with the freezer paper piecing method.  

EQ8 Out of This World Quilt
Alt 1
Alt 1


Alt 2
Alt 2


Alt 3
Alt 3
Alt 5
Alt 5


Alt 4
Alt 4

The first thing to get started on this project is to get your supplies and tools all lined up. You of course will need some beautiful batiks like the Pin Dot Floral collection from Island Batik. Some Aurifil 50 wt. cotton thread will do a good job of piecing and quilting later on. You will also need pins, a ruler, rotary cutter, cutting mat and some snips. You will need Reynolds Freezer Paper, the plastic coated kind, and an ink jet printer. A nice firm postcard will allow you to fold the template on the line with a nice sharp crease and will provide an edge for the Add-A-Quarter ruler to butt up against. Finally, two optional tools are the Add-a-Quarter ruler and a light box so you can see the lines through the paper for the placement of your fabric. If you want to see, in detail, a demonstration of me using these supplies to make the Out of This World quilt, I will provide a link below to a YouTube video where I show how I made this quilt. 

supplies needed
supplies needed

Below is a photo of a completed block. Notice the sharp, skinny, black points you are able to achieve with this method of paper piecing.

completed block
completed block

It is important that you cut pieces that are large enough to cover the shapes in the block. I measured how big the shape was for covering the first batik piece and then cut strips that size. The upcoming pattern will have the measurements for these strips that need to be cut from the colored batiks and the black and white fabrics.

Cutting green strip
Cutting green strip

Next, you press the block pattern, which has been printed onto the paper side of the freezer paper, with the plastic coated side onto the wrong side of the batik. This is what holds the fabric in place while you are sewing. The plastic on the back of the freezer paper template is easily removed later and does not leave a residue on the fabric.   


Pressing green to freezer paper

It helps to pre-crease the lines on your block pattern template. You fold the freezer paper template on the first line, on the paper side, with your postcard edge on the line, and then trim the fabric that is sticking out with either an Add-A-Quarter ruler or the 1/4″ line on a regular ruler. This creates a straight edge for you to line up the next piece. The beauty of the Add-A-Quarter ruler is that it butts up nicely against the folded edge of the freezer paper and postcard.

Trimming the green
Trimming the green

Line up the straight edge of the next black piece with the straight edge of the green piece you just trimmed. I pin it in place so that it does not shift when sewing. The green piece is adhered to the freezer paper, but the black piece is just floating on top of it.

lining up the black with previous piece

Flip the block upside down so the fabric is now on the bottom and the freezer paper is on top. Fold the freezer paper back so that the trimmed edge of the green is showing. You this stitch along that folded line, right next to the freezer paper template, but not sewing through the freezer paper. The closer you can get your needle to the folded edge of the freezer paper, without the needle piercing the template, the more accurate your finished block will be. Also the more accurate you are in folding the freezer paper template, on the various lines, the more accurate your finished block will be.

sewing the black
sewing the black

Now you press the black onto the plastic side of the template, which will temporarily adhere the black piece to the template.

pressing the black
pressing the black

Next you fold back the template from the paper side, over the edge of the postcard, on the next line in the pattern, which will allow you to trim the black piece so you can add the next green piece.

trimming the black
trimming the black

Repeat across the block until all the pieces are in place. This is what the block looks like before it is trimmed up.

front of block before trimmed

It’s time to square up the block with your straight edge ruler.

squaring up the block

Once the block is trimmed up, you can easily peel the template off of the back of the block and reuse the template as many times as it will stick to fabric.

freezer paper peels off

Here’s the block all trimmed up. Now we just need to make 41 more blocks. You can speed up the process by printing multiple templates and then chain piece each of the various steps. These blocks will be done in no time flat.

completed block
completed block

Once all of your blocks are complete, you will want to lay them out on a bed, or the floor, in a fashion that is pleasing to you. From the alternate quilts I showed above, you can see that this is a versatile block and it can make a variety of interesting quilts.

Blocks laid out
Blocks laid out

The absolute best way to paper piece is to actually sew on the lines of the paper, which will give you those perfectly sewn blocks assuming you can sew straight on the lines and don’t mind picking out small bits of paper. This freezer paper method comes pretty close, but these is the possibility of a small margin of error as your 1/4″ may be off or the fabric may slip, etc. Since these blocks have points that need to match up, I wanted to put sashing in the quilt as that would make any slight imperfections not be as noticeable. There is black sashing between the blocks and a row of sashing with cornerstones in between the rows. 


sashing and cornerstones

The blocks are sewn together in rows with black sashing in between them. Then the strip of sashing with the cornerstones is sewn to the top of the rows.

sewn together in rows

Then the rows are sewn together in pairs.

sew the rows together

Finally the row pairs are sewn together and borders are added and your quilt top is done. Now it is time to quilt it. I wanted to use my walking foot on my Janome 6500. I also wanted to start and stop as little as possible, so I decided to quilt following the design of the black spike triangles with black Aurifil thread. 


Top is ready for quilting

Next I layered the quilt top, with some Hobbs Tuscany Cotton Wool Blend batting. I love this batting as it lays so nicely and is easy to quilt on a domestic machine, especially when using a brand new Schmetz quilting needle.  The Hobbs batting also gives the quilt a nice drape and doesn’t retain any fold creases.

Hobbs Tuscany Wool Cotton Blend

Here are a few more images of the completed Out of This World Quilt.


Out of This World quilt on a chair


Me with the quilt
Me with the quilt


Below is the image of my YouTube video for making this quilt. Here is a link to the video if you would like to watch it and see more detail of how I made the quilt: Out of This World- Paper Piecing With Freezer Paper           

Out of This World Quilt

If you like the video, please be sure to give it a thumbs up, share it with your friends and subscribe so you don’t miss any upcoming videos.


The supplies I used to make this project were provided by:

Island Batik Pin Dot Floral collection

Aurifil 50 wt Thread

Schmetz 70/10 Quilting needle

Hobbs Batting Tuscany Collection Cotton Wool Blend Batting


IB-Aurifil-Schmetz

Hobbs Batting
Hobbs Batting

If you are on TikTok, be sure to check out the video I have posted about the quilt. (Look for Blue Bear Quilts)

Blue Bear hopes you like this quilt. Please let him know how much you love the this quilt by writing to him in the comments!

The other amazing Island Batik Ambassadors are also posting their September Blog Pieced To Perfection projects.  Check out their projects by clicking on the links next to their names to be directed to their blog posts.

WEEK 1

September 5

Blushing Garden
Blushing Garden


Elita Sharpe, Busy Needle Quilting

Denise Looney, For the Love of Geese

September 6

Buds and blooms
Buds and blooms


Sarah Pitcher, Pitcher’s Boutique

Sandra Starley, Textile Time Travels

September 7

Chromatic
Chromatic


Brenda Alburl, Songbird Designs

Preeti Harris,Sew Preeti Quilts

Connie Kauffman, Kauffman Designs

September 8

Blog Hop Round-Up Week 1 and Giveaway

WEEK 2

September 11

Copper Patina
Copper Patina


Brittany Fisher, Bobbin with Brittany

Gail Sheppard, Quilting Gail

September 12

Earthly Greens
Earthly Greens


Maryellen McAuliffe, Mary Mack Made Mine

Susan Deshensky, Lady Blue Quilts

September 13

English Lavender
English Lavender


Emily Leachman, The Darling Dogwood

Jennifer Thomas, Curlicue Creations

Anorina Morris, Samelia’s Mum

September 14

Magenta Dusk
Magenta Dusk


Claudia Porter, Create with Claudia

Victoria Johnson, Forever Quilting for You

September 15

Blog Hop Round-Up Week 2 and Giveaway

WEEK 3

September 18

Natural Healing
Natural Healing


Lana Russel, Lana Quilts

Lisa Pickering, Lisa’s Quilting Passion

September 19

Ornate Gems
Ornate Gems


Randi Jones, Randi’s Roost

Suzy Webster, Websterquilt

September 20

Park Avenue
Park Avenue


Pamela Boatright, Pamela Quilts

Leah Malasky, Quilted Delights

Mania Hatziioannidi, Mania for Quilts

September 21

Pin Dot Floral
Pin Dot Floral


Reed Johnson, Blue Bear Quilts   Thanks for stopping by!

Renee Atkinson, Pink Tulip Quilting

September 22

End of Blog Hop + Final Round Up

Fabric Giveaway
Fabric Giveaway
The final of the Pieced to Perfection Blog Hop giveaways, from Island Batik, started on Sunday, September 17th!
Two lucky winners will each receive a bundle of new collections that will be featured this week – Pin Dot Floral or Park Avenue. Don’t miss out on your chance to add these beautiful batiks to your stash. Enter now during the  Pieced to Perfection Blog Hop:

To enter for your chance to win one of the two prizes above, follow the simple Rafflecopter prompts below.

a Rafflecopter giveaway

This giveaway ends on September, 22nd at 11:59 pm PDT. Two random winners will be notified by email on September, 23rd and announced on the Island Batik Facebook page on September, 26th. If the winners do not respond within the first three days after being notified, two new random winners will be chosen. Please check your spam folders! If the winners do not respond within the first two days after being notified, two new random winners will be chosen and notified.

Make sure to follow Island Batik on social media to hop along with the Pieced to Perfection Blog Hop. Be sure to check out the Island Batik Blog.

#islandbatikambassador #islandbatik #paperpiecing #iloveislandbatik #hobbsbatting #aurifil #aurifilthread #schmetzneedles #doyoueq #Janome #tool crazebloghop #electricquilt #eq8 #HancocksofPaducah #fabricsmart #freezerpapermethod. 


Posted on 9 Comments

Island Batik Ambassador- May 2023 Project- Island Pop Quilt- Part of the Tool Craze Blog Hop

Island Pop Table Runner

This month’s blog hop is called Tool Craze as the Island Batik Ambassadors will all be making any size project using different upcoming fabric collections from Island Batik and a provided Studio 180 Design tool. I am looking forward to seeing all the wonderful projects that will be created during this month’s Island Batik blog hop. Since this month is a blog hop, you can check out the Island Batik blog and enter each week to win a fat quarter bundle of some of the fabrics the Ambassadors are using in their projects. I will show the other fabric collections later in this blog along with a link to the giveaway from Island Batik and links to other ambassador’s blogs.

Tool Craze
Tool Craze


I love the fabric I was given to use: Maple Island by Kathy Engle. Just look at this gorgeous collection of blue and green batik fabrics with a woodland theme.  The Maple Island collection may be found at your local quilt shop that carries Island Batik, such as Boutique4quilters in Melbourne, FL and Fabric Smart in St. Petersburg FL. This collection should be in your local quilt shop this summer. You may find them online at https://www.boutique4quilters.com/ or call them at (321) 768-2060 or www.fabric-smart.com or call them at (727) 914-8850. Another online option for you to shop for this fabric would be Hancocks of Paducah: Hancocks of Paducah

Maple Island
Maple Island


The table runner I made is 22″ x 46.” It has various shades of blue and green, along with  white. The Maple Island collection has many natural elements like leaves, ferns, berries, pinecones and tree bark. I originally was going call this project “Into the Woods”, but ultimately decided to call it “Island Pop” to incorporate the Corner Pop tool into the name. Making this table runner was easy and fun thanks to the Studio 180 Design tools.

Island Pop Table Runner

Here are several closeups of the Maple Island batik bundle I was provided. The first photo shows the bundle with the Corner Pop tool and the second photo is from one of my Tik Tok videos I made about this quilt. My username on TikTok is BlueBearQuilts.

Maple Island fabric and Corner Pop tool
Maple Island selection

I used my Electric Quilt 8 software to design this table runner. The first photo is a quilt I thought of doing which uses the Studio 180 Design Split Rects and Corner Pop tools. I decided to go with the table runner in the second photo, which was made with the V Block tool and the Corner Pop tool, as it had less pieces and I think it showcases the Maple Island Collection nicely. I also like the 3d effect that the Corner Pop tool created in the dark green background. Also, another aspect of this project was to make the blocks in various sizes using the Studio 180 Design tools. I really liked how the smaller version of the blocks looked in the border.

Alternative Quilt
Alternative Quilt


Island Pop Table Runner

The first step in making this table runner is to make the V Blocks aka triangle in a square blocks. Below are the completed V blocks. Don’t they look lovely in the Maple Island Collection? If you want to see in detail a demonstration of me using the Studio 180 Design tools, I will provide a link below to a You Tube video where I show how I made this runner.

V Blocks
V Blocks

The Studio 180 Design V block tool makes it so easy to make these blocks in multiple sizes. The instructions tell you what size strip to cut for the various finished sized blocks. The triangles are cut out extremely accurately using the V block tool. Look how nice this cut out triangle looks.

Cutting triangles with V Block tool


cut triangle piece
cut triangle piece

Next, you cut out the side triangle pieces. they are cut from strips that are the same size as the triangle. When you have the folded strip right sides together you will get the required mirrored image pieces that you need to make the V block.  

Cutting triangle sides with V Block tool

It is important to lay out the block before sewing so that you have the left and right side triangle pieces in the correct location. This is not as necessary with batiks, but it is something to be mindful of. A little known fact is that there really is a right side to batik fabrics. You can keep track out the right side of a batik fabric by being mindful of the fold as it comes off of the bolt. The fabric is always folded with the right side on the outside of the folded fabric. 

V Block laid out
V Block laid out

The pieces are easily sewn together by matching the tips on both ends and then sewing 1/4″ along the edge. I pressed mine toward the dark green fabric. 

The V blocks are oversized and are easily trimmed up with the tool. Below are pictures of the large and small V blocks all trimmed up. You wouldn’t believe how easy it was to make these blocks in several sizes using the Studio 180 Design V Block tool. 

large V Block
large V Block
small V Block
small V Block

Now it is time to use the Corner Pop tool, from Studio 180 Design, to give the V Blocks some pop in the corners.


The Corner Pop tool has two sections to it. The first section is where you trim off a corner of a previously made block. In my case, the V blocks. This is similar to a stitch and flip method, but with less waste of the fabric. If you know what size square you need to do a stitch and flip, the instructions tell you which line to use to cut off the corners of the block. The instructions also tell you what size squares to cut out and then cut in half diagonally to make the oversized half square triangle corners. You cut the corners off with the ruler and then sew the oversized triangles onto the corners. It is easy to sew these corner triangles on as they are centered over the edge that you trimmed off the block. 

After you have sewn the corners on, it is necessary to trim up the block as the corner triangles are oversized. This trimming up allows you to have a perfect sized block when putting the quilt together.

trimming the block
trimming the block

Here is what the block looks like after is is all trimmed up.

finished Island Pop block

Once the blocks are trimmed up, they are ready to be sewn together to make the quilt top.

Corner Pop and blocks

Next I layered the quilt top, with some Hobbs Premium wool batting. I love this batting as it gives the quilt some puffy definition and is so easy to quilt with. It also gives the quilt a nice drape and doesn’t retain any fold creases.

Hobbs Heirloom Premium Wool


Here are a few more images of the completed Island Pop Table Runner.

Island Pop Table Runner


Completed Runner
Completed Runner
left closeup
left closeup
middle closeup
middle closeup
right closeup
right closeup

Below is the image of my You Tube video for making this quilt. Here is a link to the video if you would like to watch it and see more detail of how I made the quilt:              https://youtu.be/x2aNL1xX5Uo           

You Tube Video
You Tube Video

If you like the video, please be sure to like it, share it with your friends and subscribe so you don’t miss any upcoming videos.


The supplies I used to make this project were provided by:

Island Batik Maple Island collection

Studio 180 Design Corner Pop tool

Aurifil 50 wt Thread

Schmetz 70/10 Quilting needle

Hobbs Batting Heirloom Wool Batting


IB-Aurifil-Schmetz

Studio 180 Design
Studio 180 Design
Hobbs Batting
Hobbs Batting

If you are on TikTok, be sure to check out the video I have posted of the table runner. (Look for Blue Bear Quilts)

Blue Bear hopes you like this table runner. Please let him know how much you love the this table runner by writing to him in the comments!

The other amazing Island Batik Ambassadors are also posting their May Blog Hop Tool Craze projects.  Check out their projects by clicking on the links next to their names to be directed to their blog posts.

WEEK 1

May 1

Celebrate
Celebrate


Susan Deshensky, Lady Blue Quilts

Randi Jones, Randi’s Roost

May 2

holiday-at-home
holiday-at-home


Elita Sharpe, Busy Needle Quilting

Mania Hatziioannidi, Mania for Quilts

May 3

Let it Snow
Let it Snow


Brittany Fisher, Bobbin with Brittany

Pamela Boatright, Pamela Quilts

May 4

Make a Wish
Make a Wish


Denise Looney, For the Love of Geese

Connie Kauffman, Kauffman Designs

May 5

Blog Hop Round-Up Week 1 and Giveaway

WEEK 2

May 8

maple island
maple island


Reed Johnson, Blue Bear Quilts   Thanks for stopping by!

Sandra Starley, Textile Time Travels

May 9

Sandalwood
Sandalwood


Gail Sheppard, Quilting Gail

Lana Russel, Lana Quilts

May 10

Sea Cookies
Sea Cookies


Emily Leachman, The Darling Dogwood

Claudia Porter, Create with Claudia

Anorina Morris, Samelia’s Mum

May 11

Sorbet
Sorbet


Brenda Alburl, Songbird Designs

Jennifer Thomas, Curlicue Creations

May 12

Blog Hop Round-Up Week 2 and Giveaway

WEEK 3

May 15

Summer Twilight
Summer Twilight


Victoria Johnson, Forever Quilting for You

Maryellen McAuliffe, Mary Mack Made Mine

Leah Malasky, Quilted DelightsLisa Pickering, Lisa’s Quilting Passion

May 16

Sunny Meadow
Sunny Meadow


Sarah Pitcher, Pitcher’s Boutique

Renee Atkinson, Pink Tulip Quilting

May 17

Wild Blooms
Wild Blooms


Preeti Harris, Sew Preeti Quilts

Suzy Webster, Websterquilt

Lisa Pickering, Lisa’s Quilting Passion

May 18

End of Blog Hop + Final Round Up

week-2-prize
week-2-prize
The first of the Tool Craze Up Blog Hop giveaways, from Island Batik, started on Sunday, April 30th!
Two lucky winners will each receive a bundle of new collections that will be featured this week – Sorbet by Claudia Pfeil of Claudia Pfeil Design or Sea Cookies, designed Kate Colleran by Kate Colleran Designs, LLC. Don’t miss out on your chance to add these beautiful batiks to your stash. Enter now and every week during the  Tool Craze Blog Hop:

To enter for your chance to win one of the two prizes above, follow the simple Rafflecopter prompts below.

a Rafflecopter giveaway

This giveaway ends on May, 12th at 11:59 pm PDT. Two random winners will be notified by email on May, 13rd and announced on the Island Batik Facebook page on May, 16th. If the winners do not respond within the first three days after being notified, two new random winners will be chosen. Please check your spam folders! If the winners do not respond within the first two days after being notified, two new random winners will be chosen and notified.

Make sure to follow Island Batik on social media to hop along with the Tool Craze Blog Hop. Be sure to check out the Island Batik Blog.

#islandbatikambassador #islandbatik #studio180design #iloveislandbatik #hobbsbatting #aurifil #aurifilthread #schmetzneedles #doyoueq #Janome #tool crazebloghop #electricquilt #eq8 #HancocksofPaducah #fabricsmart


Posted on Leave a comment

New Timeless Treasures Pattern

Snow Cones Quilt

We released a new pattern on our website today featuring Painted Paradise fabric from Timeless Treasures. It is called Snow Cones.

Snow Cones Quilt
Snow Cones Quilt

Doesn’t it look like those fruity, slushy, ice cold treats you used to get as a kid in the heat of the summer? We had so much fun designing this quilt. It’s a fairly easy pattern that would be suitable for an advanced beginner quilter. Here is what a couple of the individual blocks look like.

SC Block 1
SC Block 1

SC Block 4
SC Block 4


This is the pattern cover.

Snow Cones Cover
Snow Cones Cover


Our Testers had fun making this pattern. Sharon Buman really got into the spirit of a snow cone quilt when she chose these bright colors. She cut out all of he pieces using her Accuquilt cutter and said that sewing it together was a breeze.

Tester Sample
Tester Sample


Jogi made the quilt in her grand daughter’s school colors and is giving it as a graduation gift. She wanted the quilt to be longer, so she added a piano key border to the top and bottom to turn it into a rectangular quilt. I love how she used white rectangles instead of the navy ones from the original pattern.

Tester Sample
Tester Sample


What do you think? Didn’t they do a great job? Please let us know what you think in the comments and please sign up to receive our newsletters in case you are not already signed up. We should be having some giveaways in the near future and you don’t want to miss out.


I hope you like this fun and festive quilt pattern as much as I do.


Posted on Leave a comment

Patterns Designed For Accuquilt

Storm at Sea Life Medley Quilt

Over the years, we have created a number of patterns for Accuquilt. I thought it would be fun to share them all in a post. They are all available on their website as a free download. The patterns on their website may be found here: https://www.accuquilt.com/patterns.html

The first pattern that we created for Accuquilt was Hexagon Illusions and it was made by cutting larger hexagons from an ombre fabric and then cutting smaller hexagons from the same section of the fabric and rotating them 180 degrees and appliquéing them onto the larger hexagons.

Hexagon Illusions
Hexagon Illusions


Elephant Cuddles was the next pattern and it was made from Minky.

Elephant Cuddles
Elephant Cuddles


Holiday Northwoods Medley Placemats are created with a reverse appliqué technique.

Holiday Northwoods Medley Placemats


Lilac Table Topper uses the die that cuts perfect 1″ finished squares.

Lilac Table Topper
Lilac Table Topper


Fall Frolic Table Runner was made with beautiful Jinny Beyers Denim fabric from RJR Fabrics.

Fall Frolic Table Runner


Cleapatra’s Garden Gate featured the Cleapatra’s Fan die.

Cleopatra's Garden Gate
Cleopatra’s Garden Gate


Have you ever heard of crumb quilting? That was the technique used in Spring Medley Mug Rugs. You sew small scraps of fabric together and then apply fusible webbing before cutting out the appliqué shapes on the die. Accuquilt also supplies the embroidery files as a free download on their website.

Spring Medley Mug Rugs


Fun at Sea Life Medley is a great quilt pattern for showcasing your appliqué shapes.

Fun at Sea Life Medley Quilt


With that same die, we also created Storm at Sea Life Medley.

Storm at Sea Life Medley Quilt


Antique Americana was made using the very versatile Hattie’s Choice die. This patriotic quilt is perfect for the 4th of July, Veteran’s Day or a Quilt of Valor.

Antique Americana
Antique Americana


A perfect quilt for a hot summer day would be Orange Cream Soda. It features the Studio Setting Triangles dies.

Orange Cream Soda
Orange Cream Soda


A modern take on the Glorified Nine Patch block resulted in Sherbet Dreams.

Sherbet Dreams
Sherbet Dreams


Fall is Coming is a great quilt for fall which uses Kimberly Einmo’s Solidish Fabrics from Timeless Treasures Fabrics.

Fall is Coming
Fall is Coming


Love Letters also used Kimberly Einmo’s Solidish Fabrics from Timeless Treasures Fabrics. This would be a great Valentines quilt.

Love Letters
Love Letters


In the mood to create something scary? Then you might want to make the Boo! Halloween Medley Table Runner.

Boo Halloween Table Runner
Boo! Halloween Table Runner


Ahoy Mate and Let’s Go Sailing were created using the GO! Nautical Medley die and is the perfect pattern and die for all of you water lovers.

Ahoy Mate Table Runner


Let's Go Sailing
Let’s Go Sailing


The Retro Twist Wall Hanging was made with the Starry Path die. This is the perfect wall hanging for your mid century modern home.

Retro Twist Wall Hanging


The Go! Yuletide Gnome Wall Hanging is a great decoration to make for the holidays. Who doesn’t love a little gnome?


Gnome

Yuletide Gnome Wall Hanging


Your kids will love the Deco Dino Table Runner.

Deco Dino Table Runner


Stay tuned for more fun and inspiring designs we create for Accuquilt.


Posted on Leave a comment

New Patterns Aplenty

It has been a busy summer at Blue Bear Quilts. We taught our Pixie Party Quilt and Quilt in a Day’s Autumn Leaves table runner, in August, at Affinity For Quilts in White Bear Lake Minnesota. Everyone had a great time and some beautiful quilts are in the making.

Pixie Party Class
Pixie Party Class

Autumn Leaves Table Runner

While we were in Minnesota, we ran into the editors from one of our favorite magazines. Quilt Folk. They were kind enough to pose for a photo. If you have not discovered this magazine, you need to. It has gorgeous pictures of quilts on premium matte paper and really interesting articles about everything Quilt Folk might be involved in. We also went to the Great Minnesota Stae Fair and I had to have photo with my favorite lumberjack, Paul Bunyan.

Quilt Folk magazine
Quilt Folk magazine

Paul Bunyan
Paul Bunyan


We had a couple more of our quilt designs show up in magazines. Canoe Junction made the cover of the September/ October issue of Love of Quilting magazine. It uses Flower Garden Gatherings Fabrics from Moda. Winter Visitor is featured in the November/ December issue of McCall’s Quilting magazine. It uses the Cardinal Woods flannel collection from Northcott Fabrics.

Canoe Junction
Canoe Junction

Canoe Junction in Love of Quilting

Winter Visitor
Winter Visitor


Speaking of lumberjacks, don’t forget about our Quilt Cruise to Alaska’s Inside Passage June 6-13, 2020 aboard the Holland America Eurodam. We will be making the beautiful Northern Star Garden Quilt, a pattern that was designed exclusively for this cruise. It involves shapes that have been precut for you with Accuquilt, a no tear-out the paper, paper pieced center star and Hawaiian (should be called Alaskan) appliqué snowflakes in the border. A different technique for each day were are quilting, while the ship is at sea. When the ship is at sea, it is up to you as to how much time you want to spend sewing. When the ship is in port, you will be able to go into the the ports of Juneau, Ketchikan, Sitka and Victoria, BC with your family and friends. This is a trip of a lifetime to one of the most beautiful places on Earth. The trip is over half full, so don’t miss out and sign up today. Here is the link if you are interested in joining us on this cruise. https://quiltretreatatsea.com/quiltinginthewild/

Quilt Cruise to Alaska

Alaskan beauty in fabric

Northern Star Garden

We have created some wonderful free patterns for Accuquilt, which we hope you will enjoy making. They all were designed with Timeless Treasures Fabrics. Speaking of which, we have several new patterns, which will be making their debut at Fall Quilt Market for Timeless Treasures Fabrics. More to come on these patterns at a later date. A couple of them do involve panels, however. The first Accuquilt pattern is Antique Americana, which involves the use of the Hattie’s Choice die. Here is the link for the pattern.   https://www.accuquilt.com/go-antique-americana-throw-quilt-pattern.html  Then, we have Orange Cream Soda which involved the use of the Studio 6″ setting triangles. Here is the link for that pattern.   https://www.accuquilt.com/studio-orange-cream-soda-throw-quilt-pattern.html  Sherbet Dreams involves the use of the Glorified Nine Patch die. Here is the link. https://www.accuquilt.com/go-sherbet-dreams-throw-quilt-pattern.html   Love Letters uses the Studio 8″ setting triangles. Here is the link for Love Letters. https://www.accuquilt.com/studio-love-letters-throw-quilt-pattern.html And finally,  Fall is Coming, which uses the Studio 8″ setting triangles. The link to Fall is Coming.  https://www.accuquilt.com/studio-fall-is-coming-throw-quilt-pattern.html


Antique Americana
Antique Americana

Orange Cream Soda
Orange Cream Soda

Sherbet Dreams
Sherbet Dreams

Love Letters
Love Letters


Fall is Coming
Fall is Coming

Last, but certainly not least, we have two new patterns making their debut with QT Fabrics at Quilt Market, In Houston, October 2019. They are Fit For a King, which utilizes the Accuquilt Hattie’s Choice die and Kings and Queens. You will be able to purchase these patterns from QT Fabrics, if you are a quilt shop and also from our website, very soon. Fit for a King uses QT Fabrics basic lines, Quilting Illusions and Color Blends. Kings and Queens uses a fat quarter bundle from QT Fabrics Illuminations collection, which will be arriving in shops around April 2020. Kings and Queens pattern is perfect for those fat quarter bundles you would love to turn into a beautiful quilt.

Fit For a King
Fit For a King

Kings and Queens
Kings and Queens

Well, that’s it for now. Happy Quilting till we come back and share more of what’s happening at Blue Bear Quilts.

Posted on Leave a comment

Drumroll Please! Announcing the Grand Champion Prize Winner of the Accuquilt Block Design Contest.

I entered several blocks in the 2017 Accuquilt Block Design Contest. By popular vote, these two entries were the most popular.

Here were my other entries:


But the Grand Champion was my Purple Rose. It will be unveiled on the billboard outside the Accuquilt headquarters in Interstate 80 for an entire year. I am in the process of designing a quilt and a pattern for this block, which will be available in our shop.


I also entered this contest in 2016 and here were my entries from that year.


But the one that won Fan Favorite was Not Your Grandmother’s Flower Garden a.k.a. What Happens When Grandpa Tells Grandma No More Trips to the Fabric Store.It was designed with the Accuquilt Dresden Plate Die and Kaffe Fassett fabrics.

As a result of winning Fan Favorite, I was honored with a trip to Julien California to spend a week with Eleanor Burns, from Quilt in a Day, at her Fall quilt retreat at Camp Cedar Glen in the mountains. It was a wonderful time for which I am forever grateful.

Here are some photos from that trip. 

Posted on 14 Comments

Greek Isles Modern Quilt

For the 2017 Blogger’s Quilt Festival, I thought I would share Blue Bear’s most popular pattern, Greek Isles Modern. 

This pattern is much easier than it looks. It is made with 2.5″ strips of white and 2.5″ strips of light, medium and dark batiks, that you may obtain from jelly rolls, or cut on your 2.5″ strip die with your Accuquilt Go! Cutter. The blocks are all constructed the same way, and placement is what determines the pattern. At 70 x 90,” it is the perfect quilt to curl up with on the couch for binge watching your favorite Netflix shows.

Here is a picture of Kim at Keep Me in Stitches in Largo, Florida, quilting this beauty; followed by a close up of her fantastic quilting.


Here are several more photos of the quilt out and about.


I have taught this class several times and here are some of my students interpretations of the quilt. Click on the links for short videos. They did a fantastic job!

4D1F584E-4BF0-4F0B-9EC4-06091ACAE8FC

IMG_0865

If you would like to purchase this pattern, it is available on our website here, www.bluebearquilts.com, or on Craftsy here- https://www.craftsy.com/quilting/patterns/greek-isles-modern-quilt/490532

Greek Isles Modern Quilt Cover

Sharing at the Blogger’s Quilt Festival hosted by Amy’s Creative Side.

Posted on Leave a comment

Swedish Barn Quilt Trail

When I was teaching at Bear Patch Quilt Company in White Bear Lake, MN, this August, I came across a Swedish Barn Quilt Trail when sightseeing with my sister. This trail is located on Highway 8  and goes through the cities of Chisago City, Lindstrom, Center City and Shafer. How fun it was to see all of these beautiful quilt blocks decorating buildings. A barn quilt is a quilt block pattern that is painted on a large wood square and hung on a barn, or on the front of a business. They are designed to last 6-8 years by using several coats of paint and then applying a clear coat.  The first barn quilt trails were created in 2001 in Ohio.  Scroll down to see the photo of the patriotic home that has tons of antique auto memorabilia surrounding it.

Whirling Star

Tulips in the Corner

Interdependence

Patriotic house in Lindstrom with lots of antique auto memorabilia.

Swedish Rubics Cube

Dr. Pete’s Patchwork Pets

Swedish Summer Night with Dala Horse in center

Star of Bethlehem

Table for Four

Cross and Darts

Goldstar

Tulips in Town

Swing in the Center

Fantasia

Star Burst

There’s no place like Dome

Posted on Leave a comment

Quiltcon 2017

Since becoming a certified Quilt in a Day instructor things have gotten very busy with the trip to California with Quilt in a Day, teaching quilt classes, the holidays, family weddings, colds caught at family weddings and a trip to Quiltcon. Quiltcon 2017, in Savannah, was very exciting as I went exploring to learn all about the world of modern quilting. Modern quilters are just as passionate about their craft as traditional quilters, and they love to share their thoughts and ideas with other quilters. I was trying to get a definition for modern quilting and what I came up with was use of lots of solid colors, like Kona Cottons, lots of negative space for beautiful quilting, think Angela Waters, quilts are more utilitarian, taking traditional blocks and incorporating them into modern quilts or blowing the traditional blocks up to a much larger size so there is more negative space for quilting. Here are some photos of the exquisite work that I saw in Savannah. I hope you enjoy!